Writer read your own rules!
I just realized one reason the gotcha's suddenly appeared, I was playing my rules wrong! The effects of maneuvering were supposed to only last until the end of the unit's activation, not all turn. For some reason I thought they prevented a unit from reacting (I had briefly then took it out minutes later!) . That's not the only possible source of glitch and I'm still looking at things over but its an interesting issue. usually if I can't remember a rule instinctively, it ends up getting ditched or changed.
The Toy Soldier factor. I missed limbering and unlimbering artillery when it moved. The effect was there and I don;t have limbers for all my guns but I still missed it. It might be worth adding for the story value and as a reason to paint more up. I'm thinking about that too.
But for now I'm off to play some ancients.
Friday, March 2, 2012
Oops

 Born and raised in the suburbs of Montreal 7 decades ago. Began playing with toy soldiers at 5 years. Started painting & converting at about 12 yrs and wargaming about 15 yrs. Never really stopped.
5 years in the Black Watch of Canada Cadets, 5 years at the Collège militaire royal de Saint-Jean followed by 4 in the navy. 25 years with CPC in IT simultaneous with 23 years running a boarding kennel. Inherited my love of toy soldiers from my mother's father. Married with a pack of litle Italian Greyhounds and a cat. Prematurely retired and enjoying leisure to game, maintaining our 170 yr old farmhouse and just living.
Born and raised in the suburbs of Montreal 7 decades ago. Began playing with toy soldiers at 5 years. Started painting & converting at about 12 yrs and wargaming about 15 yrs. Never really stopped.
5 years in the Black Watch of Canada Cadets, 5 years at the Collège militaire royal de Saint-Jean followed by 4 in the navy. 25 years with CPC in IT simultaneous with 23 years running a boarding kennel. Inherited my love of toy soldiers from my mother's father. Married with a pack of litle Italian Greyhounds and a cat. Prematurely retired and enjoying leisure to game, maintaining our 170 yr old farmhouse and just living.
Bits and Bobs Part 2 - What the play testing revealed
On the whole, I am really happy with how Hearts of Tin is now. The play testing did show 3 minor issues, none of which cropped up in my ACW games. One involves cavalry vs squares, another is the lack of differentiation between fortified positions and improvised cover, the last one is a Gotcha! aspect to the reaction rules.
Squares. Squares were on occasion broken so I like to include that possibility and tempt people into trying now and then but it shouldn't be the usual outcome. In each of the first 2 games in the mini-campaign, Red cavalry caught Blue infantry forming a hasty square and broke it. On the first occasion the cavalry was pursuing another unit which they had broken and were coming from the flank. It was a situation where one might have expected the infantry to break. On the 2nd occasion the infantry were advancing towards the cavalry and were charged from a fairly close distance. It is quite possible that the cavalry had in fact caught the infantry before the square was formed. In both cases the infantry were some what penalized (-1 for maneuvering, no defensive fire) and this might have made the difference if the dice had come up something else but in both cases, the same die rolls with cavalry charging a steady square would have had the same result unless the infantry's fire was effective. THAT is a problem.
Why was this suddenly happening? It was a simple, careless thing. The rule that has been in use for some time was that infantry in square defeated by cavalry will stand instead of retreating. The idea being that the cavalry had to win enough rounds to eventually destroy the infantry unit. However when that was introduced, there were no multi-turn melees, instead, the 2 sides just kept fighting till 1 side was defeated. When I re-introduced drawn melees that would persist into the next turn, suddenly the square rule didn't make sense. If cavalry did break into a square, it should be liable to collapse or else the cavalry should be evicted, there should not be a prolonged melee with a broken square. So I ruled that if the infantry lost the 2nd round as well, it would do just that. I failed to actually work out the odds of them doing that which essentially requires the infantry to make a bunch of bad rolls while the cavalry makes a bunch of good ones. I haven't worked out the exact odds but they are too good. The solution is simple, cavalry vs square melees where the cavalry win will result in another round, immediately. This will keep going until the cavalry is defeated, a round is drawn or the infantry are destroyed. Since there is not a constant time factor involved in melee rounds, it is assumed to happen quickly regardless of how many round it stakes. In effect, the drama of the moment gives the participants the feeling that a lot is happening even though little time passes. So, there might still be a dramatic collapse or the cavalry might be evicted like the Black Watch at Quatre Bras who hastily formed square as the French cavalry rode into it but calmly shot them down.
Fortified Positions. If rolling dice for hits, then whatever modifiers are applied, either there is no chance of scoring a hit or there is a chance that every die will hit. There are of course other ways to handle things, but I want to be simple and consistent. There are several instances in history of fairly small bodies of men holding out under good cover for a prolonged period of time. The question is, should skirmishers hiding behind clumps of bushes or lying down in the open, and troops defending an ordinary village have the same protection as someone in a loop holed fortress, rifle it with over head cover or defending Hugomont?
I used to have a -2 for fortified targets with only a -1 for partial cover. I'm planning on bringing it back. It will still possible to hit troops in fortified positions but most troops will need to be at close range but even superior artillery, point blank grape and sharpshooters will lose the possibility of a double hit. To be honest having taken away the -1 for deployed artillery, I also found it a bit vulnerable but entrenched guns should be harder to hit. This would resolve that as well. I need to adjust the shooting and melee charts but need to be careful not to confuse things or double dip.
Reactions and Gotchas! Gotchas are those seemingly minor technical bits in a set of rule that can trip up a person not totally immersed in the rules and expose them to a harsh penalty for something silly. I hate them in both theory and practice and I found a couple buried in the reaction rules. For example, if skirmishers fire at the enemy and these do not react but instead the enemy on their own turn charges the skirmishers, they are now locked in as written, don't get defensive fire and can't evade. I found a bunch of similar sitiuations which I hadn't intended. Over all I like the reaction idea but it needs some fine tuning.
A bit of history; Morschauser's original rules only had 1 range for shooting but if a unit moved to within 3" of an enemy unit, it had to stop and resolve melee. Once melee began, there was no escape, one unit or both had to be destroyed. In essence there was a divide between relatively safe but indecisive long range fire (indecisive if you were using rosters) and decisive but risky melee. I initially kept that divide though adding a forced back result to the melees. Were units exchanging point blank volleys or charging with the bayonet? Did cavalry counter charge? Who knows. who cares? Its all built in, no need for a reaction system, if engaged with long range fire, you ignored it until it was your turn, if charged or if the enemy wandered too close, you fought regardless of what you had been doing.
I did add in some tweaks to allow for a difference between infantry engaging in a fire fight or charging and was quite happy with how it worked. The issues came from the 3" rule and the fact that my units were of various sizes and shapes and varying numbers of stands whereas for Morschauser, each base was a unit and 1 base would fight 1 base. In practice it was easy to accidentally engage a 3rd or 4th unit in the melee. Worse it was easy to not notice that until after the fight was resolved. The system also meant that much of the narrative had to be invented whole cloth.
My solution was to bring in long and close range fire and limit melee to contact. In order to keep the sense of things, this required the introduction of a reaction system. Or rather, the expansion of the charge reaction system. And now thanks to the sorts of things that come up when playing a game rather than testing specific parts of a set of rules, I have a crop of Gothcha's to deal with.
I think the answer is to break down reactions, limit some, lift restrictions on others and take advantage of the Maneuver penalty instead of prohibitions. There are 2 main types of reaction: defensive (returning fire, defensive fire, counter charge, evade) and offensive (opportunity fire or charge). By separating them into 2 categories I think I can restrict the offensive ones without robbing units of the chance to defend themselves in a crisis. By applying penalties rather than limiting actions I can still penalize those units caught off guard.
For example, allowing units that have been charged to fire regardless but possibly with a penalty but not allowing units to engage opportunity shooting if they have already done so.
Small changes but important. It'll probably be Saturday night or Sunday before I get them done and posted.
Squares. Squares were on occasion broken so I like to include that possibility and tempt people into trying now and then but it shouldn't be the usual outcome. In each of the first 2 games in the mini-campaign, Red cavalry caught Blue infantry forming a hasty square and broke it. On the first occasion the cavalry was pursuing another unit which they had broken and were coming from the flank. It was a situation where one might have expected the infantry to break. On the 2nd occasion the infantry were advancing towards the cavalry and were charged from a fairly close distance. It is quite possible that the cavalry had in fact caught the infantry before the square was formed. In both cases the infantry were some what penalized (-1 for maneuvering, no defensive fire) and this might have made the difference if the dice had come up something else but in both cases, the same die rolls with cavalry charging a steady square would have had the same result unless the infantry's fire was effective. THAT is a problem.
Why was this suddenly happening? It was a simple, careless thing. The rule that has been in use for some time was that infantry in square defeated by cavalry will stand instead of retreating. The idea being that the cavalry had to win enough rounds to eventually destroy the infantry unit. However when that was introduced, there were no multi-turn melees, instead, the 2 sides just kept fighting till 1 side was defeated. When I re-introduced drawn melees that would persist into the next turn, suddenly the square rule didn't make sense. If cavalry did break into a square, it should be liable to collapse or else the cavalry should be evicted, there should not be a prolonged melee with a broken square. So I ruled that if the infantry lost the 2nd round as well, it would do just that. I failed to actually work out the odds of them doing that which essentially requires the infantry to make a bunch of bad rolls while the cavalry makes a bunch of good ones. I haven't worked out the exact odds but they are too good. The solution is simple, cavalry vs square melees where the cavalry win will result in another round, immediately. This will keep going until the cavalry is defeated, a round is drawn or the infantry are destroyed. Since there is not a constant time factor involved in melee rounds, it is assumed to happen quickly regardless of how many round it stakes. In effect, the drama of the moment gives the participants the feeling that a lot is happening even though little time passes. So, there might still be a dramatic collapse or the cavalry might be evicted like the Black Watch at Quatre Bras who hastily formed square as the French cavalry rode into it but calmly shot them down.
Fortified Positions. If rolling dice for hits, then whatever modifiers are applied, either there is no chance of scoring a hit or there is a chance that every die will hit. There are of course other ways to handle things, but I want to be simple and consistent. There are several instances in history of fairly small bodies of men holding out under good cover for a prolonged period of time. The question is, should skirmishers hiding behind clumps of bushes or lying down in the open, and troops defending an ordinary village have the same protection as someone in a loop holed fortress, rifle it with over head cover or defending Hugomont?
I used to have a -2 for fortified targets with only a -1 for partial cover. I'm planning on bringing it back. It will still possible to hit troops in fortified positions but most troops will need to be at close range but even superior artillery, point blank grape and sharpshooters will lose the possibility of a double hit. To be honest having taken away the -1 for deployed artillery, I also found it a bit vulnerable but entrenched guns should be harder to hit. This would resolve that as well. I need to adjust the shooting and melee charts but need to be careful not to confuse things or double dip.
Reactions and Gotchas! Gotchas are those seemingly minor technical bits in a set of rule that can trip up a person not totally immersed in the rules and expose them to a harsh penalty for something silly. I hate them in both theory and practice and I found a couple buried in the reaction rules. For example, if skirmishers fire at the enemy and these do not react but instead the enemy on their own turn charges the skirmishers, they are now locked in as written, don't get defensive fire and can't evade. I found a bunch of similar sitiuations which I hadn't intended. Over all I like the reaction idea but it needs some fine tuning.
A bit of history; Morschauser's original rules only had 1 range for shooting but if a unit moved to within 3" of an enemy unit, it had to stop and resolve melee. Once melee began, there was no escape, one unit or both had to be destroyed. In essence there was a divide between relatively safe but indecisive long range fire (indecisive if you were using rosters) and decisive but risky melee. I initially kept that divide though adding a forced back result to the melees. Were units exchanging point blank volleys or charging with the bayonet? Did cavalry counter charge? Who knows. who cares? Its all built in, no need for a reaction system, if engaged with long range fire, you ignored it until it was your turn, if charged or if the enemy wandered too close, you fought regardless of what you had been doing.
I did add in some tweaks to allow for a difference between infantry engaging in a fire fight or charging and was quite happy with how it worked. The issues came from the 3" rule and the fact that my units were of various sizes and shapes and varying numbers of stands whereas for Morschauser, each base was a unit and 1 base would fight 1 base. In practice it was easy to accidentally engage a 3rd or 4th unit in the melee. Worse it was easy to not notice that until after the fight was resolved. The system also meant that much of the narrative had to be invented whole cloth.
My solution was to bring in long and close range fire and limit melee to contact. In order to keep the sense of things, this required the introduction of a reaction system. Or rather, the expansion of the charge reaction system. And now thanks to the sorts of things that come up when playing a game rather than testing specific parts of a set of rules, I have a crop of Gothcha's to deal with.
I think the answer is to break down reactions, limit some, lift restrictions on others and take advantage of the Maneuver penalty instead of prohibitions. There are 2 main types of reaction: defensive (returning fire, defensive fire, counter charge, evade) and offensive (opportunity fire or charge). By separating them into 2 categories I think I can restrict the offensive ones without robbing units of the chance to defend themselves in a crisis. By applying penalties rather than limiting actions I can still penalize those units caught off guard.
For example, allowing units that have been charged to fire regardless but possibly with a penalty but not allowing units to engage opportunity shooting if they have already done so.
Small changes but important. It'll probably be Saturday night or Sunday before I get them done and posted.
Born and raised in the suburbs of Montreal 7 decades ago. Began playing with toy soldiers at 5 years. Started painting & converting at about 12 yrs and wargaming about 15 yrs. Never really stopped.
5 years in the Black Watch of Canada Cadets, 5 years at the Collège militaire royal de Saint-Jean followed by 4 in the navy. 25 years with CPC in IT simultaneous with 23 years running a boarding kennel. Inherited my love of toy soldiers from my mother's father. Married with a pack of litle Italian Greyhounds and a cat. Prematurely retired and enjoying leisure to game, maintaining our 170 yr old farmhouse and just living.
Thursday, March 1, 2012
Bits and Bobs on Hoft, scenarios and the mini-campaign
Today its back to miscellaneous musings in random order.

Duncan takes charge of the 1812 US forces crossing the Neverwaussie River. This from one of the earliest outings of Hearts of Tin (then known as Morschause Meets MacDuff) at either Cold Wars 2004 or Historicon 2005? I'm sure I have the info somewhere........ 54mm figures on 60mm square bases.
1. The mini-campaign.
There were 3 main reasons that I decided to try one of the mini-campaigns that were offered up in response to Jeff's challenge; to try the rules, to see how it worked and for fun. I chose Steve the Wargamer's version for 2 reasons, firstly, it was first, secondly, I had enough units to do it using my 40mm fictional armies.
What do I think now that its played? Well from an objective POV, I had a great deal of fun. These were among the best solo games I've played.
As a mini-campaign, it worked like a charm. Several times the campaign format affected my battlefield decisions (in all but the last game) and the way the games were strung together with consequences helped develop the story and each game affected the challenge of the following ones as the forces were affected. I have to admit, I had my doubts at a couple of points since the follow on games originally call for a larger forces that the attacker starts the campaign with. Luckily, as Steve appears to have anticipated, the advantages wrung from a successful storming of the camp balanced that out. If the assault of the Princess Charlotte Dragoons had gone wrong in the first game, I might well had been forced to call up reinforcements for the Queen's troops for the last game at least, but it all came out right without any fudging from me. ( Not all Oberhillsian officers and supporters are in agreement with that last bit I hasten to add.) Hats off to CS Grant for writing the scenarios and to Steve the Wargamer for judiciously assembling these 3 into a mini-campaign.
As a rules test, it couldn't have been better. It gave a good work out to various aspect of the rules and confirmed my over all impression that this is the format of rules, organization etc that I have been trying to assemble for ..9 years now? I did find a few minor issues that had either been insufficiently tested or that arose from unforeseen situations, which is what play testing is all about. More on the rules later.
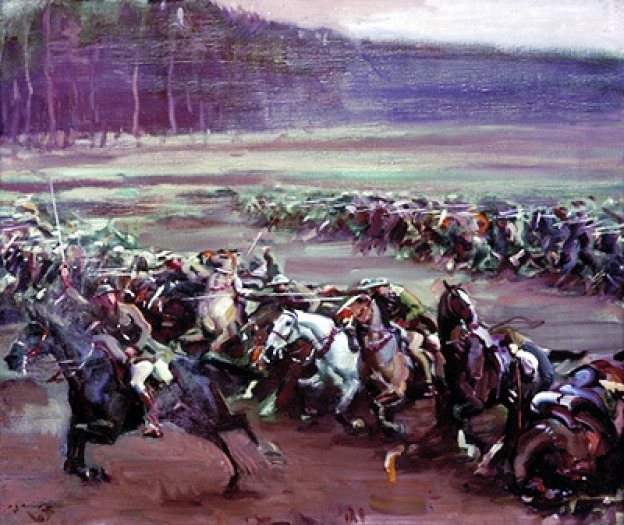
(This picture is taken from http://marysweddingdramaturgy.weebly.com/gordon-muriel-flowerdew.html)
2. Lt Gordon Flowerdew V.C.
I usually try to avoid using real names for fictional characters but as I was posting the picture of the Princess Charlotte Dragoons breaking the 2nd Infantry's square, it struck me that that sort of event called for a hero to be named in the papers but I was stuck for inspiration. I usually rely on something about the figure, a pose, a distinctive feature of dress or manufacture. It briefly occurred to me to look up names of officers from KGL at Garcia Hernandoz or the 16th Lancers at Aliwal but went for something closer to home. The charge of C Squadron of the Strathcona Horse under the command of Lt. Gordon Flowerdew V.C. at Moreuil Wood in March of 1918.
3. Units size, Basing and Table Top Teasers
Basing and unit organization for wargames is a bane of my existence. One of the early decisions about HofT was to make them as basing indifferent as I could. By and large I think I have succeeded, barring extremes. I have played games with a mix of based and non-based figures as well as a mix of basing styles with differing sizes and numbers of men. Periodically I have included some examples in the rules, based on alternatives that I have tried but I am leery of creating a false impression that they are "recommended" or worse " official". However, this should be a safe enough venue.
there are 3 main considerations for organizing and basing troops for wargames:
- Historical Precedence
- Aesthetics
- Game Mechanics
I'll skip right over why these things are all easier with singly based figures (lalalalala) as there are other reasons for using multi-figure bases and I don't like having basing decide the rules. I'll also skip over historical precedence since while I have taken it into consideration, I'm not letting it rule. Aesthetics is very personal and is also affected by figure and table size. My choices for HofT would be different if using 10mm figures on a 6x10 ft table than it is for 40mm figures on a 5x6 ft table. This brings us to the main point.
While Grant's Table Top Teasers did not specify a rules system and can be easily adapted to different scales, rules and periods, its fairly obvious that many of the early ones were designed with his father's rules in mind. This is reflected in the brief guidance to units in Scenarios for Wargames that light infantry and cavalry units should be about 1/2 the size of line infantry and that batteries consist of 2 guns.
In his rules, Morschauser recommended 4 infantry or 2 cavalry figures to a base and with my 54mm armies, I followed this but used only 2 figures for light infantry. This allowed me to nicely field the same number of bases for all units while still following the guide that cavalry and light infantry units were 1/2 the size of line infantry! After all, some of the scenarios where forces may be chosen equate all types of units indicating that the smaller specialist units are considered equally valuable as the line infantry regiments. For aesthetic reasons I have chosen to go with 6 infantry figures on a 2" wide base. When I tried basing my semi-flats it was easy enough to put cavalry and infantry on an equal frontage but it won't work with fully round 40's.
I was left with 2 options, fewer cavalry on an equal frontage or the same number of files on a wider frontage. The same applies to light infantry, if crammed 3 wide on the same frontage as line infantry, they will not look like skirmishers. An equal frontage for all units, would be both pleasing and true to Morschauser but I cannot fit a 40mm gun and crew on a 2" frontage. I have managed to make 3 light infantry fit ok but they do look crowded. After a side discussion on basing today, it occurred to me that with HofT, equal frontage was only a "nice to have", not a necessity.
Some quick experiments have shown that 3" wide bases will accommodate a gun and crew, 3 cavalry and 3 or 4 skirmishers. They would also hold 8 line infantry which probably would have been ideal but having just rebased 8 regiments I have no desire to do it again right now and anyway, I prefer 4 stands for infantry for staying power and forming "attack" columns and squares but don't want 12" wide units on my small table. The experiments also showed that 3x3" cavalry bases form a good opponent for 4x2" infantry bases. So how would that fit my organization? Well, as luck would have it, my current organization was adopted when I was wavering between Charge! and Morchauser's 5 stands per unit. With an eye to either single figures or 2 cavalry per stand, I painted up an officer & 8 troopers (Charge!) and added a trumpeter to make 10 figures (Morschauser). The campaign games were played using 4x 2 man squadrons plus a trumpeter as marker. This left 1 figure per unit on the shelf. A 3 squadron (stand) organization + a marker would nicely use up all 10 figures without requiring more. An ideal situation.
So, not yet elected but leading in the polls and declared likely to win is the following standard for my 1840's armies. (My ACW is quite different.) Each of these will be considered a "unit" for scenario purposes.
- Line Infantry: 4 stands @2"x2" with 6 figures except that regiments including skirmishers will sometimes have 1 stand into two half-stands @ 2" x 1" with 2 figures and some stands are shy a figure where an existing 20 figure unit has been stretched to fit.
- Light Infantry: 3 stands @ 3" x 1.5" with 3 (or maybe 4) figures.
- Cavalry: 3 stands @ 3" x 3" with 3 figures (possibly fewer for Irregular light cavalry)
- Artillery: 1 stand per gun @ 3" x 3" with a gun and 4 crew. (For programmed Scenarios where the reference is to batteries not guns, 2 guns will be fielded for each even though each of my guns is a "Battery")
Brigades will normally consist of 2-4 units including artillery with 3 infantry or 2 cavalry being ideal.
4. Markers. Markers are useful rather than compulsory. I'll use anything that works but prefer things that look at home on the table. Recently I have taken some inspiration from BlueBear Jeff and am using drummers etc to track both unit status and casualties. Pending the acquisition of dial bases, I am using a bit of putty to hold a small marker die to the drummers base to track casualties, this helps prevent them from getting lost or "cross attached" to the wrong unit. Equally as important is whether or not a unit may react. At the start of each turn, all drummers are to be placed behind their units. If the unit carries out a retirement, formation change or other "maneuver" etc then the drummer is placed in front of the unit to indicate that it cannot react. Shooting and melee are still being marked by placing white fluff "smoke".
A discussion about what the play tests indicated about the rules will have to be another post.
Born and raised in the suburbs of Montreal 7 decades ago. Began playing with toy soldiers at 5 years. Started painting & converting at about 12 yrs and wargaming about 15 yrs. Never really stopped.
5 years in the Black Watch of Canada Cadets, 5 years at the Collège militaire royal de Saint-Jean followed by 4 in the navy. 25 years with CPC in IT simultaneous with 23 years running a boarding kennel. Inherited my love of toy soldiers from my mother's father. Married with a pack of litle Italian Greyhounds and a cat. Prematurely retired and enjoying leisure to game, maintaining our 170 yr old farmhouse and just living.
Subscribe to:
Posts (Atom)