Wednesday, December 30, 2020

Last Game of 2020: The Defence of Maudlin Drift

The last tale of heroic Toy Soldiers in action for this year. With this tale comes a THANK YOU to  all those who have stopped by and especially those who have taken the time to leave a comment. They are all appreciated and provide inspiration to carry on and sometimes also ideas well worth considering  or questions that cause useful thinking on my part but even just the number of views helps inspire me to keep blogging and keep trying to improve.  I'll be here in 2021 and I hope you will be as well. 

May we all enjoy a safe marvellous 2021.

HAPPY NEW YEAR!
 
______________________

Now, on with the story!

The traditional sentimental shot of the most poignant part of the battle prior to telling the story....
(Well, for  Europeans at least. btw Were all  trading posts on the border  founded by Irishmen?)


Shortly after the courier passed through giving the alarm, the first Zulu warriors appeared.


On the British left flank, two companies of the 89th held an old trading post against
wave after wave of attackers, doing great slaughter with their Martini Henry rifles.


Over to the East, two companies of the Gordons who were part of the convoy escort were camped by a patch of woods. Colonel J. Hill commanding the garrison had ridden over to talk with their commander when the Zulus rose up and, crossing over a previously unsuspected ford, attacked in waves. The fighting was fierce and prolonged but ordering up a company of the Naval Brigade, a brief counter attack gave the British a breathing space in which to fallback towards the laager on the hill before they were surrounded and wiped out.   


As the British right began to pull back the Zulus overwhelmed  the  garrison in the yard of the post and started heading for the almost empty laager. 


When the British were almost back within the laager, the Zulus caught up with them and for a moment the whole line threatened to collapse in a bloody massacre but Col. Hill rode forward, steadied the Jack Tars and fell to an assegai. His brave action bought enough time for the sailors to rally and man the wagons. 


As the above incident was playing out, the Zulus finally over ran the post and charged towards the laager. Once within the Gatling's range however, its deadly hail of bullets starting scything them down.


As dusk settled in, the Zulu commander decided that the game was not worth the cost and order his warriors back.

____________

There we are folks, two wild cards shortened the game by 2 turns. I'm not sure if the British would have survived  two more turns, possibly, but they were glad it wasn't put to the test. You'll be happy to know that Colonel J Hill survived his wounds and will appear again.


Tuesday, December 29, 2020

Prologue: Rider from the Column!

South Africa: January 1879

In response to a British ultimatum, the Zulu King, Cetshwayo, has ordered his armies to mobilize for war!

Traditional opening dance scene.

A small British garrison from the 58th Foot has been posted at a border trading post to guard the ford and assist convoys hauling supplies to the front. One such convoy is currently laagered on a hill overlooking the river along with its escort of two companies of the 92nd and a Naval landing party.

"Sir! Messenger from the column, riding hard!"

Shortly before midday, a rider is seen approaching at a gallop, hotly pursued by Zulu warriors. What can it mean? Better safe than sorry, the order is given: "STAND TO!!"

.......................................

Last Stand: Scen#30 from One Hour Wargames.
Each 1 foot square on Thomas' map has become a block
of 4x4 hexes on the left and right, or a 4x5 block in the center
 and the compass revolved 180 degrees so that the hill is to the south. 


Monday, December 28, 2020

Preparing for the end

 Of the year!  One last game to be played.

It was time to choose what to pick for my traditional Last Game of the Year. A quick review showed that of my 12 Active and Reserve collections, only one has not yet made an appearance on the table this year. OK, that part was quick but somehow I ended up enjoying 2 hours reading posts from the last decade. Anyway, the period, forces and scenario have been chosen. In the process I was reminded that the commander for one side had been transferred to another theatre of operations and had not yet been replaced. 

Oh bleep, I meant to replace the miscast horse ears and reins before priming. Oh well, there will be time tomorrow to do that and paint him up. .

A dig through the boxes of raw castings and spare parts soon turned up a candidate and a suitable head. Tuesday I'll paint him and maybe base up a few more of the enemy then set the table for a Thursday game.


Sunday, December 27, 2020

Stand Down

 Fresh from the painting desk, Colonel Nolan was eager to see action. His spirits rose in anticipation as a staff officer approached.


Jonny Dhu, as his men quickly named him, was in for a disappointment though. A truce had been agreed to and the army was to stand down and resume training and reorganization until further orders were received in early January.

Saturday, December 26, 2020

Unboxing Day

 Thank you to all who left Christmas greetings, that sort of thing is much appreciated. 


Now, to the point. Somehow Santa knew that I wanted some of the new Hat 1/72 ACW figures, if only to reward them for producing wargame style sets. OK, he used my credit card and possibly my fingers on my computer to place the order but its the thought that counts.

LtoR mix Airfix, Italeri, Imex, all Italeri, new Hat, Cesar's Zouaves, Airfix.
Please note that the Zouaves are on a thin base.


I'll withhold final judgement until they are painted but they look well done to me. Possibly 2 boxes of marching figures with 12 varieties of head and equipment might have been overkill but it has filled a gap. 

The figures are a bit on the big size but not impossibly so. Eyeballing it very roughly, if Airfix were 5'6", 130lb, Accurate 5'8", 120lb, Italeri 6',150lb, the new Hat would be about 6'2",140lb. Or something like that. In separate units at usual table/battle distances, or if well mixed, they'll all work fine. Best of all, there is a whole box of command figures and they are the same size as the Zouaves Cesar sent me a few years back.  I feel a second Zouave unit coming on! 

Of course I didn't need more ACW units but....

Anyway, the next ACW game has been delayed until I get some painting done. Look for them at some point in January!

Thursday, December 24, 2020

Yuletide Greetings

 A wish for all my friends and readers of all beliefs to have as merry a holiday as is safely possible in the circumstances.

Christmas Truce on the shores of Lake Sloy in the NorthWest in 1880.

Stay home, play with toy soldiers (and hang out with family for a little bit at least) and be safe. 

Tuesday, December 22, 2020

Patience of Job

For over 20 years this BMC staff officer from the Gettysburg set, has been patiently waiting for a uniform and a chance to deliver his message. Today he is excited, he's been glued to a base and measured for a new coat (of paint). It looks like his time is nearly here. Perhaps I should name him Colonel Job.

Meanwhile, out of a host of applicants, these seven have been selected to serve on General Douglas' staff, delivering orders to Brigadiers. Sadly, 7 poker chips are now surplus to requirements again.


Lastly, the Black Hat Brigade has been based and a new officer appointed to command them. He also needs a uniform but the Winter campaigning season is upon us so there will be more time available for painting and playing in the months ahead.


In the late 90's when I found myself drawn into 54mm gaming, I built a pair of Volley & Bayonet ACW armies in tandem with my friend Tom. The basic units were brigades represented by 4 figures on a 3" x 3" square base per brigade. 


54mm Volley & Bayonet Cedar Mountain c2000

It was a few years later that I got hooked on Morschauser who also used 3" x 3" wide, 4 figure, bases with 54's. It took me a while to get used to one stand units with no way to show formations but when I left those sorts of rules behind, I found that I started to miss the higher level focus on what the 'army' was doing rather than getting hung up on the details of formations and manoeuvres of each unit. The hexes help to bring that back regardless of basing.


Sunday, December 20, 2020

Now that that's settled.

For a long time now I've been itching to go beyond the rules experiments and basic unit additions so that I can do more "work" on some of the little extras, constancy in look of troops, basing, terrain and various markers and play aids that will make the games look more polished and easier to play.

Well, having driven the rules around the block more than a few times over the last 5 or so years and tried and largely rejected every option, idea, and variation I could think of or steal, I've happily once again returned to the basics of the early games, just a bit more polished. Perhaps there is a better way but this is my comfy way and it fits my resources, likes and habits and I'm happy that I understand why I like these choices as well as being comfortable that they work for me. 

Not saying I'll never tweak or add anything, after all, for starters, the Zulus are still lurking in the cupboard and  aren't really covered yet. Still I'm home.
 
First experiment with a prototype 2d eliminated unit marker. These will replace the little red and blue discs I use now (usually). Each army will have a pool of customized markers equal to its break point and place one each time a unit is removed. No need to need to keep track, when you place your last marker, game over.

When I get enough of this sort of polushing done, I can start getting on to the occasional complex scenario, some actual, planned campaigns and maybe even get back to writing a bit more about the background history, personalities and famous units.


Thursday, December 17, 2020

All Things Must End

At last, after nearly two weeks of intermittent gaming, the battle is lost and won. Unfortunately all that gunpowder and the dust kicked  up from the troop movements and all that dice rolling seems to have made it very difficult for the photographer to take a sharp photo. (That's my story anyway...

The day was getting on but at last the time was ripe and General Douglas ordered his army forward. A shortage of couriers (or low rolling) was still making it hard to move everything at once so the attack went in en echelon.  


After a hard fight, the Rebel artillery was silenced and the Highlanders broke through the rifle pits. 


With the line breached and evening rapidly approaching, General Lannigan ordered his army to fall back to the woods for a last stand. If they could hold off the next attack, the army might be able to escape in good order as night fell.
(in technical turns there were 3 turns to go and the Rebels needed to lose 4 or 5 more units to have their morale break otherwise they could claim a draw. The problem was that they had multiple units only 1 hit away from breaking!)


It was not to be. The Dominion cavalry, rested and reinforced, charged like fiends with the Highlanders racing to keep up and the Rebel line collapsed. Casualties had been heavy on both sides and General Douglas ordered his army to let the enemy go. 
___________________________________
 
If anyone is curious about the rules they may be found here: Model Major General. Very few of the proposed changes stuck, and those that did are all fairly minor tweaks or changes in language, so its still basically the old Square Brigadier, just "upsized" and thus promoted in rank. 


Wednesday, December 16, 2020

Please Stand By

 Normal gaming and blogging will resume shortly.

I seem to have forgotten how the busiest time of the year for my wife's home business affects the freetime of her errand boy, assistant, bookkeeper, tech support, landlord and general odd jobsman.

However, the game is 2/3 done. 


Just as the Rebels were starting to look a little too thin on the ground to hold much longer, Lannigan's Luck applied. Three favourable chance cards in a row put them back in the game.
 
Ace ="We marched all night. - player receives an unexpected reinforcement of 1/2 d6 units."

Of course Lannigan rolled a 6.  As I started trying to figure how to scrape together 3 units from what was left on the shelf, it occurred to me that it might be time for a force of the Rebels' Kree and Hunter allies to join them.

Right, snow on Thursday, should have time to play the last 5 turns.  

Monday, December 14, 2020

The End is Nigh

 The third day of battle began today.


Apart from various domestic distractions, I've been spending free time on tuning and re-tuning the rules. In part this is because occasionally I forget that I like to enjoy the fun of playing with toy soldiers while trying to capture the feel I get from reading memoires rather than worrying too much about consistency of scale, and details of organization and nomenclature. 


The other reason is that as I put more old toy soldiers on the table, the games were getting longer and less exciting. So I tweaked the rules until they were simple and fun but a bit too quick and abstract. So I tweaked them again, and again.  

Five turns into the third game of this series, its feeling and looking right for what I want and Tuesday looks good for me to have time to finish up the game.

Friday, December 11, 2020

Rawden Gap Day 2: A Bloody Fight

Although the Rebel's counterattack retook the farm, the Domion's attack pressed on again while a fierce, long range, firefight raged in the centre. 

 
Supported by some well aimed rockets, the Dominion infantry pressed forward, over running the farm and pushing into the woods. The opposing Rebel line seemed thin and anticipation of a breakthrough was high.  

The battle was not quite won yet though. Soon the attack came under deadly fire from close range artillery and  flanking Rebel infantry. Then came a courier with new orders "Fall back! The Rebels have pierced our centre!".  


Despite heavy casualties, the Grenadiers were still holding the reverse side of the hill and soon the Highlanders rushed to support them. Suddenly, the fight swung. After having taken sustained heavy casualties themselves, the Rebels made one last push to secure the hill. They wavered under a storm of rifle and artillery then crumbled when the Highlanders went in with the bayonet. 


It was barely midday but the Rebel army was falling back in disorder. The Redcoats were keen to pursue and finish the job but orders came: "Regroup, secure the position." 

General Douglas was playing it safe. His own army was nearing its exhaustion point because of the heavy losses sustained during the two days of battle. 

Soon however, a rumour started to circulate.  Reinforcements had arived by train and were on the march, set to arrive before dark.


There was going to be one more day of battle!


Wednesday, December 9, 2020

By the Rocket's Smoky Trail

 Ah, those crazy rockets!

Turn 3 started off with a bit of excitement provided by the often entertaining Naval Rocket Battery.

When rolling for rockets to hit, a "1" indicates a rogue rocket. You then dice for each hex it enters up to its maximimum range: 5,6 veer left, 4 straight on, 2,3 veer right, 1 explode. 

In this case the rocket wove back and forth passing over 3 friendly units while I held my breath, only to make a final sharp turn and explode right on target anyway!

I have high hopes of getting to play the last 12 turns on Thursday.

Tuesday, December 8, 2020

A Turn A Day ......

 .....Keeps the game going?

The Winter Campaigning season doesn't really begin until after Christmas but there have been more than the usual calls on my time as Gofer, assistant and handyishman. Still, Turn 2 was played.

The Dominion won the initiative and, after an unusually effect barrage of shells and rockets, stormed the farm.
In the centre, the opposing infantry engaged in a firefight.

Meanwhile, back at the farm, Gen Lannigan noted that the redcoats who had stormed the farm were completely unsupported. A coordinated counter attack soon recaptured it.

Another turn tomorrow? Probably, maybe even two or three!

Who knows what tomorrow will bring?


Monday, December 7, 2020

Rawden Gap: Day 2 Begins

 Overnight the armies completed their march. Staff officers and Generals studied the ground and reviewed their strategic goals and soon aides were delivering orders for the morning.


In the morning, the Dominion's guns opened the ball with the Rebel guns soon answering. 

(To be continued)

Saturday, December 5, 2020

Rawden Gap: Day 1.

A spirited advance and rapid deployment by the Dominion cavalry soon put Her Majesty's army firmly in control of both Centre and East Hills. 

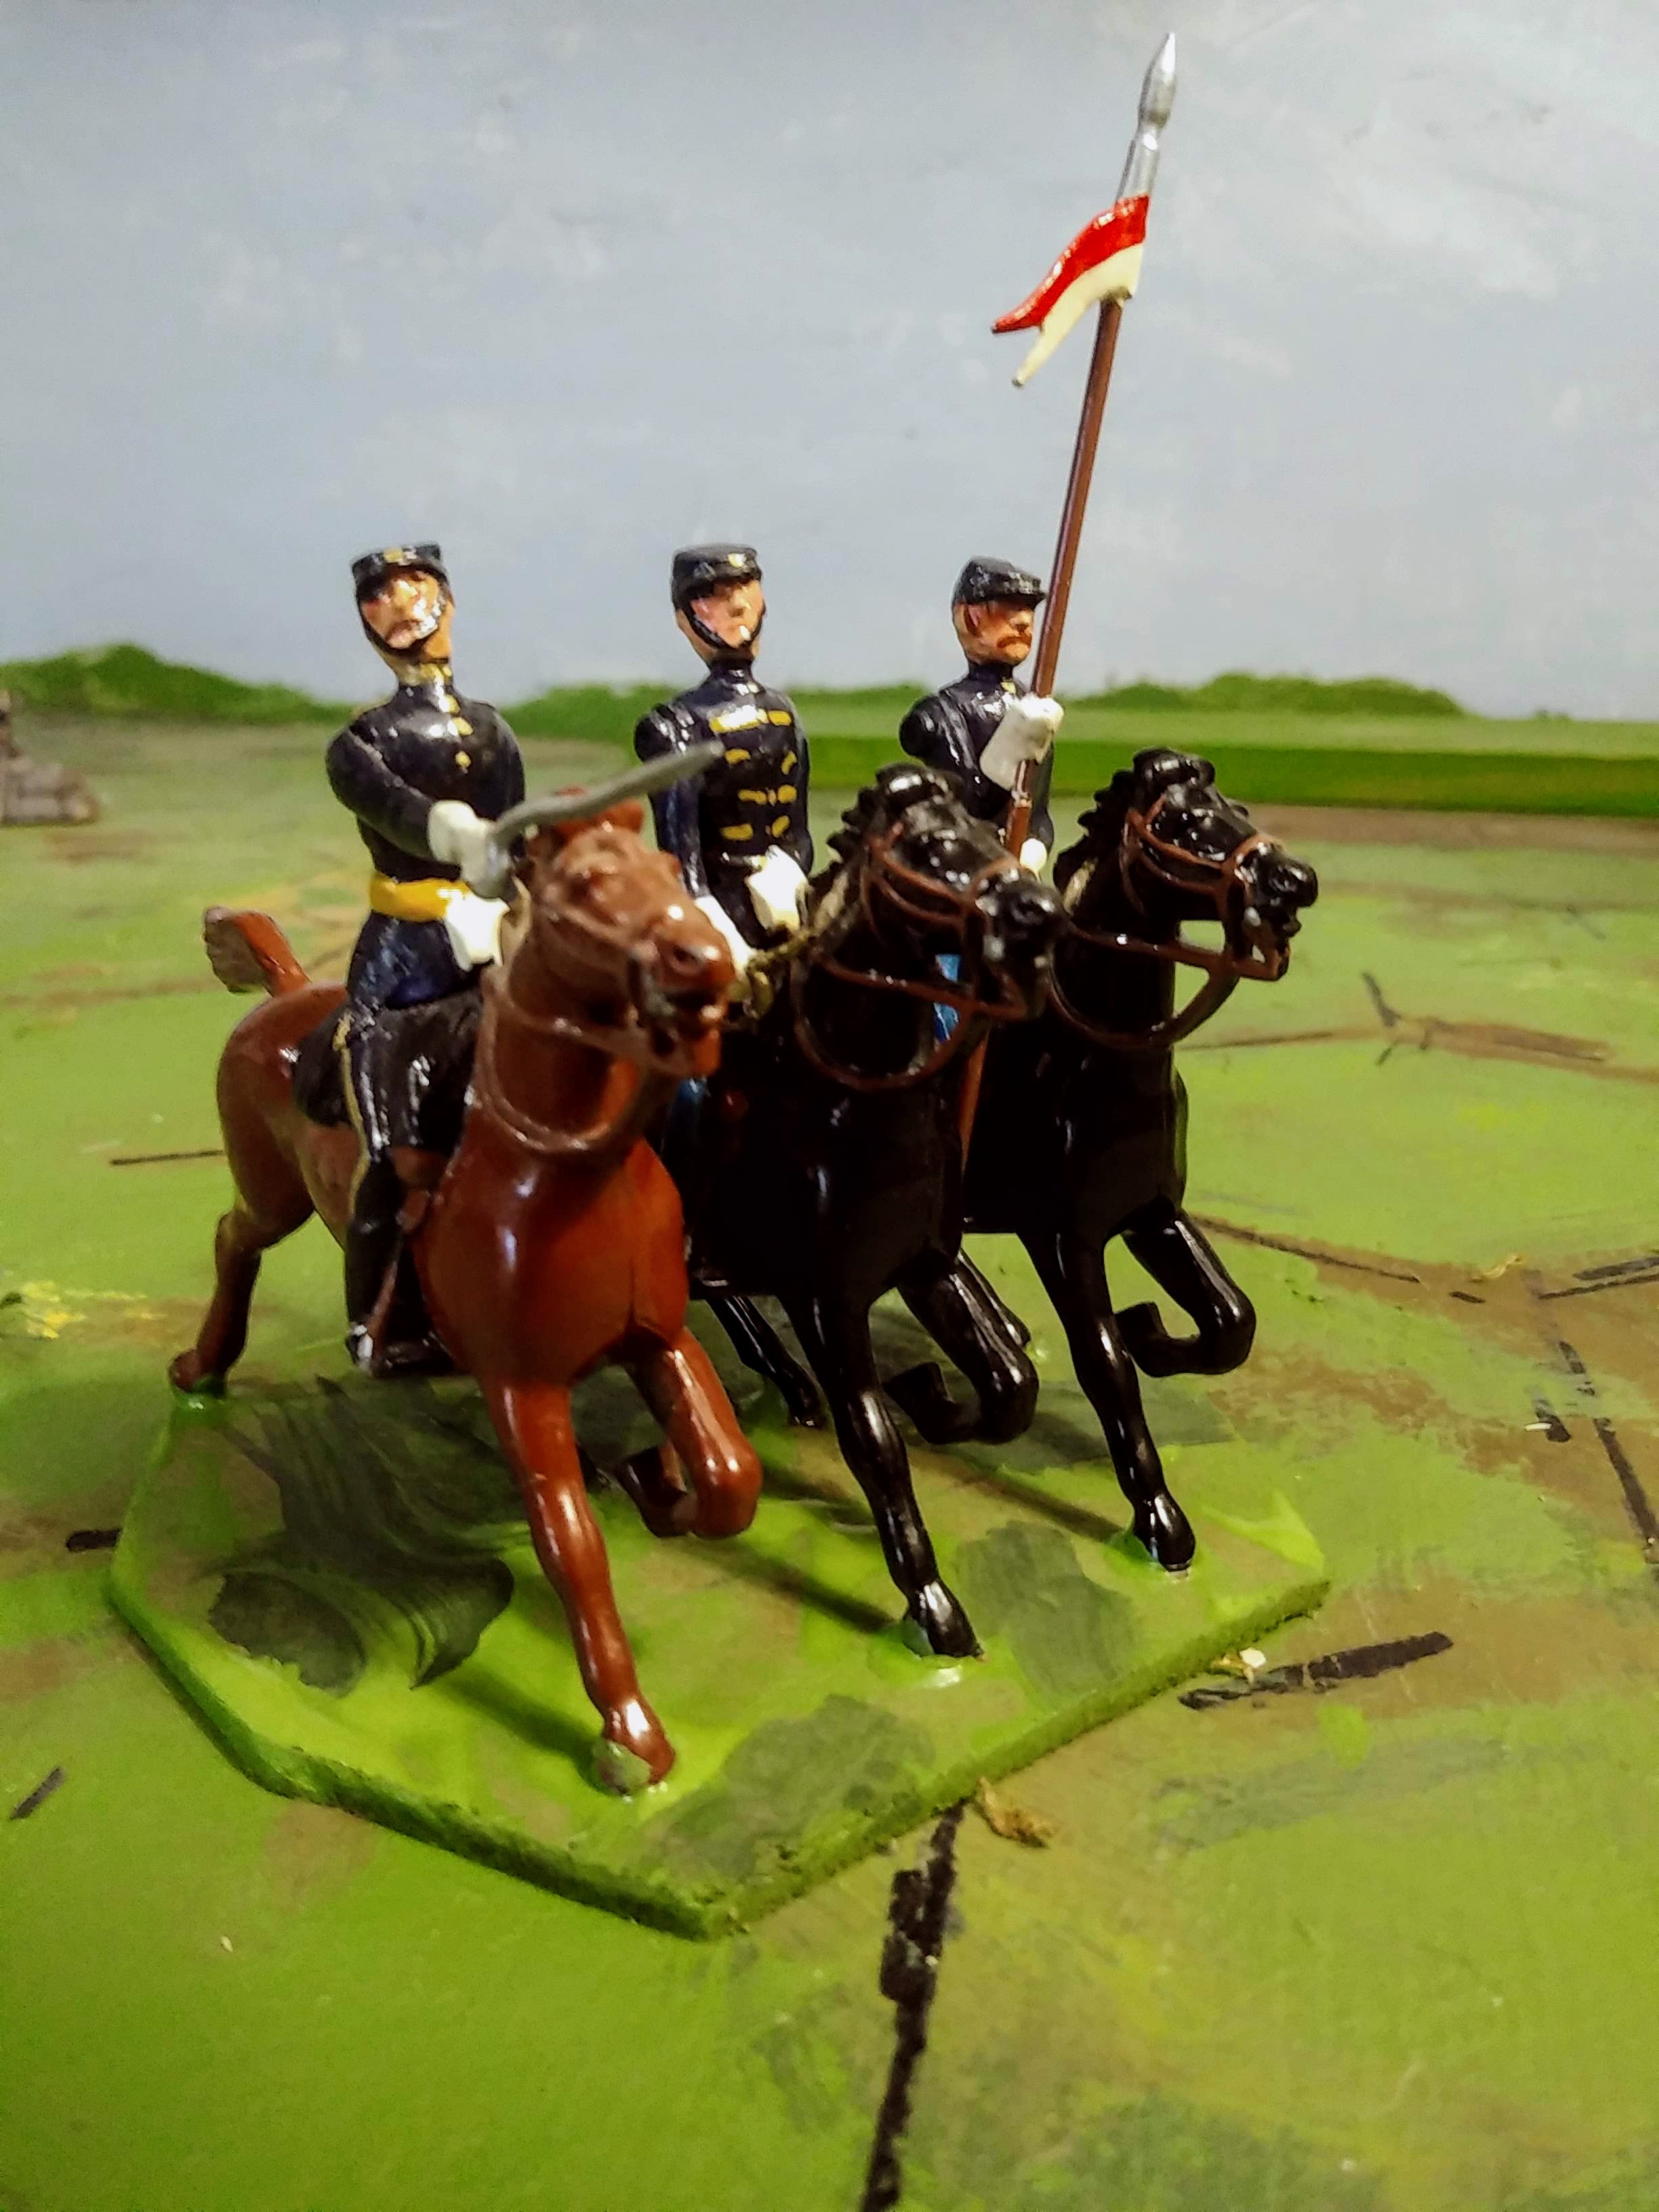
In accordance with current tactical ideas, the NW Rifles  dismounted and opened fire supported by the horse artillery. Caught in the open, the Rebel 2nd cavalry halted in some disorder while Lagg's Lancers fell back and took cover behind the walls and buildings of a farm. Colonel Denison put himself at the head of the Bodyguard and charged, hoping to sweep the enemy away and over run the Rebel battery before it unlimbered. The terrain and enemy fire broke the impetus of the charge though and it was repelled with loss.  As Denison struggled to order the squadron, he was hit and the remant broke to the rear.

A prolonged firefight between opposing cavalry and artillery ensued as infantry on both sides rushed to the sound of the guns.

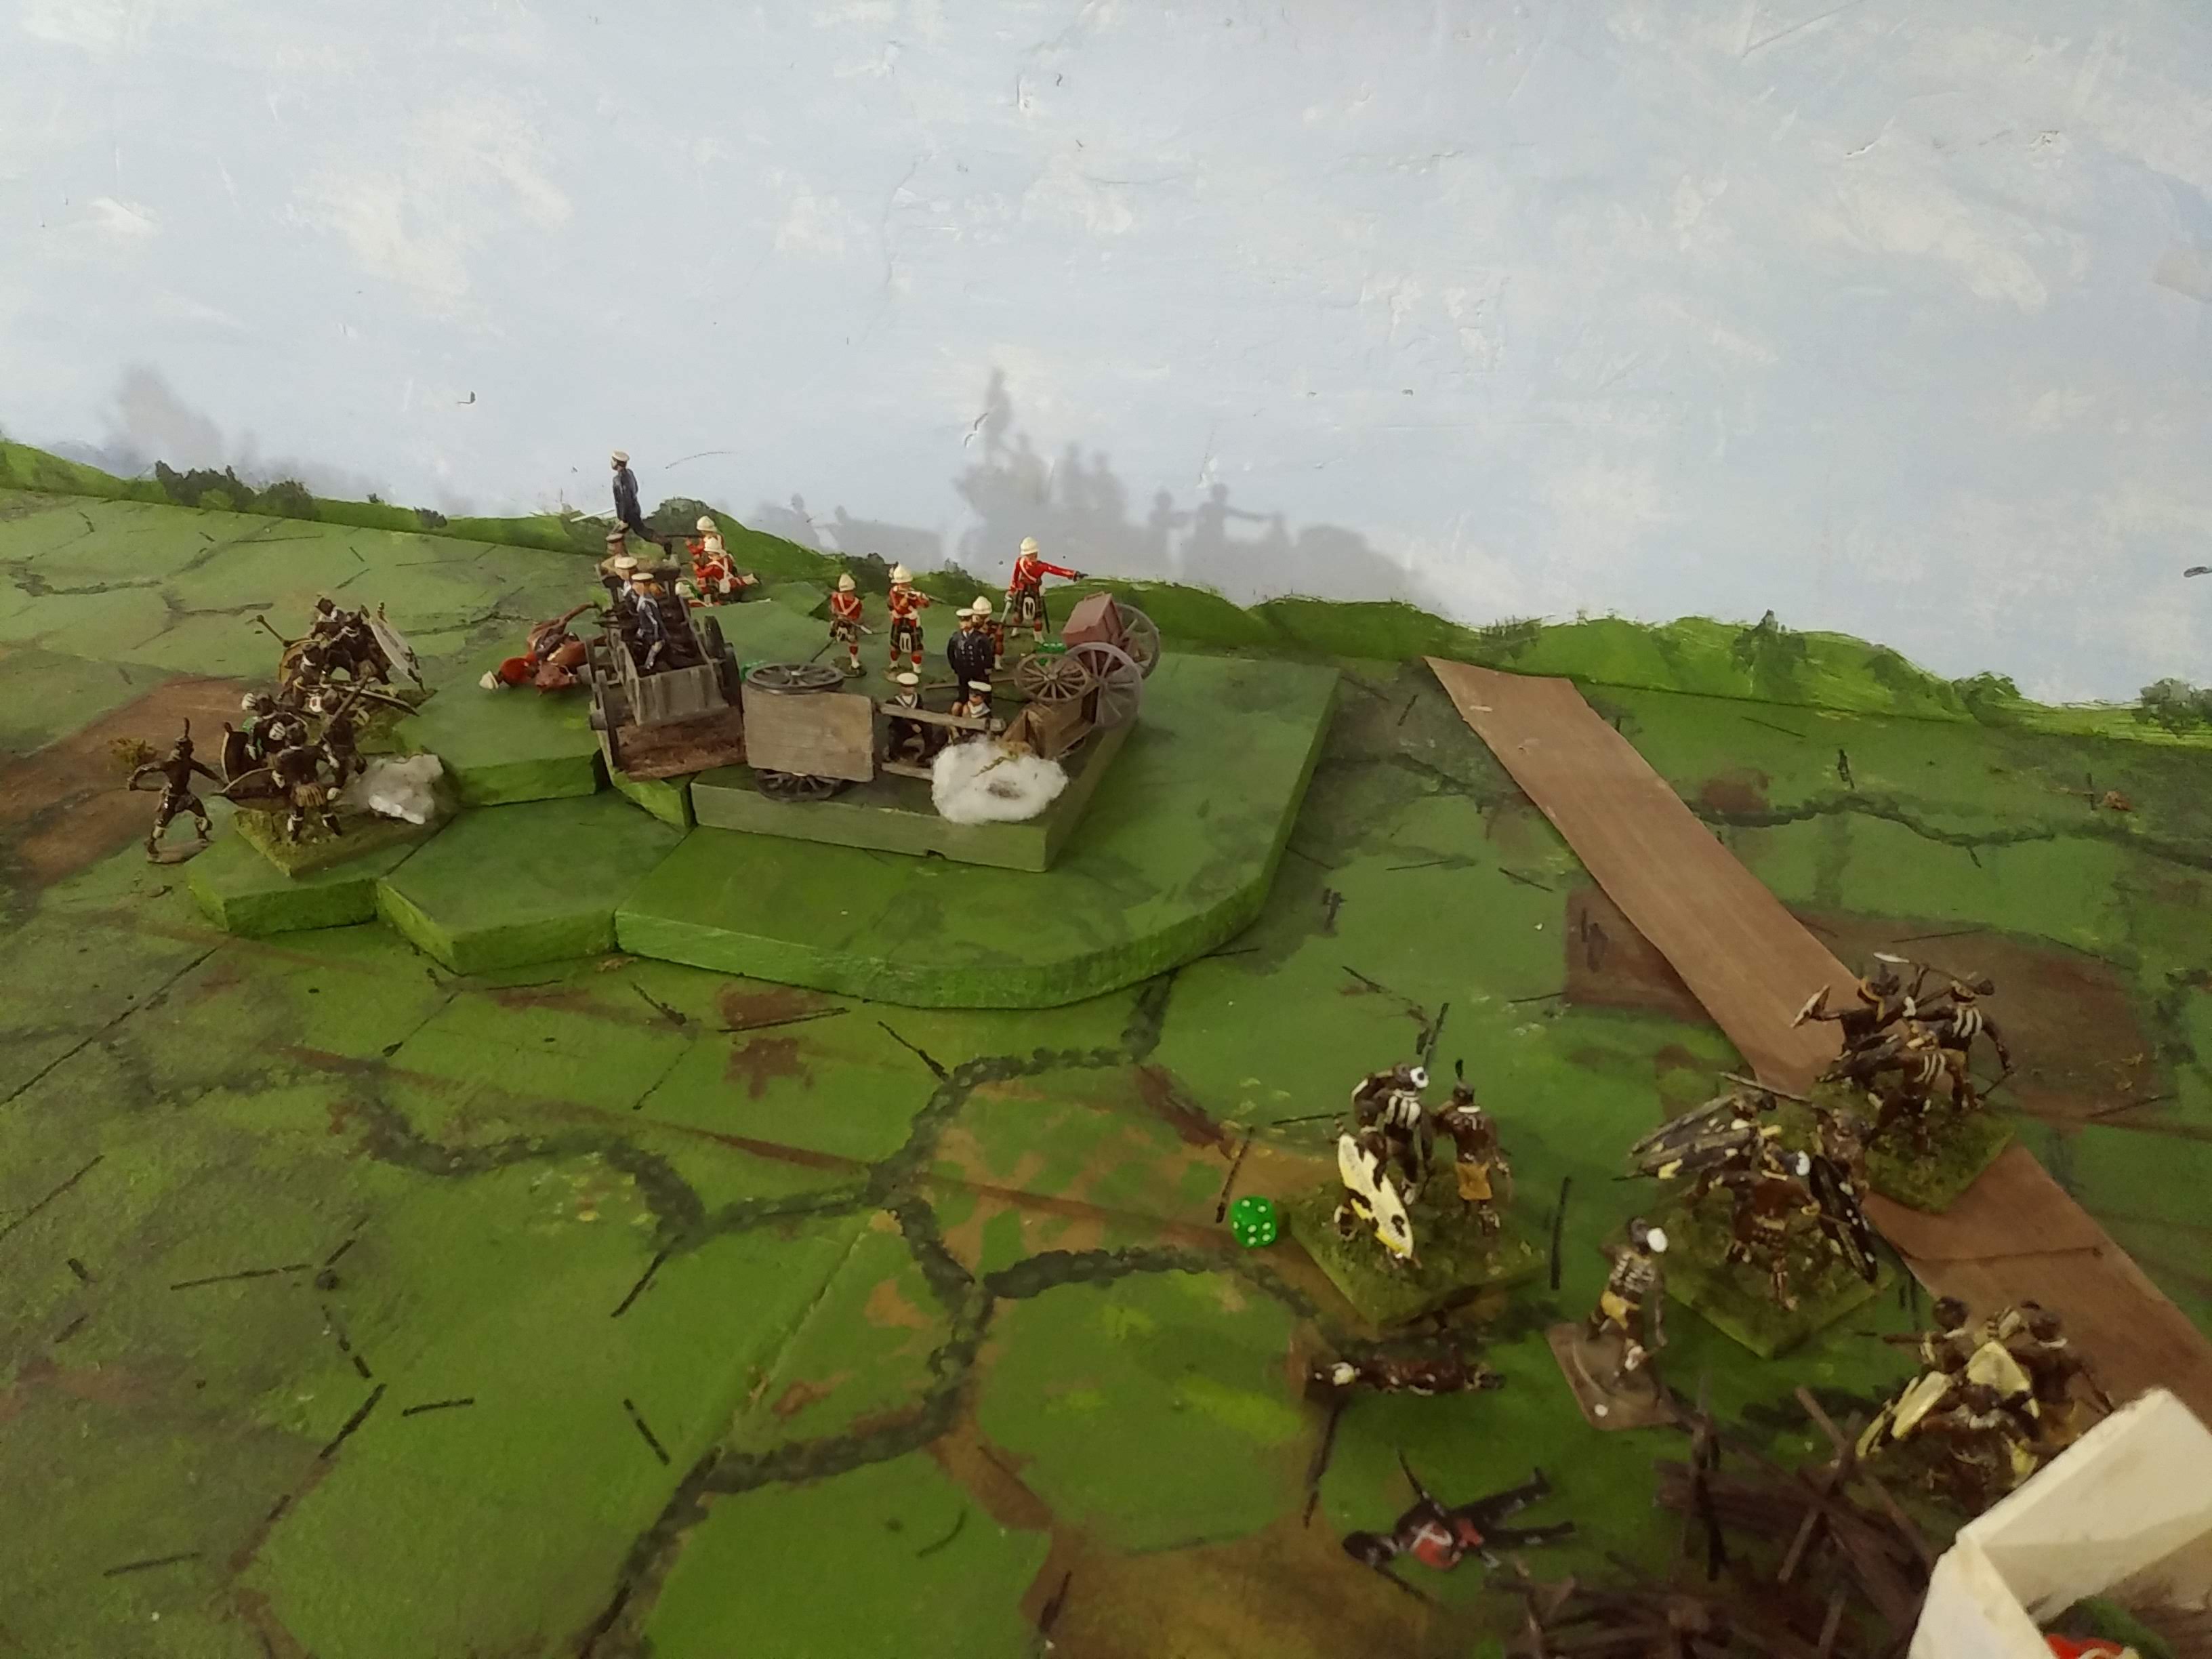
The Highlanders were first up. Their leading companies opened fire while  the rest manoeuvred into position for an attack on the farm. Behind them, the Grenadiers deployed to secure Centre Hill and seize the Western gap which was being disputed by the opposing cavalry.

Time was running out however. The Rebel Zouaves were already on hand, and the Hussars were clearly getting the worst of the firefight. 

The Highlanders charged the farm with a loud cheer but the Lancers held their post. Across the Gap, the Hussars had finally had enough and fell back in disorder, but not without having clawed their opponents badly.

With Zouaves and Voltigeurs deployed and moving to flank the attack on the farm, General Douglas called the Highlanders back and ordered his army to take up defensive positions across the line of hills. 

It was clear to both generals that neither army would be fully deployed before dark so the fighting died down. 

The Dominion had suffered the heaviest casualties on the first day of fighting but they held the key ridge and the gaps. Both armies began preparing for the next day's fight.


(Note: A technical discussion of the scenario, battle, and rules will follow the end of the battle, sometime next week.)

Friday, December 4, 2020

Rawden Gap: Pt One

After two quiet months, the Origawn and Dominion of Faraway armies were on the move again. General Lannigan decided to make a dash through the Rawden Gap, hoping to bypass General Douglas's main force.
The gap is a break in the ridge that separates the North and South Valleys. 


Unfortunately for the Rebels, General Douglas got early word of the move and marched quickly to meet him. 
 

By mid afternoon on the 4th of Dec, the opposing advance guards clashed at the gap. 
(To be continued)

Thursday, December 3, 2020

Lagg's Lancers

Make and Mend is over. 

I only managed one converted & repainted figure but he allowed me to add a fourth Rebel cavalry unit. Since I also based one existing unit for each side as well as the Dominion's field hospital, I'm satisfied. I'll need to do some work to produce a hospital for the Rebels but I have something improvised for the game.   

The newly raised Lagg's Lancers.
(No relation to Rush's Lancers.)

The reversion to my initial plan of three figure cavalry units had left the Rebels with a spare bugler and officer. The pool of reserves is getting thin but it included the last of the Britain's 17th Lancers that I once bought from Stuart Asquith. His four mates have been in Zululand for a couple of years and I was waiting for one of them to be released for other duties before making a Rebel unit with officer or bugler plus two lancers. Well, the two newly surplus figures needed a job so I decided one lancer was enough.

Tomorrow I will set the table and, hopefully, get to try the big lads on the hexes. (hmm looks like Captain Jinks needs to be reminded to keep his squadron within the grid area lines.)

Tuesday, December 1, 2020

Shaping the Battlefield

 "Waste not, want not", that's  an old saying that reflects how I was raised. 

I bought many feet of pine boards for use as display shelves 15 years ago when we bought this old farmhouse. A few years later, after I retreated into my current room and sold off or gave away over half of my miniatures and toy soldiers, some of the shelves became various rectangular hill shapes. Now they are beginning to morph into vaguely hex shaped hills as I prepare for battle.

Some of the joints are a little iffy if used to make multi-piece hill complexes, but they work fairly well as stand alone hills and the joints can always be disguised with a little scatter.  

Note that deployed units will face the point of a hex giving them 2 frontal, 2 flank and 2 rear hexes.
 Road columns will face a side and have 1 frontal, 2 flank and 3 rear hex sides.


The new and adjusted bases need a lick of paint, and I'd like to add a new unit or two and get the field hospitals ready and based if I have time. Once that's done, or Friday regardless, the troops will deploy and the dice will begin to roll.

I also clipped my cavalry bases to fit the hex grid, and rebased the guns.

 My initial thought is to start with a small "advance guards clash late in the day" scenario and then follow it up on the weekend by a larger pitched battle with positions determined by the advance guards' clash.