Saturday, January 31, 2015

The War of 1812-1838

Yes yes, I know, I'm conflating two conflicts but its on purpose. I realize that there are those who feel that a game is not  a valid historical wargame if one unit has the wrong hat or the wrong shade of facing but obviously I am not quite so fussy. A few years ago I decided that I was building too many armies for very similar games, same weapons, tactics, troop types and terrain, different hats.

I started looking for ways to indulge the desire to paint such and such a uniform without building whole armies for each. One option is of course the fictional army route but another is to allow similar uniforms from different wars to be used together despite small differences in style of shako and the like. I had almost forgotten that decision as I started looking at what I have on hand for the War of 1812.

What there is and what will be.
40mm figures of various makes.

Once I had decided that I could live with the way existing units included officers and ncos in the ranks as fighting figures, I found that I have enough units on hand to fight most actions in proper uniforms and to fight the biggest games that I want to play with slight inaccuracies. I only need to paint 28 new figures, 12 of which are on hand, to  complete the basic force. At some point though I still want to add a troop of 1812 Light Dragoons and a unit of Voltigeurs. Without the optional wants I have 8 line infantry, 2 light + 1-4 Indians, 2 cavalry, 3 guns, a platoon of pioneers and an HQ group, 1 infantry, 1 light, 1 gun, 2 cavalry, the pioneers and the command group are from 1837 but close enough. I might actually try to sell the 4 chunky navy gunners instead of painting 2 more because I like the slightly later homemade ones better.  The unit needing the most new figures is the 49th Foot which is starting with 6 leftovers from the 89th Foot and 7 castings. Oh, there are 78 infantry to shift back on to washers.

I haven't laid all of the American forces out but it will come to 10+ infantry, 3 light, 1 gun, 1 cavalry and 2 militia. Obviously some holes to fill. Only 2+ of the infantry units are from 1837 but there is a stray unit of French converted to Mexicans to fit in as volunteers.  That's about 32 figures to  repaint and possibly re-convert. I do intend to add a troop of US Dragoons though and more gunners.

Not so scary after all. I'm going to start by fixing some broken figures then try to do a couple of figures each month until all units are up to scratch.


Friday, January 30, 2015

A Few More 1812 thoughts

Before I put the figures away yesterday, I decided to look at what was needed to fill out the proposed OB.

Not many of my old units are intact as originally painted. Some figures have been broken, especially some converted command figures, while some US units had coats repainted 2 years ago to convert 4 x 24 figure units into 6 x 16 figure ones. Also I had included officers and nco's in the ranks and the only mounted officers were  brigadiers. The proposed OB was calling for the addition of at least 18 mounted officers and nearly 100 more figures In all.

Whoa!

Another gratuitous shot of some of the lads when they were new. Photo be e tenebris lux.


OK not a lot of figures by hobby standards but this wasn't supposed to be an expansion, just a rationalization. I decided to take a closer look at how the proposed armies would fit on the table in light of my decision to NOT rebase the figures on washers on to smaller rectangles. The short answer is that it wouldn't.

I decided to revisit my original plan for Charge! companies as historical battalions grouped into brigades which will be treated as Charge! regiments. This only calls for a few more command figures to be cast and converted once spring comes, a dozen or so S&S figures out of the cupboard to be finally painted up and at some point, possibly another battalion of Scrubies. Much less work and even the bigger battles will fit on my table.

But first up are a pair of dismounted Faraway lancers who just need tidying and varnishing.


Thursday, January 29, 2015

Chippewa Charge!

Change of topic!

I've been a bit troubled about my War of 1812 collection ever since I found myself with two stylistically incompatible types of figures, various sets of rules and no lasting consensus on the sort of game I want to play. When one adds in a shortage of space and a desire to focus painting and playing on the late 19th century, its no wonder I've been contemplating selling off the chunkies. At first I hesitated until I painted 200 replacements but once I decided that I could do a portable style wargame with what I had left after selling the chunkies only one thing really stopped me. Nostalgia.  After all, this was a collection I began when I bought this old farmhouse 10 years ago and prepared for premature retirement. The 3rd Ohio was one of my first units of original figures and the figures have appeared in Battlegames magazine and (mislabelled as 25mm) in Stuart Asquith's Guide to the War of 1812.

Back when the figures were new and bright. Homemade US shakos on Sash & Sabre British with the blanket rolls removed. Prince August Indians lurk.(photo by e tenebris lux)


There is a long way to go but I am finally making a tiny bit of headway of reorganizing and making better use of space, and I think I have made enough room for another shelf which should cover me for a few years worth of additions. So, I took another look. Leaving aside figures, I also don't want to get distracted by rules. In fact I am trying to reduce the number of sets I use.  One set I am committed to using, is Charge!, which is used for the Not Quite the Seven Years War games. The authors state several times that it was designed for the late 18th Century and Napoleonic wars so it ought to fit.

My first thought was to field 1812 Battalions as Charge! companies but for the smaller battles this is too few units and too inflexible. My existing armies were originally designed for 2-4 x 8 man companies with regimental command groups and since the rules state that the examples are just suggestions I decided to give it a try using my original units making roughly 1/2 sized Charge! units.

Somewhere in Upper Canada in 1814. The Glengarries have beaten the odds and repulsed the New York Dragoons while the main battle lines pummel each other with musketry and cannister.
The rules weren't meant for the War of 1812 so I had to give some thought to how to adapt the war to the rules and vice versa.

The first question was light infantry, especially, US Rifles, Kentuckians, Glengarries and Voltigeurs, not to mention Indians. The knee jerk reaction is that they should all be different with varying capabilities and morale but in practice, while the US Rifles certainly had a reputation for accuracy, in battle they all seemed to have fulfilled their role well and  I know I'll play more generic games than historical recreations. I decided to treat them all as standard Charge! light infantry with 2 exceptions. First, irregulars such as Indians and US volunteers, Kentuckians etc fight as militia if they try to form up. The second is that the Indians will   do morale by company not by regiment.

The next question was what to do with Militia and varying qualities of Regulars. The Charge! militia is particularly weak but will serve for local forces called out in emergencies and for reluctant units forced to cross the border.  The only differentiation of regulars in Charge! is that Grenadiers shoot better. I can't see that as the right bonus for the British but may use it sparingly for crack troops on both sides. Rather than muck about inventing minor tweaks and destroying the elegance, I am going to treat all other regulars, fencibles, volunteers, and embodied militia as line infantry. But, there's a twist, a unit becomes understrength and has to retreat when it had lost more than 1/2 of its original strength, including supernumeries. A standard unit will be exactly 1/2 the size of an original Charge! unit or 3 x 8 man companies + 6 officers, drummers etc. The number of supernumeries can be increased or decreased to make units less or more resilient to enemy fire without changing its own fire ability. Local or demoralized units could also also be shorted a company to weaken them.  

Last man standing. The 1st Ohio finally breaks bringing the game to a close. It occurred to me that some sort of pre-set victory condition other than mutual annihilation might have been good but it was a close game with some nerve racking turns of fate.
So, it worked even better than anticipated (O Ye of Little Faith!)  Not surprising since the rules have always worked well. Perhaps not for those who want screw ups that they aren't responsible for  but I make enough mistakes of my own to add friction, For example, it just didn't sink in that since the British left was advanced, they would be in range sooner and thus just ordering the whole line to advance full speed would give the British left a free first shot against the US right. Only the fact that the US rolled consistently better for shooting allowed them to recover from that to come within a hair of winning.  

Once a game is going the little guys don't really clash too badly with the big guys and its good to have a  table ready army and a trusted set of rules, especially one which I didn't write and won't tamper with because I use them in a group project. There I am, a collection rescued!

There are more figures that should or could be added, especially mounted officers, drummers and Generals, and a few others here and there.  My Scruby Americans need another 6 figures, the British Scrubies need to go back on washers for uniformity and stability, but nothing major and its all ready for small scenarios right away and only 200 or so more figures needed should I wish to fight the biggest battles and have a choice of uniforms. But that is for a possible future, for now what I have works and I can rest easy and get back to 1899.

A Sergeant of the 41st grabs the colours of the 3rd Ohio at the end of that ambush battle some 8 years ago. Gary, who commanded them, used the shot as a screen saver for weeks afterwards.
(photo by e tenebris lux) 


Monday, January 26, 2015

The Same Thing but Different

There I was, looking at the table and thinking, really I ought to play another test game, and it occurred to me that there was a similar incident at the very same location some 10 or 15 years earlier so away went the fieldgray and khaki and out came the red & blue. 
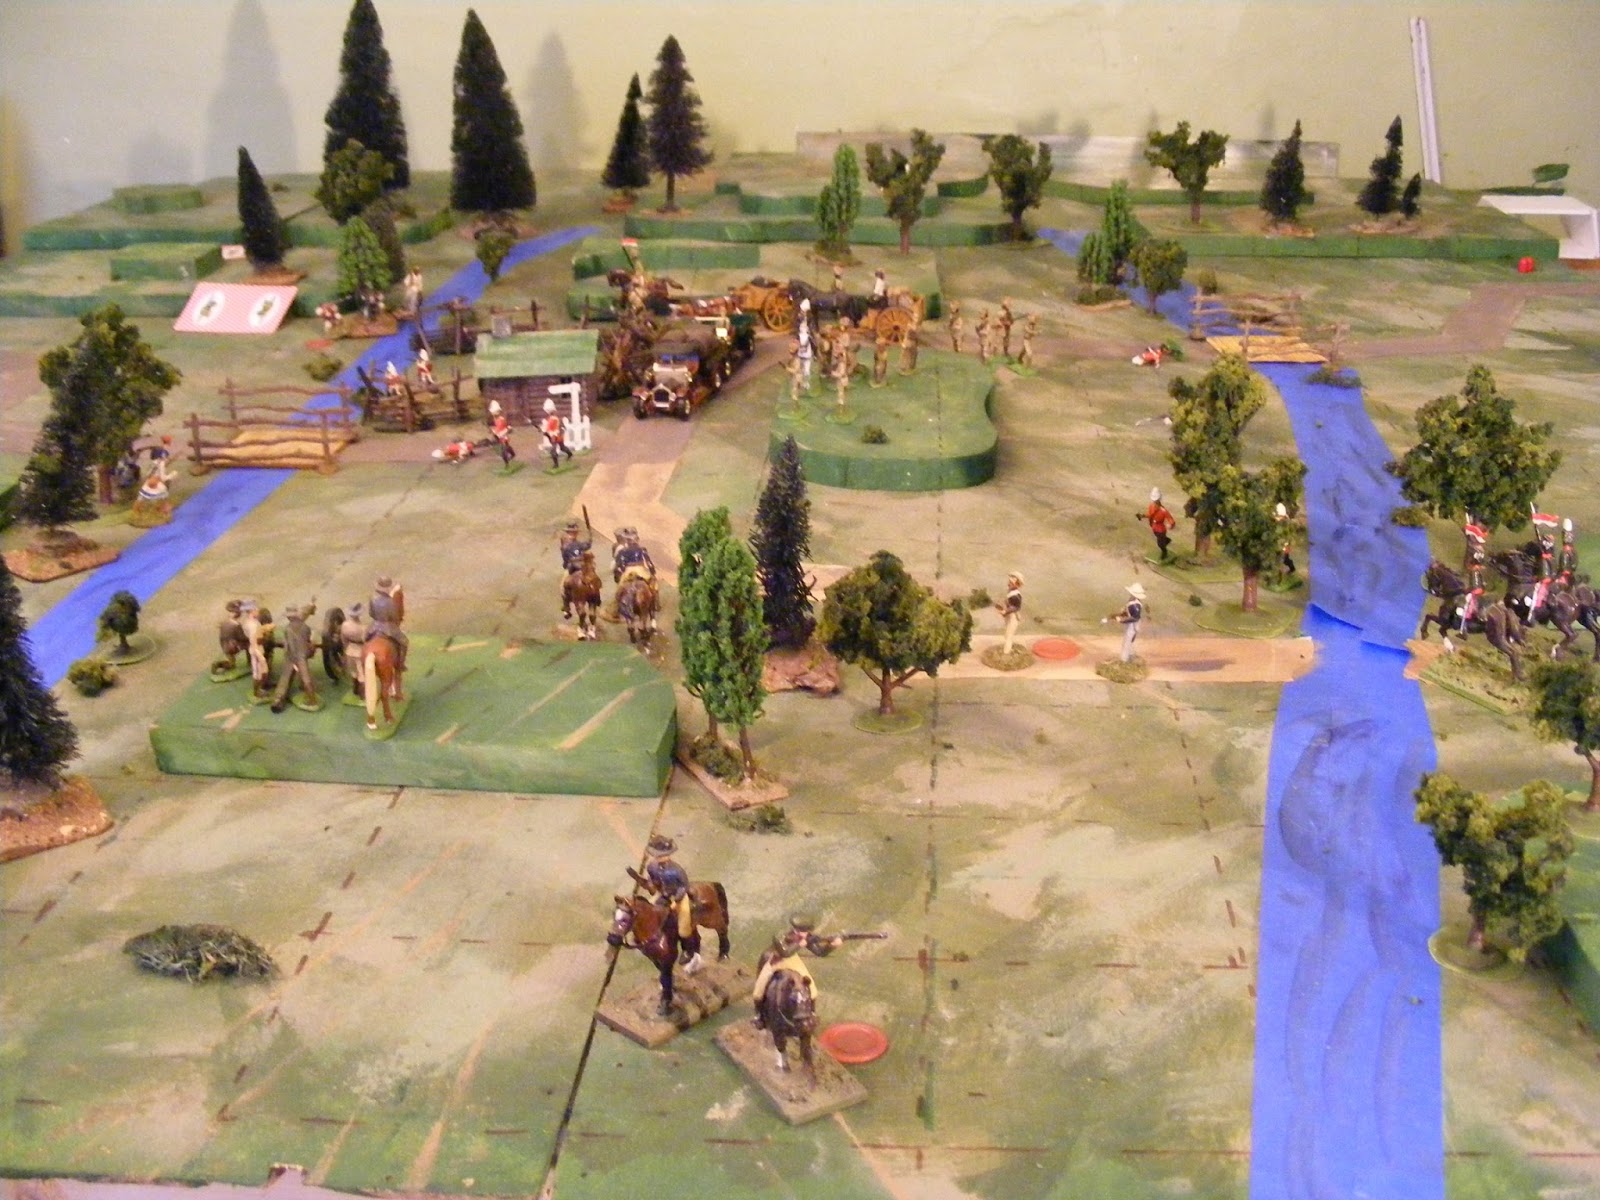
The Queen's Lancers sweep across the bridge routing some Frontier Rifles but are eventually thrown back by the Blue Dragoons after a hard fight.

That was last night. By the time I started to play this morning, I had had time to think a bit about things. There is a lot to be said  for the sequence of play used but also some weaknesses such as having to have some way to mark which units aren't eligible to shoot and the inability for friendly units to "shoot in" an assault. More important than these were the engrained habits of decades which lead me to want to shoot in "my turn" and which sometimes led me to forget to shoot with the other side. It didn't help that I picked up Little Wars as a bit of bedside reading and for the umpteenth time looked at Colonel Sykes' suggestions including the one about troops being able to fire or move, something that crops up often enough in old rules including some of my own and the first Featherstone rules I used. It is undeniable that troops did combine fire and movement over a period of time but usually ineffectively unless they stop to shoot then resume movement. If a turn represents 10 or 15 minutes this could be covered, as I have sometimes done in the past, by reducing both movement and fire effect but in a game of toy soldiers it still feels like firing on the move. Having to choose to do one or the other feels more like the real thing and leads timid players to halt and blaze away. I decided to go back to the active player shooting or moving on his turn and the other side only reacting with units that are being attacked at close quarters.


As both sides rushed troops on, the aging General Scott sent all of the line infantry over the secondary bridge in assault columns. They suffered heavily but pushed forward. Rifle and MG fire swept the Voltigeurs back, the Blue artillery was nearly wiped out by counter battery fire and the game looked just about won for Faraway. '
While I was settling that out I decided to reword the firing effects and to step up the lethality. The casualties in the last game were probably more appropriate but I decided higher risks would lead to a more exciting game and a quicker conclusion for the same size of game. I wasn't altogether happy with the way the automatic pinning for all units was working so I have decided to go back to allowing elite units to choose to take full casualties instead of being pinned. I'm also going to go back to having different numbers of hits per unit. 4 for elite, 3 for regulars, 2 for poor. This will reduce the instance of 1 man units launching desperate attacks.  Having decided that the player is, to some degree, every officer not just the General, I will also reinstate the give ground rule for cavalry and artillery that allows them to retreat under fire to reduce losses. This brings the rules back in line as a version of the Square Brigadier rather than something completely different. In any event, this game lasted less than 1/2 the time of its 3 predecessors and there were no tedious turns.

 The back of a postcard summary is below.
This time, Oberhilse had brought 17 units to attack Faraway's 12. I set the army morale at 6 for both sides with Farway losing 1 as long as  Oberhilse held the small bridge and 2 while they held the large one. With the morale standing at 4 for Faraway and 1 for Oberhilse I almost called the game but knowing that the changes included some volatility I pressed on. Two turns later with the score standing at 1 to 1 a desperate charge by the lancers on a machine gun ended the game. Just not the way they intended it to! 

The Back of a Postcard version of the Square Brigadier in the Age of Rifles.
as played on Jan 26 2015.

Sequence: Roll for initiative, A moves or fire or rallies units, Resolve Close Combat. Reverse and repeat.
Detached  If  Commander not within 6 of general or unit not within 3 of a Commander roll 1d6.
4,5,6 act as player desires
2,3 units may change facing and formation and shoot but may not move
1 units retreat a full move.
+1 if Elite, -1 if Poor, +1 for Commander (optional rate commander from -1 to +2)

Stacking and formations. No more than 2 units per area at any time. Front unit shoots/fights, rear unit supports. Speed is based on formation at start of turn. Deployed is unit ready to fight not road column. Infantry is extended if there is 1 deployed unit.

Move Infantry 1 if deployed, 2 in column, Cavalry 3 mounted, Artillery 2 or 3 limbered.
x2 column on road, x 1/2 if slowed by broken terrain, infantry & pack only 1/2 speed difficult terrain

Rally. Unit needing to rally may not move except to retreat and fights with 1/2 dice. If it does not move and is not adjacent to enemy it may rally. It may shoot and rally but does so with 1/2 dice.  

Shoot. Shoot if deployed. No move and shoot but may deploy/dismount and shoot. Roll 1d/2 rifles or 1 crewman  5,6 hits +1 if superior, -1 if inferior
1/2 dice over 1/2 range
1/2 dice if needing to rally
Suffer 1/2 casualties if in hard cover
Extended infantry suffer 1/2 casualties but go to ground and must rally, Elites may choose to take the casualties instead.
Cavalry and artillery may suffer 1/2 casualties if they immediately retreat a full move needing to rally.

Rifles 4, MG 4,  Lt Gun 8, Field gun 10, Heavy 12.
Indirect arty fire. May fire at unseen enemy if howitzer or if over 1/2 range but -1 to dice.

Close Combat. 1d/figure 5,6 hits  +1 shock troops charging -1 poor troops
Count all of first unit and 1/2 of supports.
Units needing to rally roll 1/2 dice
If attacked from front attacker rolls first unless countercharging, remove hits.
All other adjacent units then roll.
A unit with its supports that takes more hits in melee that it inflicted must retreat and must rally. Attacker must occupy the position if defender retreats. Cavalry which charged and destroyed enemy or forced it to retreat may attack again once. After all combat any mounted cavalry that charged must retreat and rally.

Commander May boost unit. If shot at or in melee. Roll 1 die. 4,5,6 1 hit cancelled 1=commander killed or wounded and removed.

Morale. Hits = loss of cohesion, fear, fatigue, ammo shortages etc as well as killed, wounded and missing. For 1/2 casualties either round down for a longer game, carry remainders for a shorter game or else dice for them (4,5,6 its a hit, 1,2,3 its a miss) . Units  are shaken when they take 3 hits, 4 if elite, 2 if poor. Retreat 1 full move may not shoot or fight in melee and will surrender if attacked but may be merged with another unit of the same regiment. Transfer strength points and lose 1 of the units.

Army Morale. Unless other victory conditions, Morale = 1/3 number of units. Lose 1 for each unit or commander lost. Others by scenario. When at 0, concede game.

Sunday, January 25, 2015

No, no, yes! Found It!

Yesterday morning the weather dawned sunny and warmish but by late afternoon snow and then rain was falling and I managed to retire upstairs and start the game. Once again the game could easily have been set in France 1914 if it wasn't for the shop signs. However, we'll call it Atlantica. At the end of November, Oberhilse forces blew a bridge over a major river dividing the forces. Once they were ready to launch a counter attack, they needed a way to cross back over so they stealthily launched a column to seize an unguarded crossing. Word got out as it usually does and an allied force rushed to intercept. The battle began as opposing forces entered the table from opposite corners. The Blue (Oberhilse) army, with a very small superiority in numbers and in weight of artillery, had to capture the main bridge to win, any bridge to draw.
General Henrison was once a general in the service of Oberhilse but he was forced to retire when it was decided that he was too chunky for modern fashion. A native of Hougal, he has answered the call to come out of retirement and take command of the rebel army or the Redcaps as the papers call them. He wears his old uniform but with a shiny, new, red kepi to show his allegiance. 
 The lead troops came on  to the table as "detached" or "out of command" troops and having to roll each turn to move. The result was that Red (Hougal & Faraway) threw infantry over the main bridge backed by an MG while the new Light Horse seized the Stone House crossroads blocking the path of any Blue forces crossing the farther, minor, bridge which was passable by infantry and cavalry only. The Blue advance guard came 1/2 way on then dithered for a short while before deciding to focus on an attack on the big bridge.
A brave dash by the Hussars might have restored the already flagging fortunes of the day but the wounded horses and men mark where they were caught in a crossfire by riflemen and machine gunners.
The first clash took place on the 3rd turn as some Oberhilse Hussars charged a thin line of riflemen. That was the end of the proposed rules. I mean they worked OK and got the right result but I hated the mechanisms, just not me and not what I was aiming for. The words of Peter Young came back to mind yet again: "Morale is in the mind of the wargamer himself, for ultimately a war game is a duel between the two opposing generals themselves. Do not let them hide their deficiencies behind the alleged failings of their metal or plastic followers!" .

That says it all really as far as the questions I was pondering last week, Fortunately I had been rereading the posts from last fall more carefully and had been able to remember where the rules had been headed and why I had decided to stop experimenting and start writing the full set, and I can now see how that effort went off the rails so quickly. Despite the grid, this isn't really a variant of the Square Brigadier.  Five minutes later I had a new draft which I'll summarize at the end of this post. The full rules will take longer but there won't be a two month's  hiatus this time (hopefully) or if there is, at least I'll have notes! 

At the height of the battle. Both sides have their full strength on board. Red's bridgehead has been wiped out but the cost to Blue was excessive. The green chits indicate each Blue hit, red chits mark Red's hits.
Like the two games in November, the game just flowed. I lost track of how many turns were played or how long it took because I was too busy playing as the turns clocked over one after the other.

The game can be followed reasonably well through the pictures. I had more but they were even blurrier than these. Apparently the tripod does help. Basically Blue decided to focus on the big bridge at the far end of the table and virtually ignore the secondary one. Red decided to hold both but to cross over the big one to give his troops space to fallback without losing the bridge to a lucky rush. There were flaws in Blue's attack but the dice were also in Red's favour at crisis points.

Blue decided to attack by the book with extended lines of riflemen to reduce casualties. It was working ok apart from the MG on his flank but with lines of extended troops, its hard for either side to gain local superiority and exercise any leverage. A slow battle of attrition results, usually to the defender's advantage. Blue did try a couple of rushes but could not roll a hit in melee regardless of odds.

At this point, the game began to drag a little with a slow fire fight unlikely to force a result any time soon. Since I had somehow changed victory conditions from an original intent for both sides to be trying to capture a bridgehead to Red only needing to hold, this meant a Red victory when time ran out or I got tired of rolling.  Rather than call the game or try to figure out how many turns I'd played and what the limit should be, I changed tactics for Blue. Bringing up what fresh and consolidated units I could muster, I started trying to rush the bridge with small assault columns. The result was predictable but not inevitable. They were forced by circumstances to go in piecemeal and were shot to pieces. Might have worked early on when they had an advantage in numbers if they had risked massing the units but it was too little, too late. At any rate, it soon ended the game!
Game's End. Blue hits its break point. 32 figures lost out of 64 while Red stands at 20 lost out of 56. I usually go by units but I hate stopping to recount losses near the end. This way, if I issue each side with markers equal to their breakpoint, when the bin is empty, the game will be over. I suppose lost unit markers ala Battlecry would do the same thing. Something to think about.
The Back of a Postcard version of the Tin Army rules (aka Tin Brigadier)

as played on Jan 24 2015.

Sequence: Roll for initiative, A moves/rallies, B fires, Melee, Reverse and repeat.
Detached: Commander not within 6 of General or Unit not within 3 of Commander
4,5,6 to move (affects all units if a commander) +1 if a commander, or independent, -1 if poor.
Move Infantry 2 or 1 and fire, Cavalry 3 mounted or 1 dismounted and fire, Artillery 2 or 3 limbered. 
x2 on road, x 1/2 if slowed by broken terrain, infantry only 1/2 speed difficult terrain
Shoot. 5,6 hits +1 if superior, -1 if inferior
1d/2 inf or 1 crew. x 1/2 if indirect arty. x 1/2 vs cover or difficult tgt
1/2 d if disordered.
Extended inf, deployed arty, cavalry are difficult target but are disordered if hit in the open.
Rifles 3, MG 4 Lt Gun 6, Field gun 8, Heavy 10. Indirect arty range x2
Melee. Defender rolls for shooting if eligible and removes hits then all others on both sides roll. Any unit in melee that takes more from shooting+melee retreats disordered.
1 d/figure 5,6 hits +1 if superior/shock -1 if inferior
1/2 dice vs obstacle, 1/2 dice if disordered
Commander with unit may try to inspire troops if shot at or in melee 5,6=cancel 1 hit, 1=killed.
(hits are morale, fatigue and cohesion as well as some casualties)
Modifiers are cumulative. (1/2 for range and 1/2 for cover = 1/4. Round up remainders of 1/2.

Friday, January 23, 2015

Straining the Bath Water

While pondering the inter-relationship of rules for sequence of play, command control and combat, and of the frequent contrast between what feels right when pushing toy soldiers around vs what is intellectually right in terms of simulation, it suddenly occurred to me that the current draft lacked some rules ideas that I thought I had adopted. Had they been carelessly  thrown out when discarding other changes?

A look back through old drafts failed to turn up any version including the remembered changes. Was I mistaken?   I started rereading past posts and found them in November, just before the flu, Christmas and an outbreak of ACW distracted me.  I also found a note saying that there would be no more mini-drafts because I was about to start on the full version (probably 7-9 pages like Hearts of Tin was in its heyday) Obviously this didn't get done. I am forced to rely on a few hints in 2 game reports and on the Greycell Archives. A surprisingly random source of bits of information, mostly of no real importance even when correct but occasionally including important bits of trivia.  All is not lost.

One of the things that I've been thinking about this week as I contemplated the more Borg like versions of Square Brigadier from 2013/14 is the way in which the cards in the Memoir/Battlecry rules limit how much shooting is resolved per turn.  This allows for the combat effects actually rolled to often be fairly decisive  in a way that would spoil the game if everyone could shoot every turn with the same chart.  So, the over all effect is fine if one  assumes the guys sitting a hex away from each other without rolling any dice are shooting away without affect. It looks and feels odd but has about the right effect. On the other hand, allowing every one to shoot whenever they have a target etc  etc  means that all that extra rolling and chart checking has to be restricted so as to come up with about the same effect.

Along the same lines, all those units that don't move in Memoir might be waiting for orders or maybe they've been pinned by the fire of that enemy unit that didn't roll any dice. Again, the result is OK but when I'm playing with toy soldiers, I like to feel like I know why they are or aren't doing something even when its really just a dieroll, a chart and my imagination. Don't get me wrong, I enjoy playing  Memoir etc (Actually played again on Wednesday and won for once, 1 out of 2 CharB's traded for 4 38t's, Yes!  )  but I don't have to explain the author's choices, just play them.  I'm also all too conscious that trying to include all the why's and wherefore's all too easily leads to a Middle School approach with pages of charts and modifiers and one hour turns with a headache by lunch.

Anyway, the point is that choices in one aspect of the rules such as command control or play sequence often restrict choices in other areas such as combat results. Its a matter of finding the right feel for the game in hand. The immediate plan is to finish clearing the debris off my table tonight and setting up a game to be played on Saturday if the rain comes early or Sunday if it doesn't. I probably won't have a proper draft done by  then but here is a quick summary based on a cross of what I remember crossed with my decision to re-introduce a form of non-player choice retreats:
Tentative summary
-Roll for initiative. A moves and rallies, B shoots, resolve melee. Repeat, reversing roles.
- Detached commanders and detached units roll: 4,5,6 move as player wishes, +1 Elite/Vet etc or a Commander -1 Poor
-Move. Inf 1 if extended, 2 in column, cavalry 3   etc
- Shooting. Units that moved or are in column may not shoot. (I'll mark this by how I arrange the figures ) 2 dice per unit +1 if adjacent  -1 if disordered 5,6 hits, 1st hit from each unit firing is ignored if in cover or if extended infantry
up to 2 units of infantry in 1 area can shoot but they are a dense target enemy dice x 2.
Melee, Units that are adjacent and did not shoot this player turn now roll 3 dice +1d if shock unit charging, -1d if disordered or flanked, road column etc.  Cover absorbs 1 hit per unit attacking. Charging unit may take ground if enemy retreats or is destroyed.
Morale Any units that take hits must check morale after all shooting and after melee. 5,6 OK, 3,4 Pinned/Silenced/Disordered, 1,2 Retreat in disorder. 0 Rout.
+1 Elite, -1 Poor.   -1 more hits taken than given in melee. Commander may join and reroll die but is lost on a 1.
Disorder lose 1 die in shooting/combat. No move except to retreat. May rally if not adjacent.


Tuesday, January 20, 2015

Who Ordered That?

In the classic horse & musket era, it was sufficiently rare for a unit to be forced to retreat by long range or skirmisher fire  that one can safely ignore the possibility in a simple game. The same is not true in the age of magazine rifles.  Units advancing in the open were often forced to halt and take cover while even units in cover were sometimes forced to retreat to avoid being destroyed by heavy fire. Units sometimes withdrew under light or ineffective fire but normally only if scouting or delaying and there was no benefit to be gained by staying. These are retreats under orders rather than panicked routs. The trick in wargame terms is to determine who should be deciding if a unit retreats. Should it be the player, acting as unit commander as well as "army" commander? Or, should it be the game presenting the player with a fait accompli ordered by a subordinate?

Over the last few years, various versions of the Square Brigadier have vacillated  between  using the equivalent of a "flag" result from the Battlecry series of games (fait accompli) and allowing the player to reduces losses by retreating units (player decision).  Both approaches are valid and as far as I can tell after trying both, they each have something in their favour in terms of game play. Its that dreaded thing, a matter of "paying your money and taking your choice". After a couple of months of player's choice, I am starting to lean back towards letting the dice decide, one more thing for the player to overcome, especially in a solo game.

Unfortunately the change has other ramifications for the way modifiers are handled so I'm going to have to revisit some of the old versions that worked. If they don't appeal I may look for a third solution such as a simple one of those dreaded "morale" or "reaction" tests. I'll then modify the draft to include both options and hopefully put a game on table come Friday as Red Army races Blue Army for control of a key river crossing.  

Sunday, January 18, 2015

See you in hell!

The Rebel and Federal cavalry face off for the first time in a nameless skirmish. After 2 rounds of drawn  melee they saluted each other and rode off, still Blue Dragoons at heart.
(I did try keeping the yellow hat band on the Blue Dragoons but they looked so much like police officers that I repainted them dark blue.

It occurred to me yesterday (not for the first time but I think its worth noting when you notice the same thing repeatedly)  that grid based units have, or can have,  many similarities to single stand non-grid units. The immediate, more trivial, aspect of this observation was the recognition that if I have again, and I have, scrapped figure based combat for unit or element based combat, then once again it does not matter how many figures are in a unit as long as they fit in a grid area and I like the look.

For a while now I have been playing with 3 figure cavalry units on the grid and 8 figure ones off grid but last fall I upped my new units to 4 on the grid. I think it was the size of the bases on a few  of my figures that prompted  the idea of replacing each 4 figure unit with 2x3 figure units but I shook my head yesterday to clear it then painted up 1 more rebel light horseman while finishing a 4 man squadron of Blue Dragoons. At the same time I revisited the proposed 4x4 figure infantry units in favour of 2 x 6.

This has nothing, or little at worst, to do with rules, its about how many figures I want to paint and then cram onto the table when all is said and done. The largest Teaser games call for around a dozen cavalry and infantry scenario-units. Something like 16 cavalry and 48 infantry in 20 game-units , as proposed, makes for a nice compact force, easy(ish) to finish and then duplicate in various uniforms for various settings. Making it 24 cavalry and 128 infantry in 40 game-units on the same table would have meant longer games and squishing almost all units in whichever uniform into any large game which wasn't where I had decided to go. Phew! Another self inflicted bullet dodged.    

Friday, January 16, 2015


Historifig Scruby 40mm ACW cavalry repainted as Hougal Light Horse. 

"A" Squadron of the Hougal Light Horse is now ready to take the field in defence of the new Republic of Hougal.  These Volunteers, all veterans of the Oberhilse Blue Dragoons from before the Separation, are wearing a uniform from an illustration labelled Spanish Cavalry 1890 in Vol 2 of Funcken's Uniforms of the World. When trying to remember where I'd seen it I looked first at the similar light blue uniforms of the French Chasseurs but the caps were wrong. I broadened the search and found at least 1/2 dozen countries with light cavalry in light blue with red pants. Having found the original I searched on Spanish uniforms but found that they didn't exactly match Funcken's illustration. I then resorted to the marvelous Vinkhuijzen collection in the New York Public Library Digital Collection and found the matching colour scheme under Chile 1890 but with a slightly darker blue. 

Close enough, the intent as always is to pretend that it is 50 years ago and I walked into an Eaton's store and found a box of handpainted 40mm SAE cavalry (or something similar) and brought them home to add to my army. 
Soldado de cazadores y su cent... Digital ID: 84094. New York Public Library
Chile 1890: Soldado de cazadores y su centineraPicture from the NYPL Digital Gallery Vinkhuijzen Collection of military uniform prints.
Three more Dragoons are set aside for "B" Squadron but next up are the first squadron of Blue Dragoons in the 1899 field uniform. They are taking longer because after popping off the old epoxy putty floppy cap tops that I had added to the original kepis, I had to file the kepis down a bit before adding, new smaller peaked caps from epoxy putty. By tomorrow I hope to have them finished. I have resisted the urge to put them in drab with light blue pants and have just gone for the usual 'modern' dark blue Oberhilse tunics and the modernized caps. I should add rifles but need to cast some up so maybe later along with dismounted dragoons.

The 2nd Hougal squadron and some dismounted Light Horsemen will follow. This will give the Hougal Rebels all three arms, well 2 1/2 I suppose as they only have the Mitrailleuse not real artillery, yet.

Thursday, January 15, 2015

Convoy: A Square Do Over

Did I mention that I call this the Winter Campaigning Season? Yesterday I nipped across the province to Halifax for a game of modified Memoir with Ron (lost by the skin of my teeth but great game trying out some 1940 stuff, no pics alas).  That left me just enough time to muck about with the Square Brigadier and to reset the table. This afternoon I replayed the convoy using the Square Brigadier.
Some Oerbergers showed up early and demonstrated why a bayonet charge against sharpshooters in a wood might not always be the best tactic for Her Majesty's infantry. An attempt by said sharpshooters to exploit their success by grabbing a truckload was even more disastrous on their part when they were repulsed and routed.
The armies this time were composed of A General, a sub Commander, 2 cavalry, 4 infantry and an MG guarding the column and 2 cavalry units at the outpost. All troops had rifles and were shock troops. The Oerberg forces were a General, a subcommander, an MG and 8 mounted rifle units. All irregular sharpshooters. Deployment was done in the same manner as the previous game but with slightly different results in placement of units.

I didn't take many pictures since the game looked fairly similar but it certainly flowed faster with more tension. I think this was due to the more decisive combat and morale system and with  fewer fiddly options leading to faster turns. Any question about the abrupt victory conditions or unit removals had been removed again by yesterday's Memoir game as well as by having reread most of the game reports of the last 5 months. MacDuff and the Tin Army have again retired and been put on half pay and I have begun again the slow work of polishing a complete and finished version of the Square Brigadier for the late 19thC / early 20thC. The ideas are there in my head but expressing them in a way that reflects what I actually want and avoiding accidental changes in function when tidying format mean that it won't be done in a day but the draft pretty much as used is available under pages. By this time tomorrow  it will likely have been tidied and expanded again but there were no new ideas introduced in this game, just a slightly different blend of existing ones that have been tested over the last few months, some of them almost a decade old now, others newer.
The desperation charge that saved the day.
Please not that figure removal does not equate actual casualties, its just an easy way of tracking a unit's diminishing combat ability.
The beginning was similar but the game and result were different. Time wise the game took about an hour and 1/2 to reach a finish.

Once again the Oerbergers were ahead ahead early on but rifle fire first silenced then knocked out the Pompom and wounded Oom Bob while a bayonet charge over the bridge, led by General Otter himself, seized the wood controlling the exits despite the General taking a bullet. A follow up charge by Lancers cleared another party of Oerbergers and the enemy morale collapsed. 

The basic rules lay out that unless modified by scenario conditions, an army counts up the number of units it has and divides by 2 to determine how many units and commanders it can lose before conceding the game. There were 9 units on each side so a breakpoint of 5. When a desperate charge by lancers survived a blast of sharpshooter fire, and won the melee followed by the Irregular losing unit rolling low and routing, the ambushers broke. They had lost the general,the PomPom and 3 mounted rifle units, 2 in charges, one to MG fire. The Queen's forces had lost the General and 2 units but had 3 others reduced to 1 hit from being removed. It was a close run game.

So, with rules and organization once again in hand (and back close to where they were at the start of December) I am again turning my attention to figures. Since I am bent on reducing my collection of  figures, in addition to adding new ones, I am going over my 1840's figures to see which can be refurbished to fit the late 19thC and which can be adapted to fit better into the 1812-30 period.

I was happy to see the Blue Dragoons take the field again but their fancy braided uniforms looked terribly archaic. In light of their past deeds and the deadliness of modern battlefields, they are in the process of receiving new service tunics, brown belts and cap covers. I also have to report that the Hougal revolt continues and  yet more members of the Oberhilse army have deserted to fight for their new state. This includes of a squadron of Dragoons who have shed their peaked caps and dark blue tunics and ordered red kepis and breeches and light blue shell jackets. They should be in action before the month is over.

Tuesday, January 13, 2015

Tasting Figgy MacDuff Pudding

If the proof of a pudding is in the eating then the proof of a game is in the playing.
Faraway troops escorting a convoy through territory claimed by both Her Majesty and the Republic of Oerberg.

Last week's game was enjoyable and woke old memories. As I continued to fiddle with the rules and thinking about old fashioned MacDuff figure to figure melees, I found myself thinking about Colonial wargaming and small scenarios. I had things to do today, but nothing urgent, and I had a few hours to myself. The table was still mostly set so I just jiggered it a bit and improvised a varient on an ambush of a convoy.
The playing cards mark possible ambushers. 1/2 of them are dummies. Since the game was solo I placed them blind and discovered what a card was when it was spotted or if I  wanted to move or shoot with it or if it was in a position to shoot and failed a control check to stay hidden.
Faraway (Red) fielded a detached commander with 6 cavalry garrisoning an isolated farmhouse belonging to an old Oerburgher. A convoy on its way to resupply a key frontier  outpost entered on the main road on the farthest side. The convoy consisted of 2 trucks and 2 ox carts guarded by  General and a subordinate commander with 16 infantry, an mg, and 6 cavalry. All troops were regulars and classed as shock troops in melee.

Oerberg had a general, a subordinate commander, an mg, 15 mounted rifles and 12 infantry.  The rifles and infantry were all classed as Irregular sharpshooters (superior firepower) non melee troops.
A group of Oerberg riflemen hiding in a copse on the riverbank  got excited and opened fire on the 1st turn. They were eventually driven off by the bayonet but not before causing significant losses and distracting a significant proportion of the enemy. 
The game was enjoyable and engaging with several turns of fortune and nothing in the rules jarred though I kept spotting little details I could add. However, this little skirmish, barely bigger than the train ambush last fall, took over 3 hours to resolve!

I've been spending some time postgame pondering why it took so long and examing how I felt about how it played, how it compared to other options tried since August and what it is I am really looking for out of a game now. 
The Oerberg pompom was well placed to make the approaches to the bridge a killing zone, especially with sharpshooters holding the wooded bank beside the bridge. A desperate charge by the DG Bodyguards cleared the woods and the trucks rolled forward.  An even more desperate mounted charge by Oerburgers almost took a truck but the whole situation changed as the last 18 mounted rifles emerged from cover. With heavy casualties threatening a rout, the order to retreat was given. The shattered  remnants of the Queen's infantry backed by their MG was able to hold back pursuit over the bridge and the convoy managed to limp back to safety. A drawn game.

So why was the game so long when the rules were all so simple and the forces so small? In part it had to do with the mental work of tracking who was who and how the morale of the various commands stood and keeping clear who could shoot and how many dice they got this turn and what formation they were in and other such details, and partly that things were new and sometimes needed contemplation. Its worth noting though that my old MacDuff rules, which this version has been slowly beginning to resemble more and more despite the grid,  had the same issue.  The rules were simple and seemed fast but even small games needed several hours to play. 

I was excited to get the game on the table and really happy with the feel for the first hour, as I was with the previous game but, by near the end, I was still enjoying it but also starting to long for the quicker, easier, if less story rich, mechanisms of the Square Brigadier with its fixed units,  fixed combat values and quicker resolution (or unit destruction...) The ability of infantry units to stay around is actually fairly in keeping with history. It was not uncommon for units to survive long periods under fire, even when pinned down and unable to move. A slow trickle of casualties did not often have a cumulative equal to the shock of very heavy casualties in a short time or of a charge gone home.   It doesn't make for a quick or always exciting game  though when you go through the process turn after turn with only incremental results until things eventually, hours later, reach a climax. Its ok if that's what you are seeking, and at times its what I think I want but sometimes, quick and exciting is good. I keep thinking about past Square Brigadier and Hearts of Tin games and a comment Lentulus made last week about exploring mechanisms for whole-stand removal for games with his 10mm 18thC troops.   

I also honed my thinking on organizations as I played and how I portray dismounted cavalry, esp for mounted rifle units. Eventually I may duplicate all mounted figuress but I think a mounted marker for dismounted mounted riflemen and dismounted marker for cavalry units is the way forward for now. I have a lot of casting, converting, and painting to do!

A few things to think about anyway. There may well be a rematch on the weekend with some very different rules in a sort of showdown. 


Sunday, January 11, 2015

Let Us Cross Over The Rivers

Our impression of the feel of a game is often as important as the reality of how it played. When I look at the actual mechanisms there are only two main differences from previous versions of my game: movement by both sides followed by shooting by both sides and finally charge resolution rather than alternate turns with one side moving and shooting and resolving charges then the other, and the substitution of temporary groups for fixed units. In some ways these changes made very little difference to how the game played or to the outcome but the change in play sequence in particular made a world of difference to the feel. It is not a particularly new or innovative play sequence rather it is pretty much drawn from Featherstone and from Lawford and Young  but that is perhaps the point. Its comfortable like an old pair of slippers and feels right for Old School glossy wargame figures yet the game maintained the convenience of the grid and a small number of figures.

Since the game is no longer a variant of the Square Brigadier I have decided to settle on the name The Tin Army.
General Grey arrives and is briefed by the commander of the Oberhilse advance guard.
The scenario has a small detachment of Faraway troops defending a river crossing on a quiet sector of the front. In this case there is a nice straight canal crossed by 1 bridge and a larger river crossed by 2. Oberhilse must capture a route across both bodies of water to win. Faraway must hold all of the bridges to win. The forces appear in dribs and drabs in what was supposed to be random order but dice being what they are, they all appeared in order! 

Rather annoyingly, the scenario breaks from the usual format of "units" and occasionally 1/2 units to speak of companies, troops, squadrons and units without specifying what each was intended to represent. So for example there are 2 companies in the front village and the rest of the unit in the rear village. Ok so is that 2 and 2? 2 and 1 ? 2 and 8?  No hint of proportion. If my own organization was fixed it would have been easier but eventually, taking into consideration what was available, I settled on the following. 

Faraway or Red Army: 8 infantry and 2 cavalry and a commander in the small town , 8 more infantry and 2 more cavalry in the bigger one. Reinforcements eventually included the General, 4 more cavalry with the cavalry commander, a commander  and 16 infantry, another commander with  8 infantry and an MG, and last but not least, a field gun. (in Red and Khaki) Total: General, 4 Commanders, 8 cavalry, 40 infantry, 1 MG, 1 gun 

Oberhilse or Blue Army: 8 infantry and 4 cavalry under a Commander followed eventually by an MG and further 8 cavalry for the advance guard, another 8 cavalry and commander, a field gun and 3 "battalions" each with a commander and 16 infantry. (in Blue and Field Grey) Total: General, 5 Commanders, 20 cavalry, 56 infantry, 1 MG, 1 gun.
  
The game lasted 16 turns and probably lasted 2 1/2 to 3 hours. I spent too long fiddling with rules, taking pictures and just plain looking at the figures and used up my block of "me" time so had to finish it 1 or 2 turns at a time over two days when I could grab a minute. 

I'm not going to attempt a blow by blow description of each of 16 turns but the pictures and captions will hopefully give a good impression of how things went. The red discs mark disordered or pinned units, the red caps mark carried over 1/2 hits while the white caps mark shaken units. Now that I feel very 'settled' I'll add more scenic markers to the to-do list along with more dismounted cavalry so units don't have to change uniforms when they dismount. 

Blue decided to run the gauntlet of fire and bypass the village with the Jaegers and cavalry of the Advanced Guard while the rapidly approaching infantry stormed the village. Red called everyone forward but some of the detached units were slow to fall in. 

A gratuitous close up of the arrival of The Frontier Horse. These volunteers are now largely recruited from Oerberg across the mountains, one of several grievances held by Her Majesty's government against that state. 

The aggressive General Brown has arrived to take command of Faraway's defences. He redirects 2 companies of infantry to retake the bridge captured by the enemy lancers. His own cavalry has left the defence of the village to the infantry and has formed a skirmish screen to prevent the village from being surrounded. Reinforcements rush to the front on both sides. 

This picture follows the teaser in the previous post. In the village, an assault by Blue's infantry has taken the Red house but the garrison of the White house is still hanging on after repulsing an assault. The Blue advance guard has taken heavy losses from shooting and a series of cavalry charges and is now spent. Red has recaptured the bridge and taken the commander and a handful of Jaegers prisoner.  As Red savours the moment, the Blue Dragoons suddenly appear, almost as if the GM had missed their arrival and just plopped them down on table where they might have been as if their approach had merely been unnoticed. 

The village has fallen and as more and more Blue infantry marches on backed by artillery, Red is forced to abandon his efforts to retake the village and fall back in hopes of a draw. The Lancers and Country Volunteers hold the Blue Dragoons, just. Both the Dragoons and Lancers will be shaken by losses next turn and forced to withdraw but Blue still has fresh reserves moving forward.
The slaughter was terrific as impetuous massed charges by Blue infantry faced fierce rifle, machine gun and artillery fire but while repulsed shaken, their attacks also shook the enemy. Red still controlled both bridges and the light ws failing (ie only 1 turn left) so I was going to call it a draw on Turn 15 but Blue had fresh infantry just within reach of the bridge and was willing to risk another turn of  shooting. This turn the gunners fired high and although the lead company of Windsor Blue's had to double forward with bayonets to reach the enemy, the shaken defenders were unable to hold them and the bridge fell. Another Oberhilse victory! 
The Old Queen is not amused!  


Friday, January 9, 2015

If I'd known I was coming here I coulda taken a shortcut.


Today's game not quite 1/2 way through. The rules differences are not obvious from a static picture.

When I began this WWI bicentennial thing I was picturing a generic toy soldier game  along the lines of a 40mm version of my late 19thC Square Brigadier which was of course initially inspired by Bob Cordery's Portable Wargame (Eg see the game shown below.) and thats what the last, very enjoyable, game was played with.

A cardtable game from a year ago.

Last summer the sight of the glossy 40m toy soldiers on the table got me thinking briefly about Charge! and my old "With MacDuff" Colonial games  but that approach appeared to require more figures than I wanted to paint and I  couldn't figure out how to merge that sort of game with the grid which I find useful so I put it aside.

As I wrote yesterday, the thought came back and I suddenly glimpsed what seemed a workable way to merge the ideas. Six enjoyable turns into a test game today, I realized it was working even better than anticipated. I stopped to tweak a few bits and simplify the  sequence.  A while later I hit update, reopened the file and 90% of the updates had disappeared. Grrrrr!!!

So, instead of finishing the game, I copied the page to Google Docs and reentered the updates. The formatting went whacky again when I copied it back but there is a lot to do yet anyway. If I'm not mistaken this will take over the niche that has been empty since I gave up on MacDuff and 54mm Colonials will be asked to  cover a wide variety of scenarios, missions and troops over the next decade.

But first I need to ensure that the basics do work. The game will resume in the morning and I'm looking forward to it.

Thursday, January 8, 2015

Somewhere in a Faraway village


An alarmed picquet sights an advancing Oberhilse patrol.

"Seizing the Initiative" from Scenarios for All Ages (the Red Book.)

When is a door not a door?

Playing wargames on a grid is still a new thing to me, maybe 4 years. One of the issues that I've struggled with for some of the types of games that I like to play,is the whole very useful but periodically problematic notion that  1 hex/square=1 unit.

Now the notion of fixed units is not an entirely new thing for me. Going back to my early days with WRG 3rded Ancients there were unit integrity rules but the size was not fixed. The 1 base=1 unit approach  used in Volley & Bayonet, or DBA for that matter, led to some of the same issues of having to field large units as 2 game units or amalgamate 2 units into 1 game unit, never mind splitting a unit mid-game. There are strong advantages, especially for high level or large games but there is also inflexibility.

I have, however, also played games like Charge! (not to mention my own With MacDuff to the Frontier and Hearts of Tin) where units were companies but companies formed battalions and sometimes the battalion was the unit but sometimes a company could be detached and become a separate unit. Late last summer as I contemplated some Colonial games, I started trying to figure out a way to get that flexibility without giving up the grid. I had a glimmer or 2 but utterly failed at trying to explain how it worked when I tried to write the rules. It really didn't help that the military has a long history of using the same word for 2 different things. Look no farther than division = 2 French companies, or a collection of a dozen battalions plus artillery.  So, I fell back on Morschauser and Borg and carried on and it works.

Then I played Charge! again and again I marvelled at its simple intuitive approach that over comes so many issues by not regulating them in an effort to do something one way. Even the unit organizations in the book are mere suggestions as they point out and the rules work just fine with different ones. So I spent some time over the last few days trying to figure out a simple way to keep the squares and free up the organization. After inventing some interesting new organizations and basing schemes I woke up and remembered that I was still planing to use the structure I had been building with 4 x 4 man companies + 1 MG + Colonel as a Regiment.

A shot of an experiment with combining companies mid game from August. 


What I hope to test later this week is a structure where the Regiment is as many guys as you like (4x4 figures for my armies) plus a commander with the old saw that the regiment has to retire after 50% losses. I then state that whatever is in a square at a given point of time is a group and combat is resolved by groups. Individual figures retain their own characteristics for movement, combat morale and so on  which means combat had to be switched back to dice per figure rather than per unit but that adds colour anyway and I had been a bit disappointed to drop the old way for the dice by unit approach which I had done for convenience. Formations are defined by how many figures are in a grid. 4 infantry=extended, 5-8 = deployed (a shoulder to shoulder line 1 or 2 deep)  or a march column, 9+ =  a Mass and so on. A battalion in line will end up forming 2 adjacent groups but some early mucking about shows it nicely shows some of the disadvantages of maneuvering in line vs in a mass despite the lack of a special rule, which is how intuitive rules are supposed to work.

Whether it works or not remains to be seen but at least it will have a more Colonial/Toy Soldier feel.
The updated draft is published as a page, to  the right in desktop mode, scroll through pages in mobile mode.

Oh, and the answer to the old riddle as fans of the 2nd Doctor (Patrick Troughton),  might remember is of course " When its a jar".  (ajar=open a little, a jar = glass container)

Monday, January 5, 2015

Taking it forward

Once again I'm not going to do the look back/look ahead thing, looking back, please browse the past posts, looking ahead, just expect more of the same sort of thing and often something to surprise me as well as you. 

I'm trying to catch up with some non-wargaming things delayed by 3 weeks of flu as well as answering to General Winter but things aren't entirely stalled. There has been enough of a break and a little bit of variety to get me out of "this is what I do" mode which almost always means a) Trouble and sometimes b) New and Improved Something. 

In this case, the older form of  sequence of play that I've been experimenting with again has hit the spot this time around. In essence it is a modified form of one of the three systems proposed by Featherstone in Battles With Model Soldiers. The original was "dice for initiative at the start of the turn. A moves, B moves, B shoots, A shoots, Resolve Melee". My kluge for the Square Major General was to incorporate a premovement artillery bombardment phase inspired by Bob Cordery's rules inspired by Morschauser's Frontier Wargame Rules and to lump the infantry fire and melee together into 1 phase. For the level of game, with 1/2 hour turns and brigade units, having non-simultaneous fire doesn't make sense to me even if one side did get the first shot in out of the dozens or more that they traded before it was over. For a lower level of game in a black powder era, it might still make some sense as adding a bit of flavour/chrome. Which brings me to the next point.
     
Here is a peek at some of the items passed to me on behalf of the late Joseph Lapin. The box contained various old or never finished bits of terrain as well as some always useful items such as trees and so on but the real treasures were 3 Airfix kits. The Waterloo Farmhouse is one piece that appeared on the table during games I took part in back in the '80s. The Roman and Foreign Legion forts are kits I always felt I ought to have but never did (I once had a farmhouse but it stayed behind at college iir). I'm not sure what I'll do with them yet but finishing up Fort Beau Joseph for a semi-skirmish game with Airfix figures is a possibility.

As mentioned occasionally, to minimise confusion when switching back and forth, I like having a series of rules for various "periods" that share as many common mechanisms as possible as well as having specific things to give that special period/level of action feel. For instance a similar play sequence, a similar style of combat resolution even though the particulars are different.  Having a complete change now and then is fine but its best if its very different. For example, I am unlikely to confuse Charge! mechanisms with the Square Brigadier whereas I do occasionally get confused midgame if Gathering of Hosts and the Square Brigadier do similar things in different ways. So expect some testing and adjusting of an alignment of my various 'Square Based' rules over the next month to have stand based combat & losses, a similar play sequence (eg for the medieval rules archers will fire in the bombardment phase so same idea, different detail).

At the same time, I have been meaning to revisit Hearts of Tin.  These poor rules have suffered since I got hooked on grids and at some point I took a set of rules that I was happy with and changed them into a set where all I can remember is that I don't feel like playing them. In part this is because I explored strange  new territory with the square based rules using my HofT armies and tried things that I have eventually decided were not really where I wanted to go but buggered about with HofT a bit anyway. Since the Square based rules have now returned closer to their roots but improved, I have already updated HofT to a happier place. There needs to be a bit more checking and unit stats updated and then I will be running a non-gridded HofT game in the next few weeks, either ACW or 40mm and posting a link to the rules again.

First up though will be an early 20thC Toy Soldier game using the appropriately modified Tin Brigadier with each figure being a "stand" for consistency sake. Since this is definitely a Toy Soldier game as opposed to the recent ACW game, I will be fielding inappropriate levels of units in a traditional reverse bathtub approach where a "skirmish" teaser with a train ambush might see several wargame battalions  used where platoons might be more appropriate just as later games might see those same battalions filling in for brigades in a "battle".