Monday, January 31, 2011

Belmont Ridge - Preview

The decision came down in favour of a tried and true scenario.
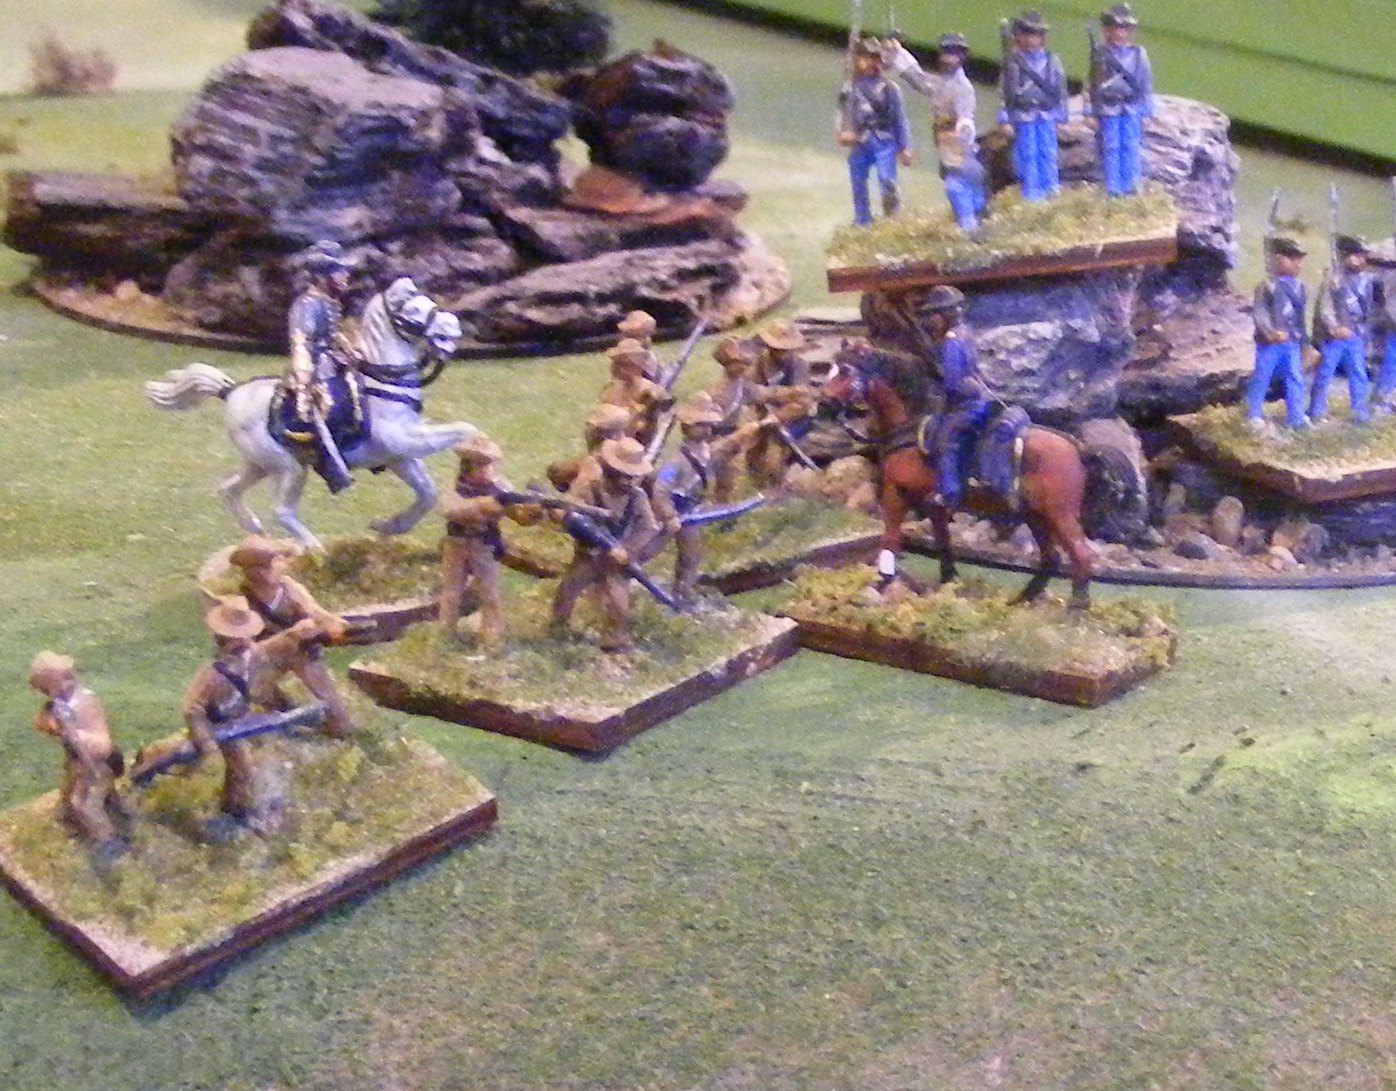
Reinforcements on the Table, in progress.

 More tomorrow.

Sunday, January 30, 2011

Delantero! Forward!


OK I want to be very clear, I am not an Alamo nut. I may have a coon skin cap and can take my pick of Fess Parker, John Wayne or Billy Bob Thorton portraying the last days of Davy Crocket, any time I want, but I am NOT an Alamo nut. The print above was won at a convention in Seattle about 5 years ago when as Santa Anna, I led the Mexican Army in a relatively bloodless conquest of the Alamo but I like the image of a boy in a coonskin cap playing with toy soldiers. Sums it up nicely.   

When I came across the 40mm Zinnbrigade molds nearly 10 years ago, and decided that I "had" to have them, I needed a  project to justify the purchase. Since the molds that were still easy to get included Napoleonic French in wide shakos and later Prussians in spiked helmets, the obvious choice was to use them for the 1st Schleiswig-Holstein War which I had been thinking about doing using recast Britain's toy soldiers.

The French were not exactly right for Danes in the old red uniform but for glossy toy soldiers they seemed close enough. I was willing to overlook the small, late 19thC version of the spiked helmet, the packs and the tighter tunic but I had trouble getting the one Prussian infantryman in loose trousers and the others in skin tight pants tucked into high boots just didn't work for me as 1848 Prussians. When the chunky Sash & Saber ACW figures that I started converting for Danes in the new uniform  turned out to clash horribly style-wise, I scrapped the whole project.  

Putting the Prussians aside for conversion fodder and a possible future FPW or WW1 project, in 2005 I turned to the "Savage & Romantic" Carlist Wars. In short order I turned out the 1st 12 figures of a Charge! style Cristino unit, and very pleased I was with them. I converted a few sample Carlists then figured out that converting all those Carlists was going to be a lot of work for a casual side project so that idea was canned as well.

Last year, after using my 1812, Sikh War and Mexican American War troops to test the Imagi-Nation waters, I decided to stick to historical fantasy and resurrected my Aroostock to Oregon project. Since Mexican California was right next door to the Oregon Territory, giving the British a brigade of Mexican auxiliaries seemed like a good idea. (I like lots of variety when I paint.) Since I have 1847 US forces, painting Mexicans of the same era would make sense, but naturally, I like the Alamo period uniforms with the wide topped shako better. Luckily these also look a lot like the Spanish that I had already painted.  These are toy soldiers for imaginary games so I'm not going to get too hung up on details but a few small touch ups will help update the 6 year old figures:  red turnbacks, cuffs and piping, tri-colour cockade and a blue overcoat on the pack.
 
Left, a Cristino, on the right, transformed into a Mexican.  

The rest of the regiment has been cast and primed and by the end of the week the new San Carlos Active Militia Battalion, 20 strong, will, at long last, be ready for action.

A second battalion and a mounted officer are needed to fill out the "brigade". I was planning a 2nd Zinnbrigade unit but do have Sash & Saber Mexicans left over from the ladder party pack and they are more compatible with the Zinnbrigade figures than the ACW figures were so I will dig them out and have a look. Lancers and Dragoons will naturally follow. At last the project is crystallizing!

A ladder party using a mix of converted S&S Mexicans with Zinnbrigade heads and Zinnbrigade figures.

Friday, January 28, 2011

Picking up where I left off

Hurrah! After a tiresome 2 weeks and various hassles, the Albatross (aka house) has finally been sold and recovery has begun. (and Zvezda WW1 Russians ordered!)

First up, Hearts of Tin. It occurred to me that I had forgotten to include rifles in the melee chart and upon revisiting it, found that the format was awkward. That has been reworked with the usual collatoral damage. I have also been over the rules numerous times looking for discrepancies and seeking to make things clearer. (Also threw in commander personalities since the more important stuff was done.)  The updated version is now available from the new link to the left.

A quick reference sheet will follow as well as illustrated examples of combat, formations etc. Hopefully soon.

The last game of the month is now scheduled for Sunday. Normally a revised version calls for either a historical scenario as a sanity check or else a tried and true teaser but I have a sudden urge to visit Plattville.

Thursday, January 20, 2011

The Scots go to town and Charge their Pikes

On Sunday I took a short break from the hectic last days before completing the sale of our old house to participate in a test game of Charge Pikes! by Wesley Rogers.  I had a small mixed brigade of my Scots Royalists in one corner and was constantly interrupted by urgent non-wargaming business so I can't really report usefully on the whole game but I took a few cellphone snaps of my Scots having their biggest success in decades.

     This first shot shows the remains of 2 regiments of English Parliamentry cavalry riding for the table edge in the distance. One unit was beaten by my Gordon Horse in a straight up fight, the other had been launched in a frontal  attack on the Strathcona Foote to see how the rules worked. They worked well for the pike and shot formation, not so well for the cavalry who rallied back into the path of the pursuing lancers.


  . My home made Scots infantry & artillery backing up Minifig cavalry inc conversions.
.
The lancers followed up by running down a heavy enemy gun while it was reloading and then wheeled and hit a large enemy pike & shot regiment from the rear. These passed their morale and proved to be a tough nut even taken in reverse but once the Strathcona's had wheeled around and along with a regiment of English Royalist horse, joined in, the infantry finally threw down arms. At this point, word came that Parliament's  Scots allies had beaten our English allies on the other flank and we all decided to call it a day.

Charge Pikes was strongly influenced by the WRG 1685-1845 rules and so was like an old friend for me.
So far we have tried Victory Without Quarters, Warhameer ECW and Charge Pikes. They all have their  strengths and weaknesses but for me these rules had lots of flexibility for building forces how you want them, esp useful should we ever try an historical refight, seemed to encourage historical tactics and were easy on the brain at the same time. Recommended.

Friday, January 14, 2011

My Tin Heart's in the Highlands

I managed that 4th run through of the Wargamers Digest Dec 1974 Battle Stations this morning, and I'm really glad I did. It was still a small, short game but an interesting and engaging one. It took me about 1/2 hour to play 10 turns and it was the closest the Yankees have come to winning. Actually by turn 5 I was starting to think that there was no way the Confederates could win then the Union General made a mistake and his Confederate opponent jumped on it. (no bias other than standing behind the Rebs, in 15mm I was always a Reb but in 20mm & 54mm I am usually a Yankee).

The game started off with the same deployments and initial moves as in the previous games. I really liked the way the brigade movement worked and the move or fire  which I had copied from Don Featherstone. It really made engaging in a musketry dual a tactical choice as opposed to a "might as well while I'm here" thing. It also lends some drama due to the turn by turn initiative, it takes a strong nerve to march forward into the enemy's range if  you move first as you know you are up for one blast before you can return fire and may be up for 2 if there is a flip. On the other hand, if you can force the other guy to go first, you can march safely into range and who gets the first shot will be decided by the initiative die. A bit artificial given the turn lengths but it does add that touch of drama to the game and reflects the tension one must have felt advancing with close ranks on a waiting enemy. (Its also the way the original MacDuff rules worked although in that case it was fire before moving rather than instead of, something to think about)

The simplified fire also worked well and with the threat of a morale test removed again,  the effect was as it should be, significant if it sustained but almost never decisive. At some point you have to go in if you want the ground. That has always been the intent, used to work and does again. Hurrah!

 Back to the game. Things went fairly smoothly with the Union defenders getting in the first shot and doing more damage that they suffered thanks to their hasty entrenchment. The cavalry rode about the hill and belatedly the Union Commander realized that he forgot about reacting to this visible threat as it developed. Luckily his Confederate opponent graciously allowed him to face about even though the turn was over.
The reb cavalry, faced with a steady line of rifles up a steep hill, couldn't work up the nerve to charge, suffered a hit from long range fire then fell back to watch developments. (my decisions)

The fire fight had now extended along the whole hill with the Rebs having moved their reserve regiment out to the left to outflank the Union position. The Yankees responded by splitting their reserve in two. 1/2 the regiment blocked the cavalry while the other half moved swiftly to extend the blue line. Despite the support of 2 batteries, the Union were still dealing out more than they were taking, all along the line, an assault looked impractical. Then the Reb General saw the mistake, when the detachment moved up into line to face the Georgia infantry, they forgot about  the cavalry and left their flank in the air. With a Rebel Yell the two Confederate infantry regiments surged forward while the cavalry wheeled and galloped up the hill. The Federals turned a company to face but had to give up their defensive fire to do so. Along the line, they rolled low but so did the opposing infantry but with 7 stands against 4 (The Yankee line bent around the ridge so 2 of the defending stands were out of arc once the line had charged in.) The cavalry, elated by the opening, rolled up and the blue line gave way.

They ran through the rocks and they ran through the briars" (oops wrong war)

The cavalry surged forward in pursuit, cutting down a few more, but the enemy took cover in the rocky crags where the cavalry couldn't follow.  It occurred to me belatedly that once again I had removed the stops and the cavalry could just keep pursuing until the enemy broke unless they had supports or cover or ran fast enough to out pace the horses. This was actually having the effect I wanted. If the infantry is steady, a frontal attack by cavalry is iffy at best but if the infantry cracks, they are toast.

Another view of the turning point.

The Yankees were far from broken, however, and reformed across the hill, their line forming an L with the short arm being behind the breastworks and the long line stretching back. The Rebs shifted their extremely useful horse artillery around to the front to thicken the fire then realized that the Union line on the hill was perfectly aligned with the foot artillery, an enfilade target.  (duh)  It took two turns of effective fire before he  woke up and pulled the line back, the end regiment having to conform to avoid being flanked and of course having to forfeit a shot in order to retreat ( in his defense, the Blue general was suffering from sleep deprivation after a low blood sugar incident in the middle of the night and was trying not to think about the phone message from the Real Estate agent about an offer coming in on the house in town, so not at his best)

By now the Yankee Brigade was nearing its break point and, with over 1/2 their men in the open, were suffering badly from artillery fire. The Southern General waved his hat and galloped forward, leading a charge of the whole line. A few minutes later the remnants of the Federal force was streaming across the valley with the cavalry in hot pursuit. At the cost of 2 companies, the Rebs had cleared the road.
"Your prisoner Sir". The Federal commander is captured during the rout.

It was the nearest the Confederates came to defeat but in the end it was  the most decisive victory. (Felt like an even bigger victory for me as the rules finally feel like they were supposed to again.)


Time to break out the '40mm and go back to Oregon

Thursday, January 13, 2011

A Change of Hearts

The seemingly inevitable result of getting the mental juices flowing is another revision to Hearts of Tin .

1) The first, which is a change to the movement rules, stems from starting to see the Brigade more as an entity with the units being components rather than being a collection of entities. Instead of dicing for the movement of each unit, I have decided to dice once for each brigade (and for stray units), partly to make the game play more smoothly, partly to better represent the Brigadier's handling of his brigade. This necessitated a chain of collateral changes  including some welcome simplification of things that distract from the important stuff.

2) I put the fire combat system back to where it was originally in concept. This also made it simpler and helps clarify a player's tactical options.

3) The melee system naturally has had small but vital changes. Some deal with how many dice are rolled and what modifiers are applied, others deal with resolution which will now be done by Brigade and do away with the severity of defeat morale tests. The over all result should get the same intended results more reliably with less fuss.

4)  The last major change involves morale, the elimination of the new morale test and the disorder state as well as an adjustment to the rules for being Shaken that will take into account entirely Elite, Militia or Irregular brigades.

Can't wait to try them out. I was going to change the scenario for something more complex but now I am interested to see how it compares and the table hasn't been reset yet so tomorrow  I intend to "play it again".

Interim report

I haven't finished my home work yet but I have reviewed accounts of 12 battles between 1775 and 1863, ranging from skirmishes to major battles. Nothing in the process has shaken my basic understanding of how things worked, the basis behind my rules,  but I have answered the first question to my satisfaction. I have not answered the second question completely, the absence of examples not being sufficient proof that something didn't happen.

The first question was to do about how retreats come about and the answer seems to be a resounding "yes" to all of the listed possibilities. In short, sometimes when a serious attack is made, one side is defeated, the ranks are broken, discipline lost and the men run away.

On other occasions, one has what might be termed a "drawn" melee where one side has had the worse, suffered heavy casualties and/or had portions of the attack break and run. In these cases, local commanders may give an order to retreat in good order to save the remaining troops.

In fairly rare cases, the drawn melee may be evenly balanced and prolonged and an orderly retreat is ordered by the over all commander.

Assuming the player is over all commander, the first 2 are beyond his control and should be handled by the combat resolution mechanisms whether or not this includes a morale test, possibly for the commander rather than his men. It could be seen as a question of how badly the melee has been lost at an intermediate level. The 3rd is definitely a player decision. If the player is representing the free will and capabilities of more than 1 level of command, then a good case can be made  to have the combat mechanism handle the fate of sub-units and leave the rest in the players hands.

Having written of my underlying assumptions or understanding about horse and musket warfare, this may be as good a place as any to set out the relevant parts.

1. There is a difference between artillery and skirmish fire and an attack. The only cases where even the worst troops are broken by such fire are rare enough that they can be treated as special events and shouldn't be incorporated as a possibility in normal rules. I speak here of troops breaking as opposed to a command decision to retreat the unit to a safer place. Note that if attempting to limit the player to 1 POV then, a mechanism for that decision to be taken out of his hands could be appropriate, a reaction test if you will for that specific circumstance. The resolve of troops can be however be weakened by such fire by more than the loss of numbers.

2. Exchanges of long range fire between formed troops other than as an early stage of an attack are rare enough that I still don't have a good feel for the issues but I suspect that this falls under the same rules as for artillery and skirmisher fire.

3. When an attack is launched, one side or other is sometimes broken or destroyed almost at once. In other cases a prolonged fight is required before either one side breaks or is ordered to retreat. A pursuit is likely to convert a retreat to a rout. By attack I am lumping together effective range musket fire as well as "charges". Even in the American Civil War with both sides armed with rifles, this decisive combat seems to happen at fairly close range, say within 100 yds and rarely last more than 20-30 minutes, say 1 or 2 turns.  Within this process, there are clearly examples of the sorts of behaviour described by many traditional morale tests, troops firing early or unleashing a volley and running, atackers halting short or falling back slightly and then being rallied and led forward again. If looking at the over all attack though, these are all subsumed in the final result.

4, When a higher level formation launches an attack, the fortune of component units may vary but the generally either the whole fails or succeeds. It may be that when the first sub-unit on one side breaks, the surrounding units either panic or are forced to conform as a matter of self defense, regardless of orders.

5. If a unit is broken in combat, it is generally finished for the day even if part of it rallies. If a unit retreats without being broken, it seems to be weakened beyond the loss of men.  The shortage so far of such units being ordered to resume the attack may be an indication of a commander's decision not to recommit these troops because of that weakened state.

Translating these ideas into rules terms, and specifically my Morschauser inspired HofT:

1) The test for heavy casualties that I instituted last year should be removed. It would be justifiable to have a test for a brigadier to order a unit taking fire to pull back but since I am not adverse to the player wearing multiple hats, it is unnecessary. A generic section on roleplaying subordinate commanders would be more apropos but someone else may write it,

2) Resolution of melee needs more thought. At present winning and losing is separate from consequences with weaker units (militia or shaken) being at risk of routing if they lose as well as being at greater risk of losing. Instead, the involuntary breaks should come during combat and the resolution result applied only to those survivors still under orders. So for example, instead of a shaken or militia quality unit taking more hits than it inflicts then  failing a morale test and routing, it should simply be destroyed in the melee process, or at least take such heavy losses that the remainder are of no use. While there are good arguments for keeping broken stands on table from a simulation & moving diorama POV, from a gaming POV,  I prefer to remove them and shall continue to do so.

3) Attack resolution needs to be at a higher level than the unit. Essentially all of the units of a command that are committed to a fight and survive need to be subject to the same result. Not quite sure yet how to work that but it shouldn't be too hard to define.

5) I need to reconsider the question of morale levels. I have been content with 2 which are measured by remaining stands, the idea being that when enough men have been killed, wounded, run away or are in a funk then the resolve of the remainder drop. Two states might be enough but it needs looking at as does the decision to base this on the brigade not the regiment. On the whole I am inclined to think my current approach is ok here.

Back to the books to look for those cases of defeated troops rallying and returning to the attack or counter attacking.


Wednesday, January 12, 2011

Morale Tests: Doing some Homework

It was no accident that I decided to break out the vintage Morschauser as one of the sets of rules to use for  the latest game. It was my 2003 modification of his rules called Morschauser Meets MacDuff that is the origin of the Hearts of Tin rules that are now my main stay. By 2005, I had boiled the rules down to 1 page  (largely by dropping explanations and grammar admittedly) and I have a sneaking suspicion that this was a better set from a gaming POV than the 16 page rules that  I am now using (ok so much of that is explanations but still..). This latter now including a rally test to determine if and how long defeated troops take to be ready to fight effectively again and which may be all together too generous.

So, I wanted to re-experience the original in search of clues to the Holy Grail. I was thinking mainly about rule mechanics but the thinking sessions that followed on some of the comments have taken me off on a surprise revisit to history as well as mechanisms.

Lets look briefly at the assault on the hill during the Morschauser game but lets not look so much at individual stands but look at the attack as a whole. As a refresher, once a stand moves into melee range, it must fight and either win or be destroyed. If it wins and there is another stand within range, it may choose to fight again or to wait forcing the enemy to fight in his turn. By the attacker's next turn, he will usually have some stands surviving and have holes in his line where stands have been destroyed. There may even be some stands in a position where they must resolve melee before moving. If he has a 2nd supporting line, he must decide whether or not to commit them and indeed whether or not to recall the original attackers. Now, I am assuming that lost stands are not all dead and wounded and indeed I assume that loses must to some degree, in theory,  be averaged across a number of stands, so that  the regiment that originally had a strength of 5 units now only has an effective strength of 3 regardless of who died and who ran away or is cowering in a corner.

An alternative system  might treat the regiment as a whole and mark casualties or record DP's or cohesion points etc or maybe remove stands or figures but force what remains of the unit to retreat if it got the worst of the fight. If it retreats, it may or may not be able to stop, perhaps remove some markers and become more effective than it was at the point at which  it retreated. (My early Morschauser variants allowed stands with rosters to attempt to remove hits.)

The questions that I am now pondering are:    

A) When an assault takes place and fails, how does that happen?  Who calls it off? Surely the general back at Headquarters who ordered the assault is too far away to be able to assess the attack in real time through the smoke and confusion and communications too primitive to communicate an order to fall back? Is it the local commander? is he able to perhaps order a  retreat because he feels that his units will be destroyed if he doesn't? Is it only uncommited units under his command taht he can call off and the rest are on their own? Is it only when discipline breaks and the men run away that the attack ends?

B) If and when the men run away, is it really possible to rally them and return to the fight, al lof them? or is there usually a permanent reduction in fighting power?

Obviously there is not 1 all encompassing answer that applies in all situations and the same sorts of questions apply to the defense and so forth. The implications of the answer are twofold, if the men who run away and are rallied are more or less incapable of further action, what are the plusses and minuses to removing the stands as opposed to leaving them on table and making them a liability? ( the ability to concentrate survivors is a minus since a number of unwilling to fight but still in the battle line troops take up the same space as the same number of ready to fight men) Also, should the combat resolution remove all decision power from the player once the troops are committed to the attack? What about supporting units?

Now, "conventional wargaming wisdom" (CWW for short) normally has some form of test that dictates whether a unit which has been defeated can continue the fight or nor, for example in Charge! if a unit is below 1/2 strength then it will retreat but if not it will rally for a set number of turns and be good to continue, in other cases it can be a die roll and so forth.

I figured it would be easy to come up with examples but its proving harder than I thought, partly because of the level of many battle accounts and partly because I probably wasn't asking those questions when I read them them before.

To take a well known small battle, Bunker Hill, which I have read accounts of, but not studied on a detailed unit by unit basis, the British assaulted the American defenses three times (if memory serves). The question is did the 1st assault fail because the officers lost control of the men and these panicked and ran? or did some assess that the assault could not win because the ranks were too disordered and casualties too heavy and call the men back before they broke? How many men who were in the front line of the attack participate in the 2nd or 3rd attack as opposed to men who had been supporting?

The level of the game also affects the answer. Take Ruffin's and Leval's Divisions at Talavera, each was involved in more than 1 combat even disregarding the previous evening's affair.  If the "units" are divisions, then they must be able to sustain multiple combats but be weaker, possibly by removing sub-units. If the units are battalions, should they be individually weaker or does it work as well if you just remove some so that the division is weaker by having fewer effective components as opposed to the same number of  less effective ones?

Translated into wargaming terms if I remove some stands and retreat others, is that sufficient? Do I have reasons to regroup before attacking again? Is there a reason to keep stands on and mark them in hopes of recovering some of the strength later or is regrouping stands sufficient?

So, I find myself with a homework assignment: go  dig out as many detailed accounts as I can and review various attacks looking to answer just these questions without getting sidetracked by all the other stuff.

Suggestions are welcome as to battles to check out for examples of troops participating in multiple attacks or who are driven out of a position and counter attack.


.

Tuesday, January 11, 2011

Black Powder at Belmont. Battle Station replayed

This was the 3rd and final play through of this small scenario. It was a small game for any of these rules but it was obviously way too small for Black Powder. So perhaps not a fair use of the rules but a fair comment on their flexibility in terms of game size as the other rules coped well.  I didn't keep careful track but this may have actually taken less time than the 15 minute Morschauser game!

I used the stats from the book for the troops and rated both commanders as staff value 8. I decided to treat the squadron of cavalry as a small unit of marauders. They and the artillery did not count towards the force's break point.

Once again I kept the same battle plans for consistency sake. On the first turn, the Rebel general ordered the cavalry to move around the enemy flank and they galloped off a triple move. The infantry refused their order. The Yankee infantry concealed on the hill declined to open fire at the cavalry skirmishers so it was on to turn 2. I started with the pinning force and this time it obediently marched forward 2 turns, unlimbered the gun and opened fire on the waiting Union infantry inflicting disorder and 1 casualty. The flanking force of infantry refused its order so the cavalry couldn't be given an order either. The Union reserve was ordered to about face and prepare for the cavalry but declined. The regiment blocking the road opened fire and disordered the Confederate pinning infantry.

On the 3rd turn, the flanking force kicked into gear and advanced 3 turns while the horse gun galloped forward and unlimbered next to them.  I now ordered the cavalry to sweep around the hill and attack and they duly did so with another triple turn. As in the first game, dismounting would have been smarter but I decided to repeat the charge, this time into the rear of the Union reserve. The cavalry had penalties for being a small unit and in skirmish formation so had 3 dice for 4,5 or 6, the infantry was unable to conduct closing fire and had a penalty for being attacked in the rear so had 6 dice for 5 or 6. When the dust settled the infantry was unscathed and the cavalry was disordered and shaken. It duly failed the morale check and was removed from the table,

Cell phone snap of the Yankees repelling the rebel cavalry by sheer indifference  

On their turn, the reserve moved smartly forward into the breastwork and the Yankee infantry opened fire all along the line leaving the lead unit of the flanking force disordered with 2 casualties. The 2nd line passed through into close range and they and the horse artillery blasted the enemy. The Yanks returned fire, shaking the pinning force. Another volley from the Confederates saw the end Union unit shaken with an extra casualty, they failed morale and routed while the regiment blocking the road also went shaken. This meant the Union brigade was now broken and on their next move, the remaining units would be forced to retreat as the enemy were within 12". The road was open.

Of all the games, this one was the least interesting and exciting. The jerky neck or nothing movement resulting from the command rolls was not as satisfying to me as the steady march of troops as the game unfolded even though they ended up at about the same spots at about the same game move. I also found the combat less engaging despite getting similar results. The cavalry attack in particular felt odd, it seemed unlikely that the Yanks would watch the cavalry making a wide sweep around the hill without reacting and then be charged in the rear and calmly disperse the enemy. If they had of faced about, the result would have been the same or worse but it would have felt better. The fire combat is as jerky feeling as the movement,  lots of die rolling leading to dribbles of casualties or nothing and then suddenly a lucky roll and an enemy goes shaken and 1 die decides if they stand or rout.

So, the rules work and I'll play them when a game is offered but I'm not likely to use them for my own games.

I also spent some time today thinking about  the question of how common it was for troops retreating from combat to rally and return to the fray but more on that tomorrow.

Monday, January 10, 2011

Morschauser on the Mountain: At point does less become too little?

I reset the game this morning and gave a play through using the original Morschauser rules including the roster concept. John Curry has republished the original book bundled with extra material so I won't go into too much detail on the rules. Basically each stand is a Basic Unit which gets 1 die when shooting and in melee and is destroyed by 1 hit. The roster takes this a bit farther and makes each stand 5 basic units, so more dice flying but no changes. The rules are bloody in the extreme with elimination of one side being the only possible melee result.

As usual when comparing rules, I followed the same battle plans. In short, the game took about 15 minutes and 5 turns to reach the same outcome as the first game. About 1/3rd of that time was spent rolling dice to resolve melees during the penultimate turn.

The last stand of defenders is surrounded.

 The game provided a good example of how simple rules can support an interesting game where basic military principles rule. Concentration of force by means of a flank maneuver was the decisive factor with superior firepower and superior numbers of maneuver units overcoming static defenses which would otherwise have been a sufficient force multiplier to pretty much ensure victory for the defender. The use of reserves almost reversed the decision but were stretched too few by the cavalry turning movement.

It also provided a good example of how a historical minatures game can be stripped down too far to provide satisfying flavour.

Regiments and generals had no role. Stands stand and fall on their own though a player can maneuver them to gang up on an enemy, where the individual stands come from is beyond the game's concern. Likewise since each stand is a unit, there are no formations though if using a road bonus, one would be forced to form a sort of road column by default. There is also no variation of troop quality but that can easily be added and indeed there are suggestions in that direction in the book.

 Rifle fire is effective enough at long range to do the work more safely than melee and gun crews stand in deadly peril at extreme rifle range. There is no rule for cover from shooting though there is a modifier  for being uphill in melee which I extended to the breastworks. In hind sight, I could have easily modified the shooting by reducing the odds to hit by one. (For example rifles hit on either a 4 or a 6, this could have been reduced to only hitting on a 6.)

The worst part to my mind is the complete lack or morale leading to the all or nothing melee, no chance of a defender being forced back or an attack stalling or being repulsed and no chance of a retreat spreading. At a higher level than the unit though, one can see a player whose front line has been decimated, willingly pulling back stands to regroup them as a tactical decision rather than as a result of direct rule mechanics, so perhaps it is a matter of focus and how you look at it. I suspect the roster system actually plays against this and perhaps lots of stands would be better after all. The rules would certainly be fast enough to handle massive games.

Hmm, odd, I feel better about the rules now after a bit of thought than I did right after the game and I can see why my earliest adaptation worked better for me than many of the later ones. In any case I once again pleased that the focus was really on the player's battle plan and getting through to a decision and not on die rolls or minor tactics. I think perhaps that that will o'whisp that is the essence of what I am seeking from rules is becoming clearer and maybe the most important bit is actually slightly different from what I was thinking.


Sunday, January 9, 2011

Battle Station Dec 74: Featherstone at Belmont Pass

This is the first play through of the Battle Stations from Wargamers Digest, December 1974. Please refer to the earlier post for set up and details.  

Overview of the battlefield before the game.

Having considered the various rules to be used, I ended up adding 50% to the distances in the scenario. This still isn't a precise translation but its as close as I can get without modifying move distances and ranges. After assessing the situation, I decided to deploy the foot artillery and 1 regiment of infantry as a pinning force while the cavalry went on a wide flanking movement on the left. The 2nd regiment I ordered to move left and assault the corner of the enemy hill supported by the horse artillery and the 3rd regiment. (I can't believe that I haven't named any of these regiments yet!)

Turn 1, the blue and the grey toss for initiative. 
The flanking move begins aided by a Russian limber.
The game started smoothly, the Yankees hunkered down behind their breastworks (built for my 15mm ACW and pressed into service) while the Rebs marched off smartly. (a bit of a relief actually having no command control test or variable move dice - UhOh!) On turn 2 the Reb foot artillery galloped forward and unlimbered on the flank of their infantry supports.  I decided that it was time to roll for the strength of the Yankee defenders (remember, this wasn't specified in the original article, only the black and white picture provided any guidance) and ended up with 3 regiments of infantry and no artillery support. I deployed 1 regiment hidden on the wooded hill on the right of the Federal position and the 3rd in reserve in dead ground behind the hill. The Federal commander had won both initiative rolls thus far and chosen to move second each time, this gave him the right to fire first (at least according to how Don explained it when laying out the rules as opposed to what is described during the example game). The regiment had 4 stands and thus had 2 dice of fire. The range was 16", over 1 foot but less than 2 feet so 2 was deducted from  each dice resulting in 1 hit on the infantry. First blood! The gun then fired needing 3 or better, a 2 was duly rolled, a miss. Now I turned to the Rebel infantry and only just remembered that it was fire OR move and they had moved so, no return fire.

The ball commences.

There seemed no reason to alter the plan on either side so the next turn rolled on with the Confederate pinning force standing and trading fire at long range while the flanking move continued. On turn 4 the Rebs won the initiative roll and forced the Yankees to go first, seemed like a good idea since they had a chance to knock a stand off the enemy thus reducing his fire but the Federals also had hidden infantry and I decided that these could not be fired at until they moved or fired or someone moved within 6". So, the cavalry moved around the hill, the horse artillery unlimbered and looked for targets and the infantry advanced. The pinning force opened up but both gun and infantry whiffed! Seizing the moment the 2nd regiment of infantry stood up and opened fire.

   Surprise!

This began a lengthy fire fight with a slow trickle of casualties, thanks in part to some fickle dice. The odds of assaulting the hill didn't look comforting so I decided to see what effect the cavalry flanking attack would have. With my other hat on, I split the reserve, moving 2 stands to face the cavalry  while the other 2 moved to the breastwork to thicken the defenses. The cavalry drew sabers and charged (more out of curiosity about the melee rules then anything else, dismounting and opening fire would probably have been wiser even though not covered under the rules). The infantry leveled their rifles and fired with -1 for range and x1/2 for cavalry resulting in the loss of 1 cavalryman. In the melee then, the cavalry rolled 2 dice, subtracting 1 from each die for attacking uphill then halving for effect, inflicted 1 hit. The infantry on the other hand rolled 1 die after halving inflicted 2 points or 1 cavalryman, and I removed a stand. (In retrospect, I had given each cavalry stand the offensive power of 4 men so should have either allowed each to take 4 hits or have treated the 4 men as 1 stand, oops) This left 1 stand or 2 cavalry facing 2 stands or 7 infantry, I rolled the morale dice while I debated whether to multiple by stands, figures or melee points. The cavalry rolled a 2, the infantry 6, making it a moot point, the cavalry turned and retreated. .

(ok this is 2 turns before the cavalry melee, in the heat of action I think I reloaded the camera with several rounds without firing a shot...)
. .
The cavalry rallied at the first opportunity but declined the opportunity to make a 2nd attempt. The fire fight was starting to wear down both sides as each fed in replacements. The holding force thought it saw an opening and surged forward but when the artillery missed, their (ie my) nerve failed and they halted on the next turn and opened fire at point blank range. So far the entrenchments had given the Yankees just enough of an edge that they would have won the firefight if it wasn't for the Confederate artillery. One more round of fire saw two of their regiments reduced to a single stand. With a rebel yell, the grey regiment swarmed over the breastwork taking out the last defender. I decide to use the rally test to check morale on the remnants of the other 2 regiments upon seeing this and both fell back 1/2 a move and rallied. With only 3 stands between the 2 regiments, it was time to go home.

     The Yankees falling back in good order.
 The last defender has been put back in place for dramatic effect. 
.   

And so ended an enjoyable little affair. It took me about an hour to play through about 10 turns and once again, a severely stripped down set of rules seemed to provide a better game than many, if not most, more complex ones. Obviously there are a lot of things not covered by the rules. Even leaving aside things not relevant to the scenario like engineering, there were no  rules for formation or direction changes, passage of lines, detailed weapon variations, troop quality etc,  but most of what was missing, wasn't missed!  Instead of worrying about such details, the focus was on the plan and basic tactics and worked. A cavalry assault uphill on rifled armed infantry was easily repulsed, an attack on entrenched infantry only worked because of artillery support and a flank attack which split the defenders at a crucial point. A successful assault on the position might have worked but it would have been a gamble and it was easier to stall and trade fire. In other words, the game felt right.

To my surprise, I didn't miss the command control restrictions or my variable moves either. The long moves and unpredictable, sometimes severe combat results gave sufficient unpredictability to keep things interesting and made reserves not only useful but necessary. (oddly the same is true of Charge! and the original Morschauser rules but is not true of many newer or more complex rules).

Not only that, but, if you are wondering what the scrap of paper visible in the lower right hand corner of the 1st picture  is? Its the entire rules hand chicken-scratched onto 2 post-it notes. Next best thing to a postcard!
Rules on a post-it. Admittedly scrawled in abbreviated form.

My enthusiasm for breaking out the copy of Black Powder has waned even farther but it is the rule set Jerry & I have selected for an upcoming occasional campaign so I will persevere.  The 3rd game is more up inthe air, Morschauser, straight up as planned, the early Morschauser Meets MacDuff variant or the latest Hearts of Tin? The game is short enough that I could try them all and F&F as well but there is something mystical about 3 so we'll see.

Oh and the solution you ask?
Nope, I didn't cheat, but all those years of training must have sunk in.
Picture from WD Dec 1974

Saturday, January 8, 2011

Battles With Model Soldiers

Don Featherstone's book Battles With Model Soldiers (BWMS), my introduction to the hobby,  was published in 1970, 8 years after Wargames. The rules are firmly aimed at the beginner and are stripped down compared to those in Wargames, indeed they are not really presented as a full set of rules but as only as some suggestions  as a starting point, just sufficient to get you going and point the way. Yet, they are not just stripped down as some mechanisms are different rather than just simplified. Improvements or just a variation?
The Reb's so far, painted in 1983, based in 2011, ready for their 1st action!


Here are the Four M's of the original rules summed up:

Movement:
Infantry: 12" move or fire, Cavalry:18", Artillery: 18" -3" to limber/unlimber.

Missile Fire:

  • Rifles: 1die per 5 figures the modified score is the number of casualties.Remainders of 3 or more are allowed a die, smaller remainders are ignored.
    Modifiers: 0-6" -1, >6"-12" -2, >12" -24" -3, Enemy in hard cover -1, cavalry suffer 1/2 casualties
  • Artillery: 1 die per gun to hit. Up to 9" need 4,5 or 6,  >9" to 18" need 5,6, >18" to 36" need 6.
    Once a hit is scored, roll 1 die with the score being the number of casualties inflicted.
    Cavalry and troops in hard cover suffer 1/2 casualties rounding down. A gun may move and fire as long as it is unlimbered during the fire phase. Guns may be trained on their target after all movement is done.
Melee.
Infantry is 1 point, cavalry are 2 points if fighting infantry, 1 point if fighting cavalry. Roll 1 die per 5 points and 1/2 the  score, rounded down are the points of casualties inflicted. .+1 per die for  shock if cavalry charge and in other situations where it seems warranted, for example, a flank attack. 


Morale.
After melee, each side rolls a die and multiplies the number of survivors by the score. The lowest total must retreat a full move next turn.

Three options are given for Sequence of play, Dicing for 1st move, simultaneous moves from opposite flanks or written turn orders. In all cases, movement is conducted then fire then melee.


My original intent was to sum up the ACW rules included for the sample game and play them straight up but after re-reading Appendix 1, Author's Note, I will make a few slight modifications incorporating some ideas from other chapters and adapting to taste.

Movement and Terrain: Earlier in the book Don mentions the effect of terrain on movement and suggests 1/2 speed on hills and "some" deduction for crossing walls and streams etc. Since he has maintained the 3" limber/unlimnber from wargames, I will borrow the 3" penalty from Wargames for crossing walls etc and will also penalize infantry moving through woods by 1/2 movement and forbid guns and cavalry from entering except if moving along a marked path. I will also allow troops moving by road to add 1/2 to their move.

Missile Fire: Those familiar with Wargames will have noted an important omission, the "saving throws of dice" have disappeared. Cover is now a direct modifier and officer casualties have disappeared. It also means that the high casualty rates are roughly (very roughly) 1/3rd higher. Artillery on the other hand, has had its teeth drawn compared to Wargames, shorter ranges, less chance to hit and 1/2 the effect. However to compensate there is no reduction for crew casualties and no limits on ammo. Oddly, the new range brackets do not match the infantry brackets so that there are "sweet spots".

Rifle Fire. When I originally decided to do a 1/72nd ACW project in 1982, I decided to make the Rebel regiments 15 strong and the Union 12 based with a mix of singles and multiples. Having revived the project last year, I decided to base all figures on 40mm wide bases and for convenience of scenario balance, have now made all units 4 stands, 3 with 4 figures,1 with 3 which will be deployed as skirmishers if appropriate. Now 15 figures nicely  gives me 3 volleys if counting noses but it would be convenient to fit the dice to the basing. If I roll a volley for each 2 bases, that will slightly reduce the casualties and make it easy to track, I just need to track hits and remove a base when 4 have been suffered. A single stand will get no dice and cannot be combined with a stand from a different regiment. Dismounted cavalry and infantry with smoothbores will be treated the same but the range bands will be 3", 6" and 12"
A newly raised Union regiment advancing at "low guard", skirmishers to the front.

Artillery: I would like the artillery to be a bit more effective, especially at cannister range so will make 6 equal 6" range bands with the score to hit ranging from automatic up to 6" to needing a 6.at 36". So at 6" a hit is automatic, >6"=12" 2 or more to hit, >12"-18" 3 or better, etc. If a hit is scored roll 1 die for effect. Cavalry, and troops in hard cover suffer 1/2 the number of casualties. I also want to make the artillery a little less vulnerable so I will declare that they also suffer 1/2 casualties from all shooting.

Skirmishers: The Battle Stations mentions skirmishers. After some waffling, I have decided to ignore skirmishers for now.    

Melee. Like firing, I want to adjust the dice to suit my basing and will maintain the same ratio as firing, 1 die per 8 pts with a stand being 4 pts if infantry or if cavalry fighting cavalry or 8 pts if cavalry fighting infantry. 1/2 the total is the number of points lost. +1 per die for shock but I will also subtract -1 per die if attacking uphill or against cover as well as no shock being allowed in these situations. Note that this means that while artillery will get defensive fire, it will not get a melee die and will normally be over run unless very lucky.  

Morale: There are various morale suggestions in BWMS, all somewhat different from the rules in Wargames, most laid out as special cases such as column attacks possibly being repulsed by shooting. The only morale used in the example battles is to decide melee and an optional test if the General is killed. In the section on ACW, there is a suggestion for a morale test for units the first time they come under fire and a vague mention of testing to rally them if they fail. I'm not going to test units coming under fire but will steal the test to use as a rally test. 

If a unit is forced to retreat after losing a melee, it must roll a die on the following turn to rally. (ie if defeated in turn 2 it will retreat on turn 3 and attempt to rally on turn 4) 1,2,3 the unit rallies and may move as ordered. 4,5 the unit falls back 1/2 move then rallies and faces the enemy and may obey orders next turn, 6 the unit retreats a full move and must attempt to rally again next turn. If a general joins the unit, he may add +1 to the die but must stay with them till the end of the turn. (This +1 will also apply in post-melee morale if a general was with the unit during the melee)

There is no morale penalty for being below strength but single stands of infantry have no combat value so are best sent to safety.

Generals. In the basic rules, generals are just another mounted figure for melee though there is an optional morale test if the general is killed (but no specific rules for this happening). For now, I am going to ignore command issues and just use the officers to boost morale. This needs to come with a risk though so if a general has joined a unit which suffers hits, roll 1 die an on a 1 he has been hit. If a general is hit then on the next move, all units under his command must test (call it morale, call it command confusion). 1,2,3 they carry on, 4,5 they halt 1 turn, 6 they retreat a full move and test again next turn, 

That should give me a simple but workable game and I am looking forward to trying it. I would like to end up with the following excerpt which nicely sums up my attitude and is in part, where I got it from.

Thank you Don for many enjoyable hours and great friends.
_________________________________________________________________________
APPENDIX 1  from Don Featherstone's Battles With Model Soldiers

AUTHOR'S NOTE
EXCERPT

"Nothing in these pages is a dictate, no word says you must or you shall do it this way. On the contrary, the book sets out from the very beginning to stimulate the reader to think for himself, and to use what he has read merely as a foundation for efforts and ideas which reflect his own temperament and character. Only in this way will he obtain maximum satisfaction from the hobby of battling with model soldiers."


   20 years being jostled in the spares bin has left minor some scars but amazingly not a man has been lost. (Until this week that is when a gun and 3 crew have gone awol. arrgh! How far can they have gone? Call out the Provosts!   )

Friday, January 7, 2011

Battle Station Dec 74


Advance Guard: 15mm ACW Minifigs leading the way onto ebay.  (seller id rmacfa if anyone is interested). Keeping up my determination to make 1/72nd my smallest scale, my 15mm ACW brigades have begun filing onto ebay in search of a new assignment. I'll hold onto a strong division of Rebs since I have still have friends in town with F&F based 15's and one never knows. That leaves 6 or 7 brigades of infantry (its been a while, I think there are 12) some artilIery and a couple more cavalry brigades. I can't remember now why I painted up 4 or 5 brigades of Rebel cavalry, mounted and dismounted, I must have had Bedford Forrest in mind. 

The first game for this year will be, as advertised, a Battle Stations from Gene McCoy's Wargamer's Digest. Most of these were WWII but I don't have enough suitable stuff to fudge any of them at the moment. I have, however, turned up 2 ACW ones. Both look like fairly simple, straight up games (actually they are almost a variation on the same game) and I think I have enough 1/72nd troops done up to try them out so this will be their official debut. (There was a skirmish or 2 between the Blue & the Grey back in '82 when the paint was new on the original regiments but even the veterans don't recall the details.)  The game in hand comes from December 1974.

The problem is set up as an attack by a Confederate Brigade against a Union blocking force of unknown strength. This is one of the fairly early ones, it contained a photo of the battle field from the player's position, some background, mission, notes on your strength and some ranges and rule distances to help you interpret the photo and make your plans. In this one, they never do reveal the strength of the blocking force so I intend to make my plan, write orders and then dice for the strength of the opposition. Since I have more boys in Blue painted up than boys in Grey, I may also switch the sides so I can make the game as big as possible. The game is unlikely to take long to resolve so I intend to emulate last year's fight for the stonewall from Featherstone's BWMS and repeat the game using various rules, in this case, Featherstone's rules from BWMS which for reason's I don;t recall, I didn't play last year, Basic Morschauser straight up out of the book and last and hopefully not least, Hearts of Tin. If it goes really quickly I may throw in Fire & Fury as well.

This picture was originally published in the December 1974 edition of Wargamer's Digest. Note the use of Airfix figures. My boy's will feel right at home.

I'm not going to quote the original article but will instead summarize the information.

You as the player, have a Brigade of infantry supported by a squadron of cavalry, a battery of artillery and a battery of horse artillery. The enemy has a force of unknown strength in improvised defences across the road up which your army is moving but there is no sign of cavalry or artillery. Your mission is to clear the road.

The brigade is composed of 2 regiments each of 7 companies each of 6 men, 1 of which is a skirmish company. The batteries are of 2 guns each. The cavalry  totals 12 figures.

If I use my Confederates which is what the magazine calls for, I have 1 brigade painted up which in my case is composed of 3 regiments each of 4 stands/companies (15 men per regiment), 2 guns as well as 2 stands of cavalry (ok actually they are Steel's Scouts from the Riel Rebellion but they are willing to sub in),  If I flip sides and finish the 6 cavalry currently on my painting desk, I'll be able to field 6 regiments of 4 stands, 2 guns and 3 stands of cavalry.  The jury is still out.

Assuming I use the original 1 brigade attacking, when I deploy the defenders there will be 1 regiment manning the line and I will dice for reserves: 1,2: another regiment of infantry, 3,4: 2 regiments of infantry, 5: 1  regiment of infantry plus a battery, 6: 2 regiments of infantry plus a battery. If I make the attacker 2 brigades of Yankees, I'll start with 2 regiments of Rebs and modify the dice to be 3,4 a battery and 5,6 a 3rd regiment + a battery.  

The rules used by the author have an 8" move for infantry and artillery, 12" by road,  16" for cavalry, 24" by road and 12" for the horse artillery, 16" by road. Ranges are 8" for rifles and cannister, 16" for shot & shell.

It is roughly 21" from the cavalry in the picture to the Union line. A few other distances are given to various hills etc. but one can estimate well enough from the picture once you have that scale.

The movement distances aren't too far off what I will be using, a little shorter than Featherstone and Morschauser but close to the average for both HofT & F&F (assuming some tardy results). The shooting ranges are a problem though, about 1/2 to 2/3 of those in all of the rules except for the musketry in F&F. Actually they are not that  far off from what HofT had before I lengthened the ranges last year, that was one of my "hmmm" items from the December game. I may increase the distance between terrain features in order to bring them in line, or I may adjust the ranges as an experiment, or both.  

With luck I hope to get this laid out and play the first game on Sunday.


Th  


.

Tuesday, January 4, 2011

Strength Through Diversity: The Year Ahead

There is an old saying that no wind is a fair wind if you don't know what port you want to sail to.

It may not be evident from my blog (he says with tongue firmly in cheek) but I'm not a very tightly focussed fellow when it comes to my hobby (or other areas of life). I like to sample a bit of this and a bit of that. One of the consequences is that despite having painted thousands of figures in 8 scales and almost every period over the last 4 decades, I can't stage even a moderately large wargame on my own, say one with 2,000 miniatures, all appropriate for the battle in hand and with terrain to match.. Probably the closest I came were my 15mm French Revolutionary Wars armies but they are all gone now anyway.  For the last few years, I have been trying to convince myself that I needed to rectify that, without success. It strikes me that if that was really what I wanted to do, I'd have done it by now.


Part of a beloved 15mm project which was sold off in bits over the last 2 years once I decided that 15mm was toooo small after all. 

When I look at the 8 or 9 (or 12)  sideshows that I have "permitted" myself to indulge in, I see that  10 of these appeared on my gaming table in 2010 and 7 of them had new figures added this year. Would I have been happier if more of these parts of my collection had sat neglected on the shelf while I focussed on just 1? No, not really, I like to see "my guys" getting out for a bit of exercise and I enjoy each of the periods I dabble in (and then some). So, hats off to them as enjoy the focus and indulge it, my path is my own.

A failed project from 2003, 40mm 1st Shleswig Holstein War. It foundered first on having unwittingly bought 2 irreconcilable (for my taste) styles of figures to convert, Zinnbrigade home cast & Scruby both slim slightly old toy stylish which look best in glossy toy style and Sash & Saber chunky which look best matte and shaded. I do use them together still but still don't like it and am working towards separating the styles. The final nail was that the Zinnbrigade Prussians were wearing knee boots and tight pants I could have overlooked the smaller picklehaube and other uniform differences if they had had loose trousers but all in all they looked too modern and I was not toy soldier-y enough in spirit to over look it  at the start of a project.

I have also noticed that these days I don't seem to have the mental and physical stamina to really enjoy an 8 or 10 hour game all the way through and I have never been keen on picking things up after a night or week's rest. I like to start and finish a game in 1 session where possible. Now that may change as my health & fitness improves again but that can be addressed on that happy day. In the meantime, 1 or 2 big events per year will suit me fine and having those be joint affairs makes them all the sweeter as far as I'm concerned.


Chippewa in 54mm at Cold Wars. The first of several "bring your own" battles staged by a group of us from the yahoo LittleWars group. Held in 2000 if memory serves.)

So here's the objectives for this year:

1. Make sure every part of my collection gets to play and gets something added at least once every 3 years and that most (off the cuff lets say 75%) get played during a year.

2. Make more of an effort to diversify the existing collection, not by necessarily increasing periods but by having different styles of game as well as different periods. Where parts of the collection overlap in terms of period and style they should be compatible/interchangeable, for example my 40mm Indians were raised for the War of 1812 but happily serve in the American Rebellion as well as the French & Indian Wars even if they may not be perfectly accurate.

3. Include at least one large wargame  per year though this need not be solo nor held at home. The goal is to use a convention such as Cold Wars or Historicon as the focus of this.


A Table Top Teaser, Surprise! where 1 wing of an allied army defects.  Fought in my old wargames room c2001. 54mm using WHAB . My Macedonians, Ron's Carthaginians and Tom's Romans iir. 


Breaking down the 2nd point I want to be able to tick each of the following boxes, note that the boxes are not mutually exclusive and that each part of the collection will normally tick various boxes.

I want to be able to stage at least one 3 to 5 hour game in each of the following:

1. historical eras/wargaming periods:

  • Ancient
  • Dark Age/Medieval
  • Pike & Shot
  • Horse & Musket
  • Victorian Colonial
  • Age of Rifles
  • Mechanized Warfare
  • ( I probably "ought" to include naval and air games but won't except as an adjunct though I did once have 16thC fleets)
2. game styles:
  • single figure skirmish
  • Old School single figure Horse & Musket
  • element based game
  • historical refight of an entire battle
  • small unit action with platoons or companies as units
  • mid-level game with battalions or brigades as units 
  • army or corps level game  
  • more rigid, game style with a sense of beginning, middle & end with definite choices and win/lose criteria (the Chess with a 1,000 pieces approach)
  • open, process game where what happens and how it happens and the story that gets told is what it is about. (The Kriegspiel approach) (these last 2 are not absolute differences but questions of focus).   


Peter Douglas on a trip home to Halifax c 2002 taking the Emir's forces against the might of the British Empire. 54mm Colonial. Like the Ancients & WWII 54mm collections, most of these figures are now gone as well after deciding that 54mm was tooo big.


In terms of numbers, I hope to play an average of 2 "at home" and 1 "away" game per month. Some of the at home games will inevitably be solo.

Monday, January 3, 2011

A New Year, A New Old Resource

As I've said before, my first wargaming influences were Featherstone, followed by WRG, Lawford & Young and HG Wells. Who I haven't given enough credit to is Gene McCoy and his Wargamer's Digest. (Not to be confused with the similarly named Scruby/Featherstone publication.) When I came across issue Volume 2, Number 1 in November, 1974 (at International Hobbies in Montreal if memory serves) I was thrilled and eagerly awaited each issue through my college years even though the gaming presented tended to be of a very different style to what I was used to. The different gaming and rules style commonly used may have made it harder to relate some articles to my own gaming but the articles were still interesting and useful. Many dealt with things like applying military principles to your games (surprise, concentration of force etc), translating historical organizations into practical wargame  formations or translating historical actions into table top battles and articles on game theory and design.

I never did convert styles, and while I have played many of the slightly later CS Grant "Tabletop Teasers", I'm not sure that I ever played out any of the similar concept, "Battle Stations: Small Unit Actions"  despite reading many of them over and over. This year I intend to put that to rights. I got rid of most of my original copies during a purge of magazines in the early '90's, most, but not all and there is a Yahoo group which includes some articles in its files. Unlike the Grant Teasers, McCoy's Battle Stations came with a suggested solution,  so I'll have to take care not to re-read the solutions before playing them out! (Some of them had limited intelligence about enemy forces, I haven't decided yet just how to handle that!)

(Scan of the cover of WD1.2 from the Yahoo Group, my own copy is not in such good condition.)

Oddly enough, my first issue, one I still have, contained an article discussing Marathon, Thymbra and Double Envelopment. Yes, Thymbra, the battle where Croesus, King of Lydia was defeated by Cyrus the Great, King of Persia. Those who have read my other blog, Gathering of Hosts, will be aware that I am in the process of reforming my various ancients into Mede/Persian and Lydian armies. Last year I fought Marathon, it seems only right that this year I fight Thymbra. I have more troops to paint so look for it in June. A Battle Station should appear later this month.