Friday, December 31, 2010

One Last Bridge - Pike and Shot Meets Bill and Bow

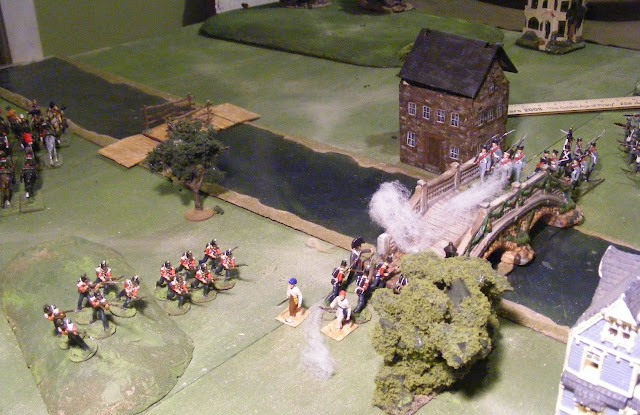
Light Lancers in French service cross the main bridge while the English Prickers drive a picquet off the 1st bridge. The infantry marches on in the background.

Well the table was all set, just had to swap out houses and troops. My 1st thought was to pit Scots and English again but in the end I decided that the Landsknechts deserved an outing. So here we are, France, 1545, somewhere near Boulogne which is now in English hands. Two small forces clash at crossings over the Dur River. The 40mm armies are a motley mix including mostly original figures mixed with 3 vintage OOP toy ranges from the 60's, home cast Meisterzinn figures and a few figures each from Irregular, Sash&Saber, Doug Miller and Perry.   The rules are Rough Wooing developed by Rob Dean and myself from Joe Morschauer's rules.

THE ENGLISH


The Earl of Belmont.  Gendarmes General

Prickers (4 companies). Sir Henry Percy, Captain of light horse lancers, 3 light horse lancers
Vaward. (6 companies) Redcoats. Michael Alan, Captain of swordsmen, 1 swordsmen, 2 bows, 2 arquebusiers.
Main Battle. (6 companies) White coats. Sir John Smythe, Captain of Billmen, 3 Bills, 2 bows

THE FRENCH


Le Duc de St. Lambert. Gendarmes General

Scots (4 companies). James Douglas, Captain of light horse lancers, 3 light horse lancers
Vaward (6 companies). Jacob Nuremburg, Captain of Pike, 3 pike, 2 shot
Main battle (6 companies). The Rhinegraf, Captain of Pike, 3 pike, 2shot

The English light horse has driven off the single company of Scots that had been deployed to hold the French side of the bridge but their Captain was almost the first to fall. Leaderless, the northern horse spurred forward riding down some arquebusiers and spreading out to avoid the oncoming German pikes.


  While the French troops disperse the English cavalry, the English infantry seizes the 2 bridges. (There is a 3rd bridge but no one gets near it) 


A rain of arrows starts taking its toll of the lightly armoured pikemen. The Duc de St. Lambert orders his German mercenaries to counter attack and the pikes drive the English back across both bridges. Eventually the impetus slows and the bills and swordsmen hack apart the pike columns and the Germans break and run. The cavalry makes a desperate attempt to retrieve the day but it is beyond them and the Duc is forced to ride for his life, leaving the "Goddams" in control of the river crossings.

And that wraps up my wargaming for 2010!

HAPPY NEW YEAR to ALL 

Thanks for dropping in 2010 and I hope you'll be back in 2011

Wednesday, December 29, 2010

Battle of The Hard River Crossing

Prologue

This is the last of this year's battles (though there may yet be time to refight it as a Rough Wooing game before the year ends). As such it seems a good time to reflect a bit more on past, present and future as well as musing a bit more about the theory and philosophy behind my future games and so forth. Luckily for all of us, I'm going to put that off into another post. Instead, let me just set the scene a little. Time & energy was short but the desire to play was long. The decision still stands to cast off imaginary lands, and cut back on strictly historical campaigns, both things which make these encounters oh so much easier to stage, the one allowing full rein to the imagination, the other hardly needing any. Instead, once again, my 1840's British and American forces meet at an undefined if not improbable location, this time one where converging trade routes have resulted in a thriving settlement near 3 bridges which have been thrown across the Hard River within rifle shot of each other in the middle of a land, otherwise nearly empty.   (This is as good a point as any to mention that while students of the Great Wars of Empire where 100,000 men may clash in a single battle may smirk at the use of "battle" to describe an encounter between less than 2,000 men a side, on the fringes of Empire, such small engagements  have affected the fate of nations)


The battle gets underway, the first cavalry clash is over, the 2nd is about to begin. At the far end of the table, the 26th Foot has just thrown back the Volunteer Rifles. (and yes this is a repeat of yesterday's shot)

Set Up 
In one of those ironies that can arise when both sides are of the same race, both forces were commanded by a General Ross (the forthcoming campaign hasn't evolved to the point of establishing all of the personalities yet and somehow carrying over personal names from an imaginary land just didn't seem right). Names then shall be forgotten and the labels Red General and Blue General applied for the day.

The  two forces involved are approaching the vital area unaware of the presence of the other due to an accident in terrain (and presumably a failure to scout ahead). All units are 5 "companies" strong. The regular infantry having 4 figures/hits per company, the irregulars and cavalry 2.  The rules of course, Hearts of Tin.


To the north of the river, Red's forces appeared from behind a patch of woods, Larsen's Lancer's in the lead. This is a Regular Cavalry unit originally recruited as Irregulars in India. The locally recruited Voltigeurs, a unit of irregular skirmishers, follows then the 26th Foot, transferred from India to China and now across the Pacific to the North-West. Due to their long journey and unfamiliarity with the country or perhaps due to wargaming etiquette, these have not been classed as veteran. An experimental observation balloon wagon pulled by an even more experimental steam tractor followed and last but not least, the Fencibles, a unit of Canadian Incorporated militia who have volunteered for foreign service.

South of the river, Blue's forces appeared from the mouth of an off table mountain pass. First the Frontier Light Horse, a somewhat problematic unit who began life as a sort of Cape Mounted Rifles but gained some Texas Ranger-y type recruits and switched sides. They are obviously a somewhat irregular looking unit but with a history of being deployed as ordinary light cavalry and I'm not exactly sure yet exactly how to treat them or if they can keep their name or indeed of its possible for me to change it successfully. So for now they are fierce if ragged regular light cavalry. Behind them was a unit of Volunteer (militia) Rifles then the 1st Infantry, a field hospital, and bringing up the rear, the 2nd Infantry.

The Battle
Both sides pressed on to the table with me pretending that they don't yet know of the other and assuming orders to cross the middle bridge. I decided not to go with the written orders option but may try it next game as there were some instances of very alert subordinates showing laudable initiative during the game. Once the enemy was spotted, I made some spot checks for the initial reactions, you know the sort of thing, 5,6 make a suicidal charge over the bridge, 1,2,3,4 deploy to defend etc, what ever options seemed reasonable in the circumstance. The result was that the Frontier horse sent 2 troops galloping (ok walking verrrry slowly, not often a unit rolls a total of 7" on 5 dice) down to the far bridge while the rest deployed to watch the main one. The Lancers who had actually arrived first, decided to match this deployment while the Voltigeurs deployed behind the first wooden bridge and opened fire only to find that their muskets wouldn't reach. Oops. (Well the river had been originally constructed for a Charge! game and was meant to prevent close range musket fire exchanges.) Luckily for play balance, it seems that the Voltigeurs are such good shots that they could be treated as being rifled armed anyway (Yes, a fudge, the matter has been referred to a committee for resolution prior to the start of any "serious" campaigning).

The light horse, seeing the opposition close on the other end, finally spurred their horses forward and charged over the bridge. A tied melee sent both sides rallying back to their respective sides while the rest of the cavalry on both sides spurred to reinforce and infantry took over the main bridge. Another swirling melee saw Larsen's Lancers driven back but the Light Horse declined to risk pursuit and an uneasy truce reigned as the 2 sides eyed each other on the North bank of the river.

Back to the west, the 2 special units deployed, the balloon ascended, noted carefully the location and direction of march of enemy units and sent down the information only to find that the Red General had taken post at the head of the 26th Foot and advanced out of communication range. Governor Lawrence, acting as observer, began making notes for his private journal. Across the river, Dr. Pierce had begun operating and a slow trickle of wounded figures was soon heading back to their units. (hmmmm)
A busy day at the field hospital. The figures on the base will be rolled for at the end of the turn. Those just off the base have just arrived and will be "treated" next turn.

As the British regulars arrived, the Red General decided to go on the offensive. It looked like a straight forward affair, British regulars with bayonets against volunteer skirmishers. A quick charge by 3 companies and the 1st bridge would be in British hands. It seemed unlikely that the enemy would stand but there was some confusion (ie low movement dice) and the Red General had to ride over and bellow "Follow me Brave Lads" and spur across the bridge. Since the skirmishers only get 1 die per stand vs 2 dice for the regulars, an evade seemed like the rational response but the regulars were coming across a narrow defile and only 3 companies at that, so I diced for it and the Volunteer's Colonel decided to stand and fight.

Once I started counting up dice, it suddenly looked like a good decision. One die per stand  for the volunteers gave them 5 dice albeit with a -1 for being Militia grade. The single company of line infantry were worth 2 dice but the 2 supporting companies only offered 1 apiece with the general's die bringing it up to 5 nearly an even match but slightly in the regular's favour. Slightly wasn't good enough and the Volunteers managed to tie the melee 3 rounds in a row while the 2nd Infantry came up and deployed behind them. When the Volunteers finally broke off, the 2nd Infantry easily drove the tired remnant of the 26th back across the bridge.

The 26th Foot retreats.

This of course put the General within reach of the balloon's report (or in game terms, if within 12" at the start of a turn, the balloon warrants a +1 to his initiative roll). Unfortunately, it seems to have taken him so long to read the reports each turn that +1 wasn't enough and the British did not win a single initiative for the rest of the game!

The battle had not stood still during this struggle. The Fencibles had been given what turned out to be a critical order, to dispatch 3 companies to support the cavalry while 2 companies supported by Voltigeurs held the main bridge exits. With the cavalry clash in doubt and the initial British assault repulsed, it was now or never. The Blue General ordered the 1st Infantry to storm the middle bridge leaving one company to garrison the Stone House. Again the irregulars were able to hold the defile for several turns before losses took their toll ( they were losing a company and thus a die for each 2 casualties but needed to inflict 4 hits to do the same to the enemy). Eventually, numbers told and the remaining Voltigeurs were compelled to fall back and the Fencibles stepped into the gap. An attempt by the the 1st Infantry to break through was easily repulsed and the remaining companies eyed each other warily across the bridge and awaited events elsewhere.


A wing of the Fencibles hold the bridge while the rest retrace their steps and head for the crisis point

Seeing the approach of supports, Colonel Larsen threw his lancers forward and eventually drove off the enemy cavalry. By the end of the affair, however, his own men and horses were exhausted and could only sit and watched as 3 companies of enemy Rifles, many of them with bandages about their heads, arrived to take post across the river.

Stalemate threatened, the Blue General spurred to the head of the 2nd Infantry and led them in a charge across the near bridge. This sent the disorganized 26th fleeing further back until their officers could rally the remnants on the 2 companies that had been left behind. Sensing victory, the Americans gave pursuit, crashing into a company of Voltiguers which had been detached as a backstop of the bridge approaches as well as a 2nd company garrisoning the small town at the foot of the bridge.  Sensing the desperate moment, the Red general spurred forward to join the Voltigeurs but was immediately struck by a bullet (rolled a 1) and was then taken prisoner as the Voltigeurs in the open dispersed. The men finding cover in town were made of sterner stuff and it was now the turn of the Americans to try to force their way out of the defile. (the 3" melee rule meant they couldn't just bypass it.)


Bird's eye view of the American charge.


While the fight raged, the 2nd in Command had taken over and gathered his men, 3 companies of unengaged Fencibles, forced march back from the far bridge due to the initiative of their Colonel, the remnants of the 26th, one company of Voltigeurs and  himself. Both armies were nearing exhaustion, the next fight would settle it. As the  Americans finally broke into the town, he led his men forward. The defender's volley rang out and the 26th lost a full company,  the Fencibles in column, crashed through a gap and into the American line but the enemy was unimpressed (ok so the sight of three 1's and a 2 impressed them a little bit).  However, the Blue General had also rolled a 1 and was struck down. The Voltigeurs who had infiltrated into the town again, rolled a hit, the Red 2ic rolled, 1!, he also went down like MacDonnell at Queenston Heights, Two companies of the 26th, remained, the melee stood at 4 hits ve 1 against them,  they needed to roll 4,5 or 6 on each of their 4 dice to turn the tide of battle.    Who needs veteran status with dice like that, 3 5's and a 6! With a hurrah they pressed forward in pursuit and sent the 2nd Infantry skedadling into the hills, covered by the remnants of the little force.  (Suggestions that the Colonel had time to receive a report from the balloon that the enemy needed to lose 1 more company to break their morale before deciding to pursue are widely dismissed).
An artist's rendering of the final pursuit. He seems to have made a slight error though and shows the Fencibles in pursuit instead of the 26th. The Fencibles, of course, having suffered more hits than they inflicted, had been repulsed.

The District Commander is now contemplating alternate uses for the balloon while sending out orders to recruit a field hospital. The added resilience that the hospital bestowed had kept the Americans above their breaking point for an extra turn or two and almost allowed them to snatch the victory while the +1 from the Observation Balloon was entirely wasted. True, twice it turned an American win into a tie but since the US had gone first on the preceding turn and wanted to again, no benefit was gained.

On the whole, a small but satisfying game. Some reflections on the game, the rules, game/scenario design and the upcoming year to follow in a few days.


"Could you tell us your name sir?"

Tuesday, December 28, 2010

The Last Bridge - Intermission

As the battle begins, the balloon rises into the air.

The game has been played using 40mm figures and my Hearts of Tin rules. It is set during one of several Anglo-American wars which didn't happen between the Aroostock War and the Oregon Crisis. 

Battle report tomorrow. 

 Meanwhile, looking out my games room window, a Green Christmas has been followed by:

Monday, December 27, 2010

A Final Teaser

A slight change in plans. In the latest issue of Battlegames, CS Grant announced that this would be the last of the current series of Table Top Teasers, not the last teaser ever, but the end of this run at least. Now my plan had been to play a Battlegames scenario each month but life being what is and plans being what they are, only 3 of the games have been from the current range of TT Teasers so I figured why not end my year with the latest and the last?

It also seemed a good time to try out my reduced table size so I have roped off a 5x6 area to play on. Time is still at a premium so I worried even less than normal about matching the terrain other than very generally. I also haven't built any particularly Oregon-like terrain yet and really this one might have been better set in New Brunswick or the Canadas.

The scenario involves 2 advance guards each tasked with controlling the crossings over the Hard River. Each side has 1 light cavalry regiment, 1 irregular or militia light infantry unit and 2 regiments of infantry. For more details see Battlegames Issue 24.
 

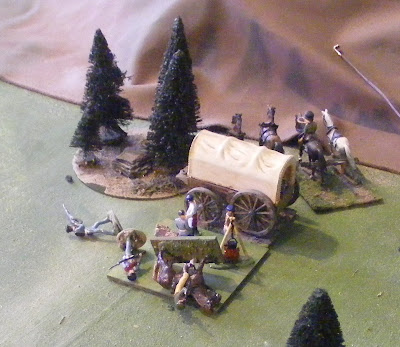
and yes, that is the balloon being towed into position prior to ascending. It is the end of Turn 3 and across the river, the American field hospital wagon can be seen just arriving.


 More to follow in a few days.

Thursday, December 23, 2010

and to all a good Knight (preferably in a play set)


One of the best Christmas presents that I ever received as a child was a 25mm hard plastic, factory painted knights and vikings castle play set from Marx. The castle is a little battered, many of the knights have suffered battle damage and the attacking Vikings long ago embarked on their ships and sailed off
 ( I bought a box of Orion vikings a few years back because it contains smaller copies of the vikings )
 but it still brings a smile to my face.
Almost spent a silly amount of money to buy one that came up for sale a few years ago but opted to spend the money on 40mm Elastolin Prince Valiant figures instead. There is a slightly different version available from MTS but the one pictured above is exactly the one I had. Looks like a sortie has  the poor vikings surrounded!

May this Yule bring you all a smile and create warm memories for the future.

(See some bits of wargames scenery can be useful for all sorts of things) 

Friday, December 17, 2010

A Little is not a lot.

But sometimes its better than nothing.

Its now been a month since my last game and seven weeks since my last "Game of the Month". Painting has been almost as slow but my North-West Voltigeurs have been recruited up to a grand total of 2 (count 'em) 2 figures. A kneeling figure converted from a Zinnbrigade 1900 Prussian, a standing one converted from one of my own 1840's infantry. The "uniform" colours were improvised during painting. The plan was to do all 10 at once and paint them either in an off white with a stripe  like traditional trade blanket coats or else in light blue like the Victoria Voltigeurs but there I was, a free evening, an itch to paint something for the Oregon game and with a puddle of homespun capotte grey on my palette and there they were, 2 figures, primed and ready to go.
  

Here they are seen trying out basing options.  They are irregular light infantry and could in a pinch be co-opted into War of 1812 or even French & Indian War skirmish games as Quebec militia. Since HofT can handle a mix of multi and single based figures, it seems to make sense to be flexible and mount them singly so they are trying out washers.

But, stylistically, they don't mesh with my earlier period figures which are chunky and not glossy and now that my rules have finally been tweaked to allow the use of either elements or figures or a mix of both, I find the urge is getting stronger to go back to the way I originally envisaged this campaign, closer to its Morchauser "basic unit" roots with each stand being an "element" with properties as opposed to just being a convenience for moving troops. I also like the idea of differentiating similar projects and since I have single figure horse & musket collection for Charge!, having this horse & musket collection be  an "element" one makes sense. Also, if I were to field my light infantry units as 5 companies with only 2 figures mounted on each base then that would allow me to maintain a standard basic organization and still have light infantry units that are 1/2 the strength of a line infantry unit but of equivalent though different power. ( Two of  those silly fancies that occasionally take one.)

The real question is whether to commit to a consistent organization and basing for this project as was envisaged early on and which is developing an increasingly strong appeal or whether to allow it to slide along as the very practical mish-mash which it is at present. A decision is unlikely before the delayed November game hits the table, hopefully before year end! Suggestions (by my subconscious) that I get the Rough Wooing boys out before year end as they are the only one of the major periods that have not been out this year, are being deliberately ignored until such time as I get that Oregon game on the table.    


In the meantime, that grey paint that was on my palette was the result of me finally painting up the last 8 muskets for my homemade 25mm ECW Scots unit. Mind you the King's General for the upcoming campaign has requested that I now raise 8 more pikemen. Is it really a coincidence that I will be fighting on Parliament's side in tomorrow's test game of WECW?


Monday, December 6, 2010

Intermission 3

Life is interfering with hobby time again.

Rather than playing musak, here are some shots of a past project, 54mm WWII Partisans that took part in some memorable wargames around the turn of the century but have now joined the lost list of figures listed on ebay for re-homing. Originally planned for Rapid Fire, they ended up being used primarily  for Storm of Steel games. The figures are conversions of Airfix, Irregular, Tamaiya and I can't remember what else.  They are meant to be dressed in a mix of Yugoslav, Italian and German uniforms and armed with a similar mix of weapons including some obviously Japanese ones that have been left in place in Toy Soldier fashion. Some of the attempts at carving various caps into Yugoslav field caps are a little crude as well but they used to fight well on the table.

I was having trouble finding reference material so put a post on rgmh. (this was the 90's after all). One of the 1st answers I got started "When I joined the partisans.."  Another later reply led to a prolonged correspondance with a wargamer in what was no longer Yugoslavia. For a Canadian Baby Boomer who grew up in the Cold War, it was a marvelous experience and was my first real first hand experience of how the web can make the world smaller and of how many helpful people there are out there.

Unfortunately, that correspondence ended shortly after Nato started bombing.  The last email included plans to go out and meet with friends to play an Ancients game in defiance of curfews, bombing and world opinion. I was sorry to have lost that connection and hoped that the break in communication did not mean anything more. Alas, over 10 years, 4 computers and  several email systems later, I no longer even that new friend's name.


and the last of their opponents
(well, last of the opposition that I owned anyway, Jerry and Ron still have their 54mm WWII forces).

Saturday, November 27, 2010

North West Aeronautic Division

OK so I was thinking about an elaborate alternate history background for my Oregon War but I've run into a few wrinkles, such as having to "change names to protect the innocent". Imaginary places and people are much easier. Anyhow, all that introduction and background stuff will have to wait but a preview of the Aeronautic Division does not.

In brief, when Edward Thomas Lawrence was appointed as the Company's Special Director for the Oregon Country, he decided that a hot air balloon would allow him to travel about his territory faster than would be possible by Yorkboat, horse, canoe and Paddlewheel Steamer and he had the wealth and influence to make it happen.  The balloon was not a huge success in the communication role but it had been found useful as an early warning device for Fort MacDuff and when war with the United states loomed, he offered its services to Her Majesty.  


A trial flight .
The balloon was scratch built by E Tenebris Lux, the support wagon which needs detailing is a dollar store toy, the 40mm crew and military observers include a Scruby ACW artilleryman, an Irregular Guards Office and various original figures by me. There is an engineer officer in the background converted from a Perry figure as well as an infantryman converted from a Scruby ACW figure from Historifig.  The balloon can be adjusted to float at various altitudes or may land on the ground.

Under HofT, the balloon will allow the British general a +1 on his initiative roll each turn if he is within 12" of it and thus able to receive reports of enemy activity.

Friday, November 26, 2010

Hot Diggety, the Eastern Front Heats Up


My Russian Civil War project has been stalled awaiting some new releases amongst other things (like time and money), particularly some Russian infantry that appeal to me more than Strelets figures do. My only real problem is that the Hat & Zvezda's 1914 figures already released or in the pipe look really appealing to me. So it may be Tannenburg and the Marne after all. I wonder how long before Zvezda does 1914 Cossacks? I'ce been waiting for this for over 40 years.


Wednesday, November 24, 2010

Sawbones

I wanted to get something added for my 40mm Oregon War which has been a bit stalled. What I really want is some more glossy, toy, 1840’s  British infantry to replace some of the chunky 1812 figures  that have been filling in so I broke out the melting pot and starting casting. These days, it takes me a while to assemble and paint even a 20 man battalion so I cast my eyes about for something else to get me going.

When I first added rules for hospitals to HofT, I was thinking of the 54mm recast Britain’s stretcher bearers that i converted to 1860's Scots Fusilier Guards but they’re a little big for my current plans.

A few minutes rummaging through the 40mm spare casting box(es) led me to some Scruby ACW artillery crew which would be perfect if they weren’t 1/2 converted into signalmen already (hmm must get back to them). Plunging back in, I soon came up with a Zinnbrigade limber rider as patient, the cook from the camp stove kit as orderly, a camp fire and kettle from one of the horse molds and one of my original officers as doctor. I have a $ store wagon to go on the base once I add new wheels, but for now I’ve borrowed one.

 I don’t know if 1847 American military doctors wore white smocks but I figured, if it was good enough for William Holden in the ACW, it was good enough for me!  Meant to remove the doctor’s hat and sash, but, oh well. Now to see if the hospital rule works!

Saturday, November 20, 2010

Choosing your facts

The latest unit to join my 40mm AWI forces came from buying some Sash & Saber British Light Infantry at Cold Wars, not because I knew what I was going to do with them, but because I liked the figures. Along with the Hessians, they are amongst the best figures S&S have done (IMO of course).
Spot the Trident figure lurking in the ranks 

My previous AWI (or AR) armies,  1/72nd  and 54mm plastic, were largely painted with Quebec and Saratoga in mind so doing something different with the 40mm troops made sense. Unfortunately, the only AWI campaigns that I`m interested in really are the Invasion of Canada and the follow up Saratoga Campaign, the brief rebellion in Nova Scotia and to a lesser extent, the border war carried on largely by Loyalists and Indians. I already had some Americans, mostly militia, Indians, some Brunswick Grenadiers and a few Butlers Rangers made up of Trident samples. Unpainted, I had some Hessian Jaegers, the British light infantry, more Indians and various militia types. I decided to start with Oriskany, a side show if you will to the Saratoga campaign but one which could use pretty well all of my unpainted figures as well as most of the painted ones and leave me ready for the Mohawk Valley should I choose to go that route.

Thanks to childhood influences, the two most famous Loyalist Units for me were Butler`s Rangers and Johnson`s Greens (aka The King`s Royal New York Regiment) with Simcoe`s Queen`s Rangers coming in third.  Since I had a handful of Butler`s done up using Trident figures, I thought perhaps I would stick with them but Butler`s hadn`t been formed yet at the time of Oriskany so I turned my attention to Johnson`s Greens. Flipping open one reference I quickly found uniform info, flipping open a second book I found a variation. I decided to check the web starting with the very good site of the re-enacted regiment. Eventually I decided that there was just enough information floating about to make it impossible to be absolutely sure of anything but that there were probably various things worn at various times and that it appeared that infantry in short green coats and cut down caps are quite credible for Oriskany and that I could pretty much choose white, blue or red facings as I chose. A little experimentation led me to conclude that red looked the best and besides, it echo`s the red faced green uniforms worn by the sons of the Loyalists in 1812.    

After languishing unpainted for months, they were finally rushed them into service for last Saturday`s game in which they held a redoubt with distinction. One of the heads had managed to wander off on its own so the officer was graced with a floppy hat of his choosing. The S&S packaging supplied me with 5 privates, a hornist and an officer. An annoying total of 7 figures, an odd number indeed. Luckily I had painted my Trident Loyalists with red cuffs and was able to slip one in, more of a grenadier than a light infantryman but Loyalists couldn`t be choosers. I will confess that while I like the Ranger that I have and want more, the light infantryman is not my favorite Trident figure and the S&S light infantry are more to my taste. The Trident infantry in tricorne are however, more to my taste that S&S`s so any further expansion of the regiment will come from that source. Nothing like having a choice!
One of Butler`s Rangers in hunting shirt joins in.  

Thursday, November 18, 2010

Up next

Having cleared up all that background technical stuff, rules, organization, philosophy etc. its time to get the glossy toys out again. Nothing like a game to inspire some casting and painting, especially now that organization is settled again. I have been eye-ing Hook's Farm as one a classic wargame scenario but since Stuart Asquith has started a 2 part series on the battle in the CWJ, I may as well wait and take advantage of his hard work if possible. So its back to Teasers and for no better reason than it being "the beginning" I decided to start with the first published Table Top Teaser from February of 1978 (see the Tabletop Teaser blog link to the left or consult the intro to the Battlegames Tabletop Teasers Special.)

The forces as laid out are:      

Red Army:

2 regiments of heavy cavalry
3 regiments of line infantry
1regiment of light infantry
2 batteries of artillery
1 troop of engineers

Blue Army:

1 regiment of light cavalry
2 regiments of heavy cavalry
6 regiments of line infantry
2 regiments of light infantry
2 batteries of artillery


Now if I was more clever than I am, I would have persisted with making sure that my light infantry units were 1/2 the size of my line units and that my heavy cavalry were more powerful and then all would be well. But things being what they are, I will need to translate the forces in keeping with my armies and rules. My starting point was the accompanying points value that indicates that Red should have 23 points + engineers to face Blue's 33 pts. Hmm lets round that to 24 vs 33 or if all units are worth an average 3 pts, then 8 units vs 11.

Keeping in mind the mission, the available choice of units, and my desire to finally field an observation balloon,  I propose the following:

Red Army

General Ross
Observation Balloon

HBC Brigade
        Brigadier Smith
        HBC Pioneers
        Voyageurs (3 co Irregular Infantry).

Cavalry Brigade
        Brigadier Nolan
        Larsen's Lancers (4 trp Regular Cavalry)
        Governor General's Bodyguard (4 trp Regular Cavalry)
        Rocket Battery, Bengal Horse Artillery

Infantry Brigade
        Brigadier ?
        49th Foot (5 co Veteran Regular Infantry w Musket)
        New Brunswick Regiment (5 co Regular Infantry w Musket)
        Victoria Rifles (3 co Regular Light Infantry w Rifles)
         B Battery Royal Artillery (Field Artillery)
      
Blue Army

General Scott

Cavalry Brigade
      Brigadier Kearney
      1st Dragoons  (4 trp Regular Cavalry)
      2nd Dragoons (4 trp Regular Cavalry)
      Rangers (5 trp Veteran Irregular Cavalry with rifle)

Regular Brigade
     Brigadier ?
     1st Infantry  (5 co Regular Infantry)
     2nd Infantry (5 co Regular Infantry)
     3rd Infantry  (5 co Regular Infantry)
     1st Co Mountain Artillery (Pack Gun)

Volunteer Brigade
     Brigadier ?
    Bangor Rifles  (3 co Regular Light Infantry with rifle)
    Pennsylvania King of Prussia Volunteers  (6 co Regular Infantry with musket)
    1st Ohio volunteers (6 co Militia Regular Infantry with musket)
    King of Prussia Battery ( Field gun)

Field Hospital or Fife & Drum band.

Now to find time to set the table, marking off an area 5'x7' to test the proposed new playing area and find time to actually play. This may be one of those 1 hour a night games but we'll see.

Google Docs now has version management for all files so , I think, I don't need to update the link each time I add a new version. I have just added some clarification on my practices to HofT, caught some minor discrepancies,  and a new rule to allow units in a battle line to average out hits for morale purposes only.

Tuesday, November 16, 2010

Past, present, future

"Oh, the more it changes, the more it stays the same
And the hand just re-arranges the players in the game"
Al Stewart

A familiar feeling. So here I am like Nostradamus trying to predict the future although in my case I need to analyse the past and present rather than relying on visions. Looking back over the last 2 years has showed some interesting trends. Disregarding games played with other player's figures, and setting aside some "1 of" stragglers, there is a solid majority of 40mm Horse & Musket HofT games split into various periods & styles of figure but only due to experimentation and trying to match other people's projects. After that, it is fairly evenly split between 25mm Ancients, 40mm Dark Age skirmish, and 40mm 16thC with  various 1/72nd 20th century games starting to creep in.   There are also respectable bursts of 40mm semi-flat Charge! games but while I love the figures and the rules, these cluster around planned convention games and rarely emerge else-wise. Even more interesting, it seems that a solid majority of games played in the last few years, have been played on a table 5' x 6' or smaller. Interesting fodder for thought. On to the present.

Its just as well I didn't play last Friday's game earlier or I might have forgotten that Hearts of Tin was written primarily for my 19thC 40mm troops. A slightly simpler game based around 1/72nd stands of troops and centimeters might have been the result. However, I'm happy with the rules and I'm happy with my toy soldiers and luckily neither needs to change with the results of my thinking. 

I have long accepted that I no longer have a desire to play big, day long battles with lots of figures on the table, at least not as a regular thing. Neither do I have the desire to do typical skirmish games as a main stay and when it come to competition style games, been there, done that applies. This leaves me with the in between, tabletop teaser type game and I'm ok with that but I thought it meant that refighting battles wasn't of interest anymore. And, in a way, that's true, at least I'm not interested in serious precise recreations but they still make an interesting basis for scenarios. The question is how to translate them without doing a big battle. 

One solution has been presented by the Grants over the years and its a practical one, but requiring a fine judgement (essentially fitting the key terrain elements onto the table, filling the appropriate areas with troops and proceeding  using one's regular tactical rules and units). 

It occurred to me this weekend that using the cm option with Hearts of Tin, two of my 4 cm wide bases (whether full of 1/72nd or 40mm figures) is about the right frontage for a 600-800 man battalion and that most Sikh and Mexican-American War battles would fit on my table at that scale. Now I don't really want to trade in my 40mm Toy Soldiers and while a 2 stand, 8 man battalion would have the same frontage of its 1/7nd counterpart, having pushed some about, I don't really want to use the big figures with the cm scale. I also don't really want to deal with a dozen 2 stand battalions either. However, each of my regiments using the normal scale, occupies about a brigade frontage if using the cm scale. 

If I combine that observation with the Grant approach, I can lay out battlefields using the cm scale as a guide and field a regiment for each brigade then carry on as if playing any other teaser. (Luckily I kept artillery ranges on the short side with something of this sort in mind.)    The only issue for Indian campaigns will be deciding whether to field composite battalions with 2 stands of Europeans and 4 of Sepoys to keep the ratios correct or whether to field "brigades" (divisions actually)   with 1 European and 1 Sepoy unit. I'll probably go the latter route so that I have the option of doing extra Sepoy battalions and doing smaller actions with the proper units as well as staging a mutiny some day.

What does this mean for my table? Well it strongly favours the 5'x7' option as being big enough to handle the battles of interest as well as the most teasers and any skirmishes I choose to play. It will even handle my not yet formulated 1/72nd early 20thC game which may be of the 1 stand per battalion sort. 

Scale-wise, I still own painted wargame figures in at least 5 scales 15mm, 1/72nd, OS 25mm, 30mm, 40mm & 54mm but considering 1/72nd and OS 25mm as one since they are close enough to share scenery and even a table if they were of similar periods, I am down to 2 active scales and look likely to be able to hold that even if I occasionally paint a bit of this or that for variety.

Period-wise, there are still too many, at least 10 which have been added to and played this year or last (more on that another day) but the good news for me is that only 1 of these is new last year, most are between 10 and 35 years old even if reborn again and again, and I don't foresee any new urges. More than that,  toys that get played with are doing what they were meant to do.    


A smaller report of a bigger game

On Saturday we played through the scenario based loosely on the battle of Hubbarton using 40mm  figures and Hearts of Tin.  Unfortunately I still didn't have my camera and my cellphone doesn't handle low lighting very well. On top of that, having been behind the 8 ball on producing a Quick Reference Sheet, I had to serve as a Human QRS for the 7 of us. Being tired to boot, I only have rather  superficial recollection of how the game played out. The table ended up slightly different from the map but the key features were there. While laying out the terrain, it suddenly occured to me that I hadn't decided on how fordable the river was and made the decision to dice for each section. With hindsight, since both sides contained local men, the location of fords etc would have been known in advance and might have altered battle plans but it worked well enough. If I ran it again, I would have liked to have given the Loyalist the extra unit he was supposed to have and added a few more troops to the redoubt rather than having that force split.

Jeff commanded the Rebel  forces and chose to send the riflemen to harass the entrenched Loyalist forces to the east while the bulk   of the Rebel infantry under himself and Lawrence entered from the west, bypassing the redoubt on the hill with the aim of over running the Loyalists from behind. Gary who commanded the on table British regulars, partly on the hill and partly camped behind the town, sortied out to hold off the attack. The attack on the flank of the column resulted in a prolonged fire fight where weight of numbers and some atrocious British artillery dice eventually told against Gary and he was forced back towards the redoubt. The attempt to block the attack from the front looked promising but a switch of initiative and some hot shooting dice resulted in the Umpteenth Foot falling into disorder and then being sent reeling from a charge.

The death march of the Umpteenth Foot.
Luckily for the British fortunes, Ed, at the head of the Indian warriors, had occupied the cattle corral and with blood curdling warcries and promises to cut out the enemy's heart, handily repulsed an attack by Lawrence's militia.   Following up, the warriors carried on a ding-dong fight with a couple of militia units for several turns before falling back for a breather.

Meanwhile, George at the head of the grenadiers had rolled a 1 for arrival, and was advancing quickly to  plug the gap left by the retreat of the Umpteenth Foot. One turn later, the remainder of the Rebel forces arrived. Quickly they stormed the Stone House on their side of the river and then looked for a way to advance around the Loyalist redoubt, driving back the skirmishers that Martin threw out to delay and distract them. Just as an opening appeared, it was filled, first by George's Jaegers and then by a battalion of Brunswick Grenadiers. A prolonged and indecisive fire fight across the river followed until darkness closed in.

The Grenadiers arrive. 

In the center of the field, the rebels pressed forward over running a British field piece but were then thrown back by the Grenadiers. At this point, several players had to leave. Casualties slightly favoured the Americans and the British had 1 shaken brigade but the British still held all of their fortifications and the corral and supplies and had put up one of their best efforts of the pseudo-campaign to date. Given a few more turns the Rebels might have been able to wear them down by sheer weight of numbers but it was far from certain that they could shake them all which was their objective and no one squawked too loudly when I awarded the British their first win.  
The Jaegers deploy (artist's conception)

Once again I was pleased with how the game ran. There were one or 2 bits that gave me pause (like the melee weakness of unsupported artillery) but nothing that made me want to change any rules. (Nothing fast and simple is ever going to be perfect in every situation.) However, there were a couple of things that seemed to confuse people when I tried to explain how they worked and 1 or 2 things which I thought I had included but hadn't so I may reword some of the explanations and will have to add the important non-verbalized bits (for example the explanation about moving and facing and what happens when a unit is attacked in the rear). More diagrams and examples will definitely help.

Monday, November 15, 2010

Trial by Fire (updated)

Last weekend I got to play two games of non-solo HofT, putting the current version to the test. A fairly full slate of much better pictures of the Friday night game than my cell phone took may be found here. As far as I can tell, chronologically the pictures start at 30 and count backwards to 1 then finish with 31.

The game was an encounter in a very constricted valley between fictional 18th Century armies. ( I was a little concerned by the amount of terrain, 2 large woods and a large hill which was partially broken ground, a little bit open and lots of difficult. Not your prime 18thC battlefield, but sometimes its the challenge that helps make a game interesting.  ) Les had made a few adjustments to the number of hits per stand and shooting modifiers for a couple of unit types to capture the desired feel for his armies. These are Bravant (dressed after the French fashion), Drakenburg (dressed after the Austrian fashion and proudly bearing Dragon banners) and the blue clad Stutz-Baerkatz. (Thank you Les for reminding me of the proper identities of the forces otherwise known as Not-French, Not Austrian and Not Prussian. The part of my brain that is supposed to remember fictional countries names seems to be faulty, especially when it comes to non-English names. Its been 12 years since I first took a part in one of the Hawk's  Not Quite Seven Years' War games and I still struggle if I don't have crib notes to hand.)


The Bravant cavalry rudely disrupts the deployment of my Stutz-Baerkatzers . 
Lentulus' 10mm Pendraken figures

To start the game off, we diced for sides and then each side selected an equal number of units from the available pool of troops plus a battalion gun per brigade. Ron took the Bravant army and entered the Western board edge with 4 brigades totalling 2 Elite Heavy Cavalry, 1 Irregular Cavalry and 3 Regular Cavalry, 2 Elite infantry, 8 Regular Infantry, 2 field guns and 2 battalion guns. He deployed in conventional 18thC format with 2 lines of infantry in the center support by guns and cavalry on either wing. 

The Stutz-Baerkatz forces under my command entered from the Northern corner of the Eastern edge with 3 Brigades comprised of 1 Heavy and 1 Medium cavalry, 1 Elite infantry, 4 line infantry, a gun and a howitzer. My plan was to push ahead, occupy a small ridge with cavalry on my left, garrison a village in front of it as a strong point and then see what my allies were up to.   The Drakenburg forces entered from the South with 3 brigades including 2 Elite and 1 regular cavalry, 1 Irregular infantry, 4 infantry, a field gun and 2 battalion guns. They sent some Grenzers into the wood and sent the cavalry around it to the left, while the infantry marched right towards my entry point.

The first couple of turns were interesting,not for what happened but because it became obvious that when using 10mm troops and measuring distances in centimeters with a set of rules designed for inches, the a 4 ft x 6 ft table become the equivalent of a 10 ft x 15 ft playing surface. LOTS of room for maneuver and a lonnnng way from one flank to another if you change your mind.  Making the most of his central position, Ron blocked the passage around the woods with one cavalry brigade, sent an infantry brigade to seize the central heights and marched the rest of his force straight at me.
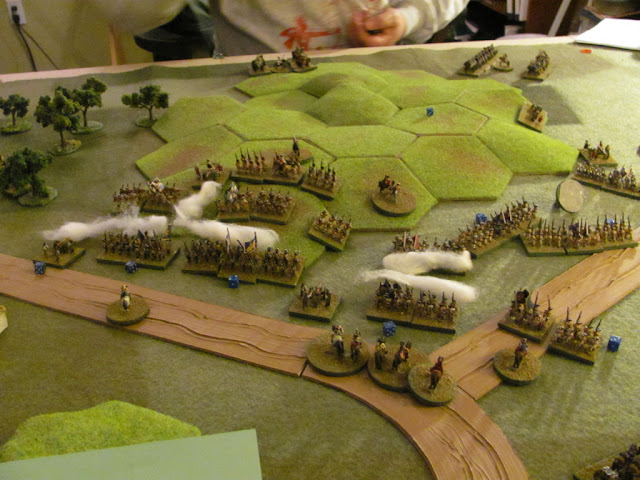
 An overview early on. Bravant to the left, Drakenburg at the bottom and Stutz-Baerkatz to the right.

The ball opened with a cavalry clash by the woods and a rather successful attempt by the Bravant cavalry to disrupt and delay my deployment allowing Ron to reach the town ahead of me.  Ron's hussars managed to sweep the Grenzers out of the wood then spent the rest of the game lurking there, blocking the road and preventing the Drakenburg cavalry from returning to support their infantry. That left 2 Bravant heavy cavalry units facing 3 Drakenburg units and despite heavy losses on both sides, the last reserve won the cavalry fight. On the far flank the cavalry charge ran over a gun, pushed back and then broke one of my infantry regiments. Then to my relief, the Bravant cavalry were pulled back to protect the rear from the victorious remnants of the Drakenburg cavalry. The remaining Bravant and Drakenburg cavalry eyed each other from opposite sides of a defile for the rest of the game, neither willing to risk destruction leaving the way open for the enemy to ride around the rear of their infantry.

The cavalry charge had forced me to deploy farther back than intended but taking advantage of having the initiative I was able to move forward far enough to prevent Ron from occupying the town without a fight and to deploy my howitzer. A couple of lucky shots later and the town was burning out of control. A daring (if I do say so myself)  strike by my cuirassiers caught one of Ron's guns as it tried to deploy forward and then my cavalry rallied back and basically sat out the rest of the game, waiting for an opportunity. In hindsight, sending them far out around the flank might have been a better use of them.

At this point we had reached a stalemate. On the allied left, Les's infantry faced Ron's infantry ensconced behind a difficult slope. It would be suicide for either side to attack over the ground with regular infantry. On the allied right, a burning village separated  the armies with each deployed ready to repel an attack. By now the evening was drawing on and Ron decided to be sensible and head home. I was keen to see how the infantry fight would go if the terrain was better and had naught but a cold empty house to look forward to for my night in town so Les and I agreed to downgrade the hill slope to broken and I picked up the reins of the Bravant army and launched the attack that Ron had set up. 

The climax of the battle as the Bravant break through the Allied lines and threaten the high command. Picture from Lentulus's Photobucket album.

The terrain made it difficult to launch an attack once I started shooting so a  prolonged firefight ensued as I crept closer. Eventually, as numbers were starting to tell on the side of the Bravant, an opportunity arose to throw in part of the 2nd brigade against the flank of the Drakenburg line and in short order both of the Drakenburg brigades went shaken and then collapsed. The Stutz-Baerkatzers had not stood idle and attacked around both sides of the village but on their right, the attack was not pressed aggressively and the Bravant were able to effectively refuse the flank.  On their left the attack was met by the Gardes with their usual sang-froid, which is to say that they fired their muskets into the air and then became disordered. Luckily the enemy decided to shoot them to pieces rather than pressing their advantage and with the Gardes out of my way, my remaining artillery could open with effect. Since the Stutz-Baerkatz brigade had already lost a regiment and a gun to the cavalry assault early on, it didn't take much to shake them and soon the whole center was cracked wide open with the remaining allied troops heading for their respective  battle lines.

Unfortunately, I didn't note what time the game began or even what time the preceding supper at the pub ended, nor what time we finished or how many turns we played, something like 10 or 12 turns in 3 hours I think, but to me the game seemed to flow smoothly, kept my attention and provided moments of tension and swings of luck but in the end it was the players' battle plans and choices that were carried out and won or lost the day. In other words, the rules worked as planned and as they did in my solo test games. On to Saturday and a 7 player AWI game but that's another post.

Wednesday, November 10, 2010

Battle of Hubleyton

An artists conception of the battle getting various details wrong of course

This is a layout for a Hearts of Tin 40mm AWI (Acadian War of Independence) scenario scheduled for Saturday. (The so called Acadian Rebellion has been raging sporadically (!?) for about 5 years in 3 scales (54mm then 1/72nd & 40mm) and after 9 or 10 games, the British have yet to claim a victory but they have not given up their attempts to reimpose tyranny on the free folk of Nova Scotia.)

The scenario in hand is based loosely (very loosely) on the Battle of Bennington in 1777. The terrain, taken from 3 conflicting maps,  has been greatly simplified, and bits shifted about to fit on table or left out and lots of pesky trees eliminated.


The orders of battle have been modified  to suit what troops are hoped to be on hand and the arrival times of Breyman's and Warner's forces advanced to make a multi-player game more interesting for all. (Both side's reinforcements had actually showed up after the 1st battle was over, leading to a 2nd engagement on the same day ). The actual OB will be adjusted to accomodate what troops and which players do show up  with a some War of 1812 militia and Indians being called on if necessary.

Initial British Forces:

On the hill defending the Dragoon Redoubt.
Col Garrie. (Army General, 1 ADC)
Royal Marines Veteran Infantry with musket (7 companies)
York Rangers: Elite Light Infantry sharpshooters with musket (2 companies)
Gun. 1 field gun.

At the ford.
Col. Martin (Brigadier, 1 ADC)
Canadian Volunteers 2 companies of Militia Light Infantry w muskets (in houses)
Loyalists: Infantry with musket (3 companies)
Umpteenth Foot Veteran Infantry with musket (7 companies) 

In the woods.
Capt. Lawrence (Brigadier, no ADC)
Indians: Irregular Light Infantry with Musket (3 bands of 2 companies each).

Reinforcments.  (Arrive when the score of 1 die is less than the turn number)
Col. George (Brigadier, 1 ADC)
Jaegers: 2 companies rifles, sharpshooters
British Grenadiers Elite Infantry with musket (4 companies)
Hessian Grenadiers: 4 companies Elite Infantry
Field Gun (1 company)

Rebel Forces
The Rebels start with 3 Brigades and must deploy at least 1 at each of their entry points.

Gen. Jefferies. (General  2 ADC)
under his direct command.
Jeff's Regiment Infantry with muskets (5 companies)
Gary's Regiment Infantry with muskets (6 companies)
Annapolis Regiment Militia Infantry with Muskets (5 companies)

Colonel Edwards (Brigadier 1ADC)
Annapolis Rifles Militia Light Infantry sharpshooters with rifles (2 companies)
Capt Morgan's Rangers Militia Light Infantry sharpshooters with rifles (2 companies)
Volunteers Militia Light Infantry with muskets (2 companies)

Colonel Roberts (Brigadier 1 ADC)
2nd Hants Regt. Infantry with musket (5 companies)
Pennsyvania Regiment Infantry with musket (5 companies)
Newport Regiment Militia Infantry with muskets (5 companies)

Reinforcements (Arrive at A when the score of 1 die is less than the turn number)
Col. Ross (Brigadier, 1 ADC)
Belmont Blues Veteran Infantry with muskets (5 companies)
2nd Canadian Infantry with muskets (5 companies)
1st Avalon Militia Infantry with musket (5 companies)

The Rebel goal is to force the British to retreat by shaking all of their brigades.
The British goal is to avoid being forced to retreat. If they can hang onto the corral full of cattle and horses as well then it is a major win.

Sunday, November 7, 2010

Does size matter?

Having been 8 years without a permanent Games room and table, I was determined to have at least a 6'x 8' table in the old farmhouse which we now call home. During the interregnum, I made do with various temporary tables ranging from 4' x 5' (try 54mm gaming on that!) to 5' by 9'. Last year, with layout finally finalized, more or less, I took possession of my new games room and set up my 6'x 8' with some shelves and storage underneath.

So far, so good, there was just room to sit around the table on bar stools and I could just, (if I stretched and didn't wear a baggy sweater)   reach the middle from the long sides. (the table is a little higher than my last one, and maybe I've shrunk a little as I don't recall that being an issue previously!). Recently, the house layout shifted again a bit to make room for my wife's mother, soon to come back to live with us and I had to slide a few more bookshelves in.  As a result, 'just enough' space has become 'not quite enough' and I am considering my options. There are 2 main approaches, reduce the number of figures and books so that I can remove shelves that are in the way and reduce the size of the table. The first approach has been underway for a while with several thousand, mostly 15mm and 54mm having been re-homed and the number of figures that can't be accommodated either on shelves or in the cupboard is slowly being brought to heel, (reducing the library is not going as well). However, there does not appear to be any realistic chance of fitting all existing books and figures comfortably into  the  existing space anytime soon and that brings me back to table size.

I have mentioned before that I am starting to enjoy being able to occasionally sit at a table and play a game. Most of those games, however, have been 2 player (or solo) games with 1/72 figures or smaller and while I am happily rediscovering 1/72nd plastic figures, I don't wish to drop my 40mm figures entirely, do only skirmishes or go back to even smaller scales. A drop in table size therefore must mean a change in theoretical gaming style, with fewer figures on table and/or less room to maneuver on table rather than a mere miniaturization  of current style games.

I say theoretical because while I like the idea and sight of a bunch of Big Battalions, for example a full sized 40mm Charge! game with 500 or 1,000 figures on the table, in practice,  I have never painted enough figures in any one scale or period to host such a game by myself and it wouldn't fit on a 6'x8' table anyway. Our Charge! games at Cold Wars, for example, have expanded to 12' and even 20' wide. Such games will have to remain a special event.  Luckily, as mentioned above, I have already gained some experience in fitting games onto smaller tables so I know that BIG games are not the only enjoyable option for me and no projects will need to be dropped even if some scenarios may not work as well, others will work as well or better.

So what are my options in terms of table and room layout? The current contenders are:

a) Leave as is and live with the constricted space. Not bad for a solo or even a 2 player game but may not be workable for a club game with 5 or 6 guys present and a constant irritant in between games, 

b) take the table apart, rotate the  6 ft cabinet which holds up one end, and install a 5'x7' table with the same general layout of the room, just a little more elbow room when moving around the table, 

c) take the table apart, reduce it to 6' x 6',  leaving the cabinet as it is and switching the prime player positions to what are now the short ends of the table. This leaves me the option of making a temporary  extension to 6'x8' if I want to do so. 

d) do as b) but reduce the table even farther, perhaps to 5'x 6' (one side must be at least 6' to accommodate the useful under table cabinet)  with the possibility of an extension.
  
Option c) requires the least amount of work on my part (apart from doing nothing) but leaves a choke point on 1 side. If I rotate the habitual base lines to what are now the short sides, however, there would be sufficient people space behind the base lines. It also gives me a square table. I've rarely played on a square table but if I recall properly, Charles Grant was in favour of the table being as square as possible to remove table orientation as an unrealistic player perception (of course this design would be  only roughly 50%   of the square footage of his table).  Still, it would fit about 90% of the games that I have played on the full table in the last 2 years with very little adaptation, more off table movement of flanking units or reserves, for example, but mostly just loss of unused space. If I add a one foot extension on either end, then the current configuration is restored.  It does, however place the center of the table at my extreme reach and means I cannot play a game sitting down and in years to come might find myself constrained to reach it at all.

Option b) leaves me with the same general configuration as now but a foot narrower in all directions. The reduction from 8' to 7' is of little moment, about the only time the extra foot in that direction would even be noticed is for a big game with lots of 40mm troops, allowing an extra unit per side,  or if doing a fighting retreat where it would give an extra turn. The foot in the other direction would be more noticeable, especially when driving on a 40mm gun crew with even a 4 horse limber. It does make a defiles even narrower when fighting the long way but the extra width is usually taken up with impassible terrain so its mostly about scenic effect.  The depth is somewhat useful for reserves and a slightly earlier arrival of
off-table troops but these are easily accommodated by allowing off table reserves and adjusting arrival times.  The down side is that the table still dominates the room even if only being used perhaps a score of days in the course of a year and that while the amount of maneuver room is increased, it is still a little congested for looking at books or figures.

Option c) appears to be a complete surrender of gaming to ease and comfort. It would take the most work to achieve and leave the smallest table but give the easiest access the rest of the time and allow easy access to all sides. I would need to consider carefully what sort of games would fit the table and would probably want to ensure that a temporary expansion was available. 

Luckily, there are more important renovations to be done before I undertake changes to an already, more-or-less functioning games room so I have time to experiment. I foresee me taping off areas of the table this winter to try playing on the various size areas. In the mean time, I know I'm not the first person to ponder table sizes so if anyone wants to share their thoughts and experiences, please do so.