I then diced for the reaction of the French player. First for the militia. 5,6 advance aggressively against the British flank. 3,4 wait in position but shift left to flank an attack on the centre as it goes in. 1,2 Hold until something changes. The result was a 5 and the militia moved to attack the flank. For the main line I rolled for hold or preemptive attack and got hold.
 |
| Game 1, Turn 3 The Highlanders are in dead ground on the reverse slope while the main force deploys and the French regulars wait patiently. |
It didn't take long for the old confusion about when a battalion is a battalion for movement to arise as companies deployed from column and moved to join the battalion line and by Turn 4 I scrapped the revived battalion movement part. Shortly after the fighting started, with some companies engaged while others were out of range, I also scrapped the revived battalion morale/combat rules. OK that confirms the 2014 decision.
Practicality wins over Pedantry.
 |
| As the first assault goes in the fighting is fierce and bloody but the French line holds. |
In many games the Chance cards have little effect but in this game the poor British got walloped by them. For starters, 2 of the 12 cards I drew turned out to be Jokers which skip a turn thus shortening the game. This might indicate a later start than planned, a heavy rain shower or just some indecision but the turn limit went from generous to extremely tight! Then, just as the British Grenadiers were lined up ready to fire their First Volley at close range and then charge, a Red Jack popped up allowing the French to pick a unit to freeze. No moving and no shooting except to return fire if fired upon. They chose the Grenadiers and chose to fire their first volley first. The firing rippled up and down the line and several companies of Irish followed up with the bayonet. On the far left the company in summer dress blew huge holes in the Irish ranks and stood firm in the ensuing melee sending them reeling. In the centre the line held but casualties were heavy.
As the British rallied their repulsed troops and prepared to send in the Grenadiers and the last fresh company of Irish, the cards again favoured the French and they got the initiative. Their losses had also been heavy but the sun was low in the sky (well the the activation deck was low). The French pulled their line back beyond close range and closed in towards the centre. The British followed up and drove the line back in disorder but on the French commander risked his life to rally his men and when the last turn ended the battered remnant of the French line still stood across the road. Victory to the French!
 |
| One French company is almost wiped out but the sole survivor rallies defiantly atop the hill. The British line sorts the survivors while the Black Watch is hard pressed to hold the skirmishers from the rear of the army. |
On the whole the game was quick and enjoyable, so a success, though I was surprised that such a small, simple game still lasted 1.5 hours. Apart from having restored the ability to fire then move or move and then hold fire to be used as a reaction only, and a small tweak to the morale test, the rules once more back to the 2014 QRS version. I decided to reset using 12 man companies and the same battle plan to see how that would compare. After hauling out a few more figures, the French defended with 3 x 12 line infantry and 2x8 militia skirmishers. The British attacked with 2x12 Elite infantry and 3x12 line infantry. This gave both sides fewer units but slightly more men with the British gaining more despite now having the same number of units as the French. I also reshuffled the cards and drew a new activation deck.
 |
| Game 2. The British line forms and advances under a heavy but ineffective long range fire. |
As French player, I decided to open fire at long range hoping to wear the British down while they formed. It didn't work quite as well as planned. Actually, across the board the French shooting dice were abysmal for most of the game. On the flank, the larger Highland unit was bolder than last game and drove the militia back with heavy losses.
 |
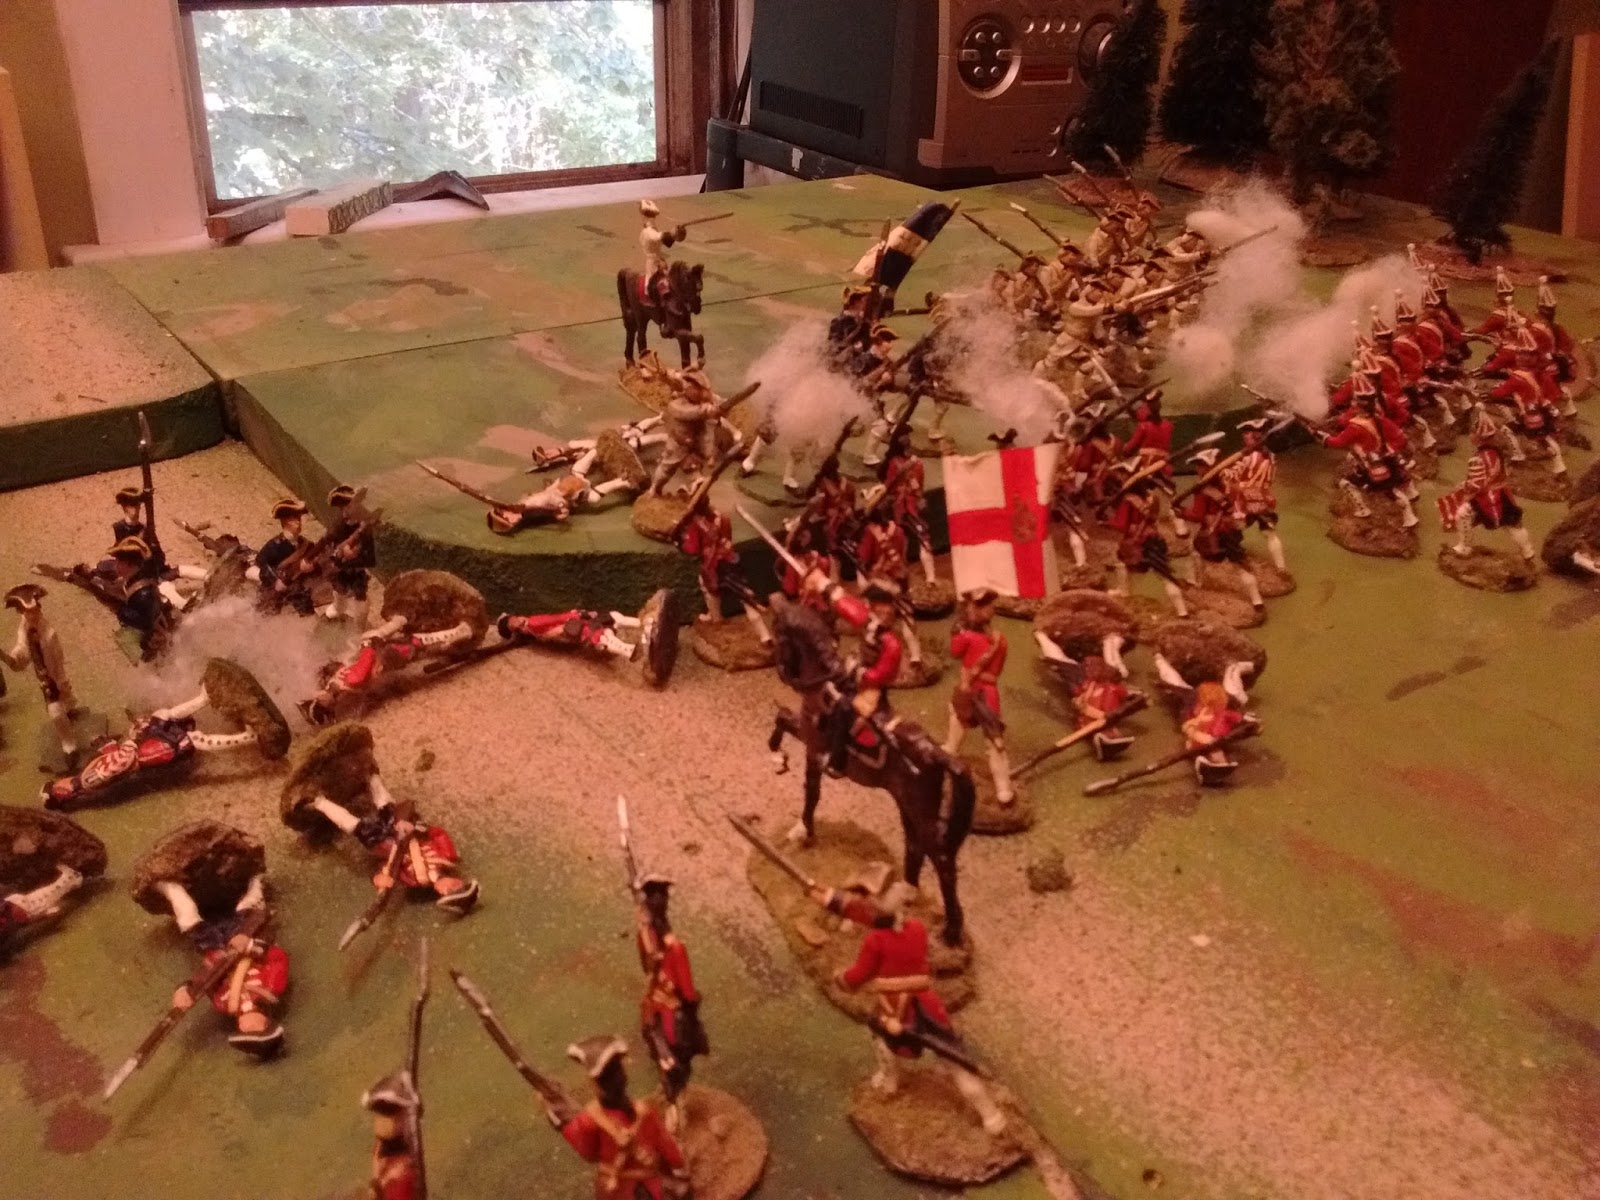
| The charge of the Irish Grenadiers |
This was a simpler, slightly larger but faster, game and more exciting to boot since the fate of each unit counted. I'm back to proof reading and preparing for more test games. I need something with cavalry and I need to play more rifle era games and something with some spear armed charging native warriors. Next month I should also set up the extension and try the largest game that I can fit to see how that goes.
Work, work, work but I'm happy to do it.

As always a rousing read!
ReplyDeleteThanks
DeleteVery nice! Brave French troops...until the end!
ReplyDeleteThey were brave to the end, there just weren't enough left!
DeleteHooray the Grenadiers! I suppose if you knocked off the two turns that you lost in the first game for drawing those two Jokers, then the end of the second game might be thought of as two rather than four turns shorter.
ReplyDeleteGood playtest, bringing the battalion amendments into sharp focus.
Yes and since the initial attack by the Grenadiers was delayed a trun in the first game, the 2nd game was only about 1/2 turns shorter despite the different sequence of events and different OB.
DeleteForward the grenadiers! It strikes me Ross that in your constant tinkering, you are changing a car tyre while the car is still moving.
ReplyDeleteNo no, I do stop the car briefly when the wheel falls off but only hand tighten the nuts. But this is so much better now that I've learned how to solo game and aren't working 60 -70+ hour weeks.
Delete