Click on pictures for larger size. Depending on your machine, you can use your figures to enlarge or shrink the picture, or there may be a '+' on the picture which will expand again and allow you to slide the large picture to see all of it. Click on the header arrow pointing left to go back to the regular screen.

Showing posts with label Grant. Show all posts

Sunday, August 21, 2011

The Apocryphal Well Refought

Last August I replayed Charles Grant's Platea from his book The Ancient Wargame, adjusted to my means. This year I have tackled  something a little smaller, the clash at the Apocryphal Well.  Not having Assyrian and Egyptian armies, or a 7'x9' table, I again adjusted the game to what I do have available.

For those not fortunate enough to be familiar with the book. This is straight, fictional encounter battle between Egyptian and Assyrian advance guards clashing over control of a vital watering hole. (I should really have thrown a brown cloth over my green table to add atmosphere.)

Grant's original map of the game layout.

The role of the Egyptians with their chariot squadron was given to my Royal Persian forces. The Rebel forces therefore, were left playing the Assyrians. The next issue to be dealt with was unit size. Grant's order of battle included units on the order of 30 to 40 man units for infantry and 20 for skirmishers and cavalry deployed on a 63 square foot playing surface. I decided that my 12 man light infantry and cavalry units and 24 man medium infantry would suffice on my 30 sq foot table but reduced the rebel units to 16 since Grant's Assyrian units were smaller than his Egyptian ones.

Next came adjusting the actual units to fit the armies I was using and classifying them under my rules, The Gathering of Hosts. The match wouldn't be perfect, especially since I lack Persian spearmen but I felt that it was close enough. I decided to allow the Persian infantry to keep their bows but ignored the Scythian Nobles bows since the Assyrian cavalry had been fielded without them. For some reason I thought the Assyrian light cavalry was double armed so used the Scythian horse archers, oh well.  I finally settled on the following and laid out the troops according to the map:


Grant's Egyptian Regiments
My Persian Regiments
(commanded by Pharlanes, Satrap of Cappadocia and Royal General)
Ptah:  45 Medium Spearmen
Sardes: 24 Phalanx Infantry
Ra:    43 Medium Spearmen
Immortals: 24 Medium Infantry Archers
Senekht:  43 Medium Spearmen
Ecbatana: 24 Medium Infantry Archers
Kush: 22 Light Archers
Bythnians: 12 Light Archers
Koth: 21 Light Archers
Ethiopeans: 12 Light Archers
Ka: 21 Light Archers
Raffum: 12 Light Archers
Lacish: 18 Light Javelinmen (LMI)
Phrygians: 12 Light Infantry
Royal Chariots: 8 chariots
Royal Chariots: 3 Heavy chariots


Grant's Assyrian Regiments
My Rebel Regiments (commanded by Rosius, The Great Pretender)
Eshnunna:  20 Heavy Cavalry
Rebel Nobles: 12 Elite Medium Cavalry
Zarzi:    20 Light Cavalry
Scyths: 12 Light Horse Archers
Tutub:  26 Heavy Infantry, bow & spear
Saka Veterans: 16 Armoured Infantry Archers
Akalate: 30 Medium Archers
Scyths: 16 Medium Infantry Archers
Hassuna: 31 Medium Archers
Saka: 16 Medium Infantry Archers
Tarbisa: 24 Heavy Infantry spearmen
Greeks: 16 Armoured Phalanx Infantry
Repiquum: 27 Light Javelinmen (LMI)
Armenians: 16 Light Infantry


  The view from behind the Rebel lines as the armies deploy.   
I've been working on the rules, trying to get the right balance of uncertainty and control, eliminating those persistent morale tests, fine tuning troop types etc and so played the game several times without having re-read the account. Once I was happy with the rules, I reset everything again and prepared to follow the battle plans from the book.

For the Persians, this was essentially a straight advance on the well with light troops covering the flanks and the chariots in reserve. The Rebels sent their light cavalry on a flanking maneuver on the right while attacking up the center, using their heavy cavalry initially to soak up arrows while protecting the left.  
The Persians adopt a position on the South Hill.

Things went according to plan at first, apart from the Scythian light cavalry refusing orders for 2 turns in a row,   In the center, the Armenians drove back the Ethiopean archers and then fell back. A prolonged archery duel ensued with the armour on the Saka not quite making up for their lack of numbers.
The battle in the center heats up.

On the Rebel left, the cavalry duly took a pounding from the Raffum archers before being released to drive them off. This they did with no great enthusiasm. In fact honours of the day go to the Raffum archers whose deadly accuracy was backed up by fierce swinging of their sagaris hand axes and by their sprinting, managing to out pace the reluctant cavalry once. Luck can only take you so far though and eventually the cavalry drove them from the table.

Scythian Nobles in the front rank with some fill ins in the rear until I finish refurbishing the full unit.

On the Rebel right, once the Skythians got moving they exchanged fire with the deadly accurate Bythnian archers before sliding around the wood to appear in the Persian rear. This left the right flank of the Greeks open so Rossius ordered the Armenians to shift to cover the gap. These, no doubt exhausted by chasing off a few archers, dragged themselves over, taking good care to avoid any possible contact with the enemy. I suspect there may have been a compact with their Phrygian counter parts since these also refused to advance into the gap, or for that matter to go to the support of the chariots! ( Odd how the same 2 units can keep rolling "1" when they are rolling the same dice as every one else!)
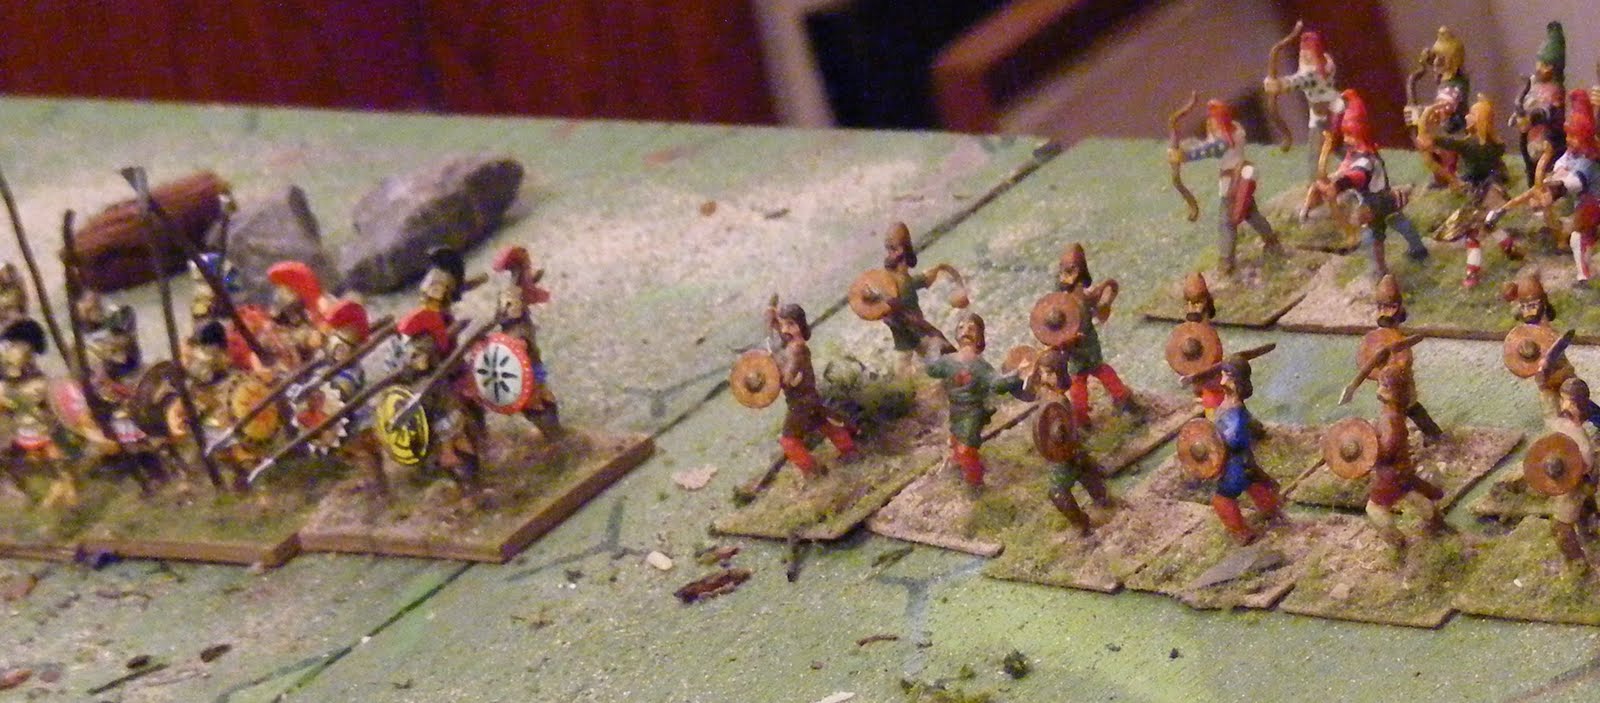
Greeks, The Armenian Regiment and some Saka behind them at the start of the game.

By the book, the light cavalry should have gone for the Bythnian archers but finding themselves actually behind the chariots after these had refused their latest order. It seemed like too good a chance and so I charged them in. Now rather than field the chariots as late Achaemenid scythed chariots, I had opted for the earlier type that may have only existed in Funcken and the Garrison catalog. At least the armoured archers in the chariot crews gave them some form of fighting power even when stationary and hit from the rear. Since the Skythians had already suffered 25% losses from shooting it ended up being 3 dice looking for 3|+ vs 1 die looking for a 4 and yes that meant 2 tied rounds of melee with only 1 hit a piece! Finally after the Scythians finally managed to win a round of melee,  the remaining chariots broke contact and lumbered off (2d6") with the fleet footed light cavalry (3d6") making no real effort to pursue.  The least valuable player award goes to the Scyths.

The chariots begin rallying while the Scythians start worrying about the various Persian light infantry closing in on them.
 So far the battle still hung in the balance. The Rebels had had some successes against the Persian light troops and the Persian infantry had suffered significant casualties but the Rebel center had taken worse than they had given. It was down to clash of 16 armoured Greek hoplites vs 24 Phyrgian spearmen. At first there was a period of pushing and stabbing with no advantage to either side, but eventually numbers told and the Greeks began to waver then turned and fled, bursting through a unit of Saka archers who had unwisely moved to stand partially behind them, As his army started to come apart, Rossius signaled  for a general retreat. He  was going to need more and better troops if his claim to the throne was honoured.

A simple little game but fun. It took me about 2 hours to play through 10 turns and reach a conclusion.  
The last of the 3 battles from the Ancient Wargame is the Battle of the Sambre, Caesar vs the Gauls. I have neither but I think I may be able to turn it into an incident during the retreat of the 10,000 with Xenephon standing in for Caesar. Won't be for a few months at least though. Just about time to break out some muskets.

Saturday, February 5, 2011

Translating Teasers

By Request.

CS Grant's various scanarios and Tabletop Teasers are often set out in generic Horse & Musket terms but they generally provide a sound basis for a good game in almost any period. One just has to exercise a bit of judgement to translate for different periods, scales and rule sets. I generally use of one 3 methods to do so.

WWII is one period where I have often used his scenarios and teasers. I have done so using home made rules and 10mm troops, Rapid Fire and Storm of Steel in 54mm and Blitzkrieg Commander (BKC) in 20mm. (I have also played using both Command Decision and BKC in 12mm but I didn't set those games up.) The best approach for each varies but one or the other generally works.

1. Points: The simplest and least satisfying solution.  In the version of Sawmill Village which appeared in Scenarios for Wargames, players were instructed to pick 6 units from a  list of available troops. This implied that all were of equal value. The notes at the front gave no particular size but said that cavalry and light infantry were assumed to be about 1/2 the size of line infantry and that batteries were 2 guns. If one consults the very 1st Table Top Teaser, it is made clear that the units involved are those laid out in Charles Grant's The Wargame, and a points value is given, but for years I went under my first assumption and it has worked just fine.  

The way I work this is to take the number of units per side and multiply by a suitable constant to get the desired size of game. So for example, for the scenario just played, the defender has 2 guns, a cavalry unit and 2 infantry units in town for a total of 4 units with 7 more in town as reinforcements. The attacker has 14 units. If using BKC and multiplying the number of units by 100 we get a game where 1,400 pts attack a force of 400 pts on the hill with 700 more as reinforcements. For a larger game, simple increase the constant and multiply by 150 pts x number of units or even 200.

Simple but it does allow players to choose a completely different ratio of infantry to guns to cavalry/armour and possibly change the feel of the whole thing. . Leaving WWII I remember playing the game with Romans vs Parthians using Armati. It was hard enough for the Parthians to attack the hill, but it was even harder when we switched sides and they were tasked with defending it! If you don't have  a point system to work with this doesn't help at all.

1.5. Allocated Point This is just a variation on the point system but it gets around the issue of inappropriate forces. It can be awkward though if the point system is too far out of whack and some judgement is required. Basically its a matter of breaking the points down by troop type.

So, for the scenario just played, using BKC or similar for a small game: (warning I haven't looked up the pts for a sanity check as to what it provides)

Defenders:
On the hill: 100 pts of A/T guns, 200 pts of infantry (and infantry support such as MG's and mortars), 100 pts of armour
In town: 100 pts of armour, 100 pts of recce, 400 pts of infantry, 100 pts of artillery (could be off board)

Attackers: 200 pts of Heavy/Medium Armour, 100 pts of Light Armour, 100 pts of recce, 800 pts of infantry & infantry support, 200 pts of artillery inc A/T guns and off table guns etc.

Command may either be drawn from available pts or issued free based on reasonable proportions.

2. Standard Units. This only really works if everyone is on board or you are setting up the game with your troops on both sides. Since the original teasers were designed for standard units, its just a matter of adopting standard units for your period. If one side has a quality advantage this can be balanced out by larger units.
Its been a while but we used to use something like:

Infantry Unit: 3 stands of infantry + MG or Mortar
Guns: 1 antitank or offboard gun per scenario gun (2 per battery) or maybe a dive-bomber for a few turns
Light Cavalry Unit: 3 light tanks, armoured cars or 1/2 tracks
Heavy Cavalry Unit: 3 medium tanks, 2 heavy tanks or 1 really heavy tank. (Depends on the .period and army). If the medium tanks are greatly inferior add an extra.
Light Infantry. A fudge factor, might be a recce or 1 1/2 track with 1 stand of elite troops, or 2 stands of paras or similar.  

I say stands, they could be sections, platoons, or companies, depending on what rules you are using. Guns are assumed to have appropriate transport.

 Lets say we were doing mid-war Russians attacking vs Germans. Perhaps:
Germans
On the ridge:
1 HQ 2 A/T guns, 6 infantry stands, 2 MG,
1 HQ 3 STUG III

In Town:
CO,
1 HQ 3 Mark IVH,
1 HQ 6 infantry, 1 MG, 1 mortar,
1 HQ 6 infantry, 1 MG, 1 mortar,
1 truck with 2 stands of Panzer Grenadiers with enhanced firepower (extra lmg),(attach as desired)
1 FAO for 2 off table 105mm  howitzers.

Russians
1 CO
1 HQ, 1 recc stand, 12 infantry, 1 mortar, 2 MG, 1 45mm ATG,
1 HQ, 1 recce stand, 12 infantry, 1 mortar, 2 MG, 1 45mm ATG,
2 76mm guns or maybe 2 SU76,
1 HQ  3 stands of SMG tank riders, 6 T34 76, 3 armoured cars or light tanks.

That it!
the same principles apply to ancients, renaisance etc.

Monday, December 27, 2010

A Final Teaser

A slight change in plans. In the latest issue of Battlegames, CS Grant announced that this would be the last of the current series of Table Top Teasers, not the last teaser ever, but the end of this run at least. Now my plan had been to play a Battlegames scenario each month but life being what is and plans being what they are, only 3 of the games have been from the current range of TT Teasers so I figured why not end my year with the latest and the last?

It also seemed a good time to try out my reduced table size so I have roped off a 5x6 area to play on. Time is still at a premium so I worried even less than normal about matching the terrain other than very generally. I also haven't built any particularly Oregon-like terrain yet and really this one might have been better set in New Brunswick or the Canadas.

The scenario involves 2 advance guards each tasked with controlling the crossings over the Hard River. Each side has 1 light cavalry regiment, 1 irregular or militia light infantry unit and 2 regiments of infantry. For more details see Battlegames Issue 24.
 

and yes, that is the balloon being towed into position prior to ascending. It is the end of Turn 3 and across the river, the American field hospital wagon can be seen just arriving.


 More to follow in a few days.

Friday, August 27, 2010

PLATEA - Refighting the Charles Grant Refight of Platea

Charles Grant's book, The Ancient Wargame, has been in my wargames library since the mid-70's. My favorite part was always the battle reports. So, since I needed to test out a new set of home grown ancient rules named Gathering of Hosts after my ancients blog, I decided to stage the Platea game from Grant's book. I won't go into detail on the rules, those who are interested can look them up on google docs, (plse note that this link now points to the Apr 2011 edition of the rules which is a little different in mechanics)  but basically they work by drawing ordinary cards red for one side, black for the other. Each card allows a player to activate 1 unit or 1 group of units and complete movement, shooting and melee before pulling the next card.

For those not familiar with Platea, it was a battle between the Persian Empire and an alliance of Greek city states in 479 BCE.  The Greek army was composed primarily of heavy infantry while the Persians depended heavily on archers and cavalry but had a substantial force of allied Greek heavy infantry as well. The two armies had been facing each other across the Asopus river for about 10 days when the Greeks decided to pull back during the night. To make a long story short, it didn't go quite as planned and their army was split into widely separated detachments when day broke. The Persians immediaetly launched an attack to take advantage of the Greek's disarray.

Grant's version is typical of the way he rendered down troops and terrain from historical battles in a practical fashion to make a balanced wargame while maintaining the key elements of the original battle. One can argue with some of the details and choices he made, for example, amongst other things, I think the battle should take place on the 2nd ridge, not the one overlooking the river, but in the end, it works. Rather than design an alternate version, I decided to play it as straight up as possible given the differences in rules and in troops available. This included trying to follow the original game's battle plans as much as possible. The order of battle as adopted my me can be found here. The unit names refer to Grant's names but for the sake of those with the book I will try to stick with them in case they wish to follow along.

Here is the game set to begin as seen from behind the Persian lines. 
Please click on the pictures for a full size view.

Starting wth the Greeks, on our right we see 2 units of Athenian hoplites supported by archers. To our left, we see the Spartan Alpha battalion with its accompanying skirmishers. In the distance behind them is the other Spartan units in column heading for the rear table edge.  In the far distance on the right we see the Corinthians.

In the center of the Persian line are the Crescent Light Cavalry (white caps) with the Cadusi and Apadan light infantry behind and to the right of them. We can also see the Phrygian heavy infantry. Just off camera to the right of the Persian line are the Theban light cavalry and the Boeotian Hoplites. Off to the left are the Scorpion Elite Medium  Cavalry then 2 units of Persian infantry, the Green and Black Immortals, screened by the Median javelinmen. On the far right are the Horsetails light cavalry.

The view after turn 1.

The game opened up with the Spartan main body wheeling about to come up on the right of the unit left behind. This required the unit to hurry and being elite with a general attached, they  needed to score 2 or better on a d6 to do so in good order. A '1' duly showed up. Elsewhere the Persian light cavalry surged forward but their infantry struggled with the stream and continued in some cases to do so all game rolling an incredible number of 1's on their movement distance dice while getting their feet wet.

The Horsetails recreate their disastrous charge on the Spartans

The Spartans, now in disorder, only needed a 3 or better to regain good order and push on. A 2 duly came up and the Horsetail Light Cavalry, following the script in the book, launched into a charge on the diordered column. Seemed like a rash venture for light cavalry to me  but it wasn't going to get much better than this and it almost paid off, they sent the accompanying skirmishers scurrying off in disorder and tied the hoplites during the 1st round of melee but were finally forced to pull back in disorder after heavy casualties. On their next turn they failed to rally and rode off the table instead leaving the Spartan Beta Battalion to resume its march in peace.

 The Crescent Light Cavalry playing their part.

In the center, the Crescent light cavalry started to head through the gap to try and slow down the Corinthians but the book says they "collided" with the Athenians, probably a function of simultaneous moves, in any event, I ended up halting them in front of the Athenians, and then having the latter charge them with predictable results, having bungled their attempt to evade, the light cavalry fled the table. 

On the Persian left, the Median javelins drove off their opposing numbers though they did so with missile fire rather than charging in as per the original. They then withdrew to let the Immortals come up and open fire on the Spartans. On the Persian left, the Thebans crossed the river under showers of Athenian archers and advanced on the Athenian hoplites. As they got closer, the Athenians sounded the paean and  charged.
Greek vs Greek
Here the Athenians were supposed to sweep the Boeotians away but despite having deployed my favorite Benassi hoplites and having classed them as Elite, the raggle taggle collection of hoplites, Apulians and Carthaginians that composed my makeshift Boeotian unit gave them a beating and forced them back. All now depended on the turn of a card, if the Persians came up first the Boeotians would charge in and finish the job. But, no, it was a Greek card and the Athenians rallied atop the ridge and repulsed the Boeotians handily when they came, following up and eventually scattering them to the winds. 

Mid-Game
   On the Greek right, the Spartans were finally reunited. Sheltering behind their shields against a storm of Persian arrows, they waited for omens to indicate the right moment to charge. A charge by the Scorpion cavalry which momentarily drove back the Spartan left flank showed the time was not yet.

In the center, the Athenian Omicron battalion followed up its success by driving off the Caduci Light Infantry and then hitting the Phrygians. These put up a surprisingly hard fight and momentarily held off the Greeks.

From behind their wall of shields the Persians darken the sky with arrows.
 As the Corinthians finally arrived in the center, the Athenians finally swept away the last of the Phyrgians and began the advance on the Persian camp. Atop the hill the omens were finally good and the Spartans charged the shield barrier erected by the Immortals. A fierce, hard fought melee followed but the end result was never in doubt.

The Immortals crumble under Spartan pressure.
   So ended my refight of Charles Grant's Platea.  The rules used were different and I had been forced to adjust the number of figures though not the number of units but the results were strikingly similar and reflected the historical outcome fairly well also. More than that, the rules played smoothly and the game was fun. even solo.  I think another game is in order!