Click on pictures for larger size. Depending on your machine, you can use your figures to enlarge or shrink the picture, or there may be a '+' on the picture which will expand again and allow you to slide the large picture to see all of it. Click on the header arrow pointing left to go back to the regular screen.

Showing posts with label Black Powder. Show all posts

Friday, January 11, 2019


The story of the Battle Beneath the Tower has now been posted on the Gathering of Hosts blog.

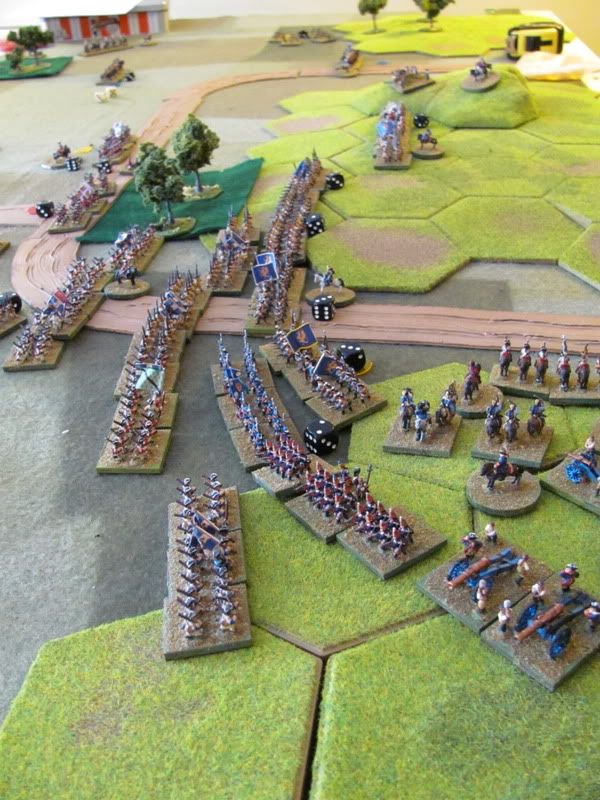
This solo game which was set  in a fictional setting that originated in the 1970's, includes some of the first metal wargaming figures that I ever painted as well as vintage figures painted more recently such as the Garrison knights shown above.

Sunday, January 22, 2012

Powder Smoke Over Belmont

Newly recruited Yanks and Rebs seeing the elephant.

In May of 2010, Jerry and I played a 1/72nd AWI game, part of a long standing, occasional campaign set in Nova Scotia, but this time using Black Powder. Having enjoyed the experience, we agreed to assemble 1/72nd ACW armies to play games set in our local area with complete disregard for the politics and history, as if Nova Scotia was perhaps a peninsula in Virginia rather than Canada.  Things happen and nearly 2 years passed but on Saturday, we finally brought the idea to fruition.

In the meantime, I have played a number of Black Powder games, each less satisfying than the one before, but never for the ACW and I decided that it would be best to at least try them again for this setting.  Last year I noted that US Grant's first battle was at Belmont and since I was hosting the game here, in Belmont NS, it seemed like a good idea to base a scenario loosely on that action, but reversing sides since it was it is my Federal Army that is based at Belmont. Having looked at the rules, I decided that a scale of 1":10 yards more or less fit the musket ranges though 1:20 might fit the artillery better. Anyway, we usually measure in cm rather than inches to give ourselves more room. Taking this translation to 1cm on table being equal to 10 Yards to the map, I proceeded to lay out the table. Another friend  had presented me with a laminated, detailed, large scale map of my local area a year or so back. Its been propped up on my desk, right up until, well until not long ago. Where it is now is a question which annoyed me exceeding Friday night!

Using a slightly larger scale map crossed with memory, I laid out the appropriate section of the table using 1" boards for the contours, occasionally eked out with thin plywood or masonite since 2/3 of the table was above the 1 contour line. The whole was then covered with a cloth with water features being cut out of a translucent blue recycling bag.  Its not an exact replica and I spotted a gaff or 2 once it was complete but nothing serious and it was amusing to be able to look down on the table and be able to relate to it having walked much of the area at time or another over the last 6 years. Looking at the rules, the terrain effects didn't sit well for the ACW so we classed the woods as rough or broken (I forget the term) ground rather than woods. I classed the 3rd and 4th contours the same way since they are quite cut up with gullies and patches of woods that I hadn't represented.

From an aesthetic viewpoint, a couple of things bothered me about the result. The first is that I needed a lot more trees, bushes and fences. The second is that the cloth is khaki-ish, not bad for a late fall, early spring day but not appropriate from mid-spring to mid-fall. The evergreens were fine and I have a few leafless deciduous trees which fit the winterish look but the bulk of my deciduous trees have green foliage, sometimes scanty but in any case, only appropriate during the spring, summer, fall times where the khaki cloth is not appropriate. I either need a grass green cloth or I need to finish painting all and every bit of wood that I might use as contours, to match my table top.  
Jerry contemplates move 3.

I began the game with a 4 regiment Brigade and 2 guns entrenched on table with the guns and 1 regiment alert and manning the defences, watching for an amphibious assault. The rest of  brigade were deemed to be unready for combat and were stood facing some improvised out of period tents (note to self: add ACW tents to the list or things to make).  The rest of my force, a regiment of cavalry and 2 brigades each of 4 regiments and a gun would arrive at some point after the alarm was raised, either by boat to the area near the battery or by road from the North, marching on past my house, depending on a die roll. Not having appropriate boats, I used a scratch built under scale ironclad of miscellaneous design that I had scratch built years ago to support my old 15mm F&F ACW armies for CS Grant's Island battle.

Jerry began with his entire force within a foot of the southern table edge. A brigade with 2 regiments of cavalry and a horse battery and 3 brigades of infantry totaling 11 regiments, with 1 gun assigned to each brigade. His mission was to capture the battery. If he could hold it, he would get a Victory. If he captured the battery but then extracted his force he would get a Winning draw. He sent the cavalry down the road followed by an infantry brigade with another moving above them. The 3rd brigade was directed down through the woods west of the pond to attack the camp.

An alert sentry spotted Jerry's troops on the road on turn 1 but no one believed him and on turn 3 when his infantry stormed out of the woods, I still hadn't managed to get my troops into battle order. Luckily for me, being hit in the rear seems to be a fairly minor penalty in BP and while my unit retreated, it wasn't badly hurt. At least being within initiative distance allowed me to shake out some other units and begin firing. A further charge by the Rebs into the prepared front of my next unit resulted in the rout and destruction of said unit.
(first time seeing the elephant for all of these units) Luckily the other lads had rallied and plugged the gap backed by a battery. The battle on this front settled into a prolonged and indecisive firefight.

Behind my brigade, as the steamboats busily chugged across the river with reinforcements, Jerry's cavalry  had reached the intersection, followed the lane down towards the river, deployed and charged across the stream. Despite every advantage one could ask for, my troops were only just able to hold them at first (drawn melee) but on the next turn he had to retire, Shaken but not Broken.
The fight rages, full of sound and fury.

By then, my cavalry had appeared, (trotting past my house, wish I had more of those Wagon Train figures so i could have added them by the side of the road), deploying and careening full tilt into the flank of a Confederate regiment. These veteran troops threw them back with heavy losses with out even slowing down their march across the table. The attack worked however. The brigade that had been heading down to take over from Jerry's cavalry and overwhem the battery from the rear, turned about and climbed back up the hill, just as my 3rd brigade arrived. Another prolonged firefight broke out as we each took turns trying to coax our units to sidle into the woods to try to flank the enemy.

At last Jerry realized that time was running out as my 2nd Brigade, which had stalled midstream for several turns, finally began disembarking, driving off the few remaining troopers. He ordered a wild bayonet charge against the defenders of the battery. This time closing fire against the already battered regiments was decisive and his Brigade broke, pretty much ending the game.

It had been an enjoyable day with much catching up and an interesting game, despite the rules.


Reverse perspective: little boat in front, larger figures in the background. Those are Jerry's newly painted cavalry. To my embarrassment, I didn't get any close ups of any of his units despite their being more carefully painted than mind. (and no not because of). Actually, I got so tired of nothing changing from turn to turn that I stopped taking pictures and then forgot to shoot the end until after Jerry had removed his units.  


Despite enjoying the game, I'm afraid, we both found the rules either frustrating or annoying at times, for various reasons. For me, apart from the stop/start feel of the no move or triple move command rolls, and the short artillery ranges (48" vs 18" smoothbore musket range) which didn't feel right for ACW, the ability of the attacker to always get the first shot, etc the combat wasn't terribly satisfying as a game experience.
One doesn't want combat  to be too predictable but there seemed to be lots  of rolling often with little effect but with occasional  drastic results that don't seem related to anything but the dice, partly because of the structure of the all important morale check

I know its possible to back build a story as to what happened,  why the cavalry that hit the column in the flank were the only ones to take damage and disorder, why the infantry hit while unformed were able to retreat fighting and form up while their comrades formed and facing the attack crumbled and fled and so on but I didn't find it as satisfying as, well lets say Charge! which can also have drastic swings of fortune in shooting or melee but in more up front fashion. You don't lose the combat then win the morale throw reversing the decision. For example a unit in Charge! that takes a walloping in melee due to bad dice will be beaten. A unit that only loses by little will fall back and rally if allowed to do so in peace as opposed to BP where we had units lose badly but shake it off or lose by a hair and then evaporate. Horses for courses.

The game also dragged on a little long despite how little happened. Partially this was because we wasted a LOT of time trying to find things in the book and partly because we took so many coffee breaks but that latter bit says a lot in itself. I would now rate the rules as maybe 3 stars or maybe 2 1/2.

In any event, we backed up a few things and played out a couple of turns of Hearts of Tin to give Jerry a feel. (The last version he played was a couple of years ago). I think we'll probably give them a go next time.  All in all a fun day


Saturday, May 7, 2011

Back to Black

I made the trek over the mountain to Morden today for a game with Jeff. 15mm Black Powder was the order of the day, more specifically, the Crimean River scenario played with 15mm Napoleonic forces. Jeff's forces include my old Battle Honour French Revolution Russians so I was able to slip into my old personna of Prince Roskov and lead some of my old boys into action. Most of my cell phone pictures came out completely useless but these two fuzzy ones should give an idea of the game.

The game is a fairly straight forward attack on a pair of redoubts. The main twist is that the cavalry may be kept off table initially. A key feature as it turned out.   The armies are quite small with only 2 battalions per brigade so we agreed to modify the Broken Brigade rule so that Brigades would only  be broken when all units are shaken rather than 1/2.  (If not it would only have taken 3 hits to shake a British brigade, 4 for a Russian one and the game would probably have been over in 2 or 3 turns.)

I placed 1 brigade supporting my left hand battery, and 2 supporting the right hand one. Jeff masked my right hand redoubt with 1 brigade and launched 2 at the weaker left hand one, supported by 2 batteries.  He quickly found his supporting artillery masked and switched the guns to the other flank but with one thing and another, they barely fired a shot all day. In retrospect, Jeff should either have charged the redoubt or stood back at long rifle range but he advanced to close range and suffered heavily from cannister. 

I brought my 1st cavalry brigade on my right, hoping to outflank his masking force. He countered by bringing his light cavalry on his right to flank the other redoubt.  I deftly countered his counter by rolling low, bringing up my 2nd cavalry brigade, advancing across the table, falling up on his lead units with twice the men......and being routed by his ferocious Light Brigade!  (Rats!) 

On the other flank, I repulsed an attack by his infantry then counter attacked all along the line. His infantry managed to form  square but went disordered and broke. Aha!  Unfortunately, I  had rather forgotten about his Heavy Brigade. Its was Jeff's turn to deftly roll low, move onto the table, advance and charge into the rear of my cavalry and infantry. Oh dear! 
Out of the distant glare ride 5 small squadrons of British Heavy cavalry.

My lads put up a good fight but 1 battalion of infantry and a regiment of cavalry were broken while 1 more of each were driven back. It was some consolation that I finished off his last infantry battalion on that flank but there was nothing to stop Jeff's horsemen from over running the redoubt from the rear. In a desperate attempt to forestall a counterattack, Jeff let his cavalry pursue, breaking the 2nd infantry battalion from my 3rd Brigade and one of my Cossack units. They didn't go down without a fight, however, and by the time the dust settled, the Heavy Brigade was broken and its 5 regiments falling back as my last functioning battalion on that flank moved to take back the redoubt.   

British Guards advance on Russian line . 

On the other flank, things looked worse. A battalion of British guards routed one battalion and was closing in on one flank while a sole Russian Hussar regiment faced down a force of light cavalry, horse artillery and infantry on the other. However, its always darkest before the dawn and the combination of artillery and skirmish fire finally took its toll and with both battalions shaken, the Guards brigade was broken and had to retreat.  An impatient Jeff decided first to screen my cavalry with Highlanders while he used cavalry and horse artillery against the redoubt then turned some of the cavalry on my Hussars while sending another squadron against my last infantry unit. The Hussars were crushed and fled but they did enough damage to shake their opponents. Another squadron fell to artillery fire. The game hung in the balance, snake-eyes or box cars as my infantry hastily formed square and I would probably be broken and the redoubt over run. Like clockwork the soldiers ran to their places, formed square and saw off the cavalry. Minutes later their musket fire drove off the last squadron of British cavalry, breaking the brigade.

I seriously doubt that my last battalion could have driven off the horse artillery and highlanders but with both British cavalry brigades broken, the British couldn't win even if they did take the last redoubt.  Jeff offered to consider it a Russian victory but I'm content to consider it a Draw rescued from a  near total Russian defeat.

Black Powder was its usual choppy, wonky self but while at times I felt that my decisions and choices were pretty much irrelevant, there was no question that my rash counter attack on the right nearly cost me the game. If my troops hadn't "fought" (ie rolled) uncommonly well, (the Cossacks in particular scoring 4 or 5 hits on 5 dice several times, and my old veteran infantry managing to hang on for 2 turns and dealing out damage  after being charged in the rear), my right hand cavalry and infantry would have been routed and the redoubt taken  at almost no cost to Jeff.

I think I've played Black Powder often enough now to rate it a solid 3 out of 5 stars. A set that I will willingly play, but not my 1st choice.

An enjoyable afternoon of gaming when all is said and done.

Tuesday, January 11, 2011

Black Powder at Belmont. Battle Station replayed

This was the 3rd and final play through of this small scenario. It was a small game for any of these rules but it was obviously way too small for Black Powder. So perhaps not a fair use of the rules but a fair comment on their flexibility in terms of game size as the other rules coped well.  I didn't keep careful track but this may have actually taken less time than the 15 minute Morschauser game!

I used the stats from the book for the troops and rated both commanders as staff value 8. I decided to treat the squadron of cavalry as a small unit of marauders. They and the artillery did not count towards the force's break point.

Once again I kept the same battle plans for consistency sake. On the first turn, the Rebel general ordered the cavalry to move around the enemy flank and they galloped off a triple move. The infantry refused their order. The Yankee infantry concealed on the hill declined to open fire at the cavalry skirmishers so it was on to turn 2. I started with the pinning force and this time it obediently marched forward 2 turns, unlimbered the gun and opened fire on the waiting Union infantry inflicting disorder and 1 casualty. The flanking force of infantry refused its order so the cavalry couldn't be given an order either. The Union reserve was ordered to about face and prepare for the cavalry but declined. The regiment blocking the road opened fire and disordered the Confederate pinning infantry.

On the 3rd turn, the flanking force kicked into gear and advanced 3 turns while the horse gun galloped forward and unlimbered next to them.  I now ordered the cavalry to sweep around the hill and attack and they duly did so with another triple turn. As in the first game, dismounting would have been smarter but I decided to repeat the charge, this time into the rear of the Union reserve. The cavalry had penalties for being a small unit and in skirmish formation so had 3 dice for 4,5 or 6, the infantry was unable to conduct closing fire and had a penalty for being attacked in the rear so had 6 dice for 5 or 6. When the dust settled the infantry was unscathed and the cavalry was disordered and shaken. It duly failed the morale check and was removed from the table,

Cell phone snap of the Yankees repelling the rebel cavalry by sheer indifference  

On their turn, the reserve moved smartly forward into the breastwork and the Yankee infantry opened fire all along the line leaving the lead unit of the flanking force disordered with 2 casualties. The 2nd line passed through into close range and they and the horse artillery blasted the enemy. The Yanks returned fire, shaking the pinning force. Another volley from the Confederates saw the end Union unit shaken with an extra casualty, they failed morale and routed while the regiment blocking the road also went shaken. This meant the Union brigade was now broken and on their next move, the remaining units would be forced to retreat as the enemy were within 12". The road was open.

Of all the games, this one was the least interesting and exciting. The jerky neck or nothing movement resulting from the command rolls was not as satisfying to me as the steady march of troops as the game unfolded even though they ended up at about the same spots at about the same game move. I also found the combat less engaging despite getting similar results. The cavalry attack in particular felt odd, it seemed unlikely that the Yanks would watch the cavalry making a wide sweep around the hill without reacting and then be charged in the rear and calmly disperse the enemy. If they had of faced about, the result would have been the same or worse but it would have felt better. The fire combat is as jerky feeling as the movement,  lots of die rolling leading to dribbles of casualties or nothing and then suddenly a lucky roll and an enemy goes shaken and 1 die decides if they stand or rout.

So, the rules work and I'll play them when a game is offered but I'm not likely to use them for my own games.

I also spent some time today thinking about  the question of how common it was for troops retreating from combat to rally and return to the fray but more on that tomorrow.

Tuesday, August 24, 2010

Control vs Friction

The topic of how much control a Wargame General should have over his troops is a topic that has been on my mind recently.  In part this is because I am not fully satisfied with any of the rules I am regularly playing at the moment and have started fiddling again, and perhaps in part today, because I played 3 games of Black Powder on the weekend and we made a change before the last one (well drilled rule for our SYW infantry)  that very slightly increased control without making it absolute and I found that this increased my enjoyment of the game even though I lost.  (by the way,you can see pictures of the games which were hosted by Les using his 10mm Pendraken fellows and very fine fellows they are too when you get close enough to see them. (if any one is wondering, I am the one in the Battlegames shirt, Les included no pictures of himself but he did appear in my garden if you check the July archive )

There are few people who would seriously contend that in life, and especially in war, that things always happen the way the person in charge wants them to happen, when they want them to happen. The question is more one of how much of Clauswitz's friction to include, which methods to use to model it and how much influence or control to give the player. Now, just to be clear, I was a fairly early advocate of chaos and friction. By the mid 80's I was using card activation by brigade, command control rolls for subordinate commanders, and soon after variable movement distances. Oddly, although combat & morale was dice based, I made several attempts early on to increase the predictability.

Since generalization and categorization often makes discussion easier despite being occasionally unfair in detail, I am going to take a stab at breaking wargames into 2 broad categories which form a continuum with a large overlap which I will include as a third category in its own right.

  • CONTEST OF WILLS
  • RIDE THE WHIRLWIND
  • THE MIDDLE GROUND   

CONTEST OF WILLS.  These are games with maximum player control relying primarily on one's opponent to provide friction. We can start with  LittleWars: fixed moves, no control or activation roles, no dice used in combat. The only variables are the skill of the player with a 4.7" naval gun and the actions of his opponent. The Complete Brigadier took this even farther with dice-less calculated combat. More commonly these days, this sort of game would use fixed movement distances, alternate moves and no unit or command activation. Friction comes from your opponent's actions and from the use of dice in combat and sometimes morale. Volley & Bayonet springs to mind and its worth reading Frank Chadwick's  Game Design notes which are available on line.  The Venerable CHARGE! also falls into this category.

RIDE THE WHIRLWIND. These are games where the player has to struggle against the system as well as against the enemy. Usually there is some form of unit or command activation and combat and morale systems with a high random element and the potential for extreme results. Other common forms of friction are variable move lengths and card activation rather than a fixed turn sequence. The end result is  game where the player can usually make choices which maximize the chance of success when it comes to carrying out movement without being able to guarantee it and where combat can result in sudden and drastic turns of fortune leading to players always feeling a little on edge  and never really in control (hence riding the whirlwind). In extreme cases, it is usually possible though improbable that on a bad day, one could remove the enemy's army altogether and still have an attack fail to take its objective.   The French & Indian War version of my own With MacDuff rules developed in the early 90's would fall into this category as would many popular sets today such as Warmaster, Blitzkrieg Commander and similar games as well as some of the Two Fat Lardies games and others.

THE MIDDLE GROUND. These are games which include some or all of the elements of the Whirlwind but in such a way that either the friction is not decisive or a player can guarantee some level of success. The Sword & The Flame  springs to mind, the play sequence is card based and movement is variable based on throwing a number of dice but all units will be given a chance to move and even on a bad die roll, the unit will creep forward. Combat and morale are dice based but extreme results are rare and troop behavior predictable in broad terms, your British regulars might falter and they may break after heavy casualties but they won't run off the table screaming at the first sight of the enemy. Fire & Fury is another popular game that i would include here. There is an activation chart but a player can often arrange a guaranteed minimum result for well led  fresh troops. Combat results can vary and are based on a single die roll or the comparison of 2 single die rolls but there are upper and lower limits to the results that die roll can produce.  DBA is yet another popular system that would fall here. Oddly, while the F&IW version of the MacDuff makes it into the whirlwind category, the original version written for Colonial games would fit here since troops within the command range of the general did not have to take a control test, they only had to contend with variable moves.
In the end, the common thread of the Middle Ground is that there are variables to complicate things but if you remove the enemy army, your troops may struggle if they roll nothing but 1's, but they will get there eventually!

Its interesting now that I look at it, how many very persistently popular sets fall into the Middle Ground, TSATF, F&F and DBA all range in age from 15 to 25 years and are still widely played in more or less their original form despite minor changes.

I enjoy and play games that fall into all three categories but find that Contest of Wills type games often lack somewhat if no opponent is available and a large proportion of my games these days are played solo. Ride the Whirlwind games can be fun, especially if taken lightly but I do find them frustrating on days when the luck is consistently bad for either side and also find that the longer and more complicated the scenario, the more frustrating it is to have everythung spoiled by a couple of bad die rolls or card turns. By default this seems to point me back to the Middle Ground, an area I haven't spent much time in recently.  Something for me to contemplate as I prepare to refight Platea on the weekend.

Painting at last! Nothing like a game to inspire. The Belmont Volunteer Battery in training as Hants County arms itself against the threat in neighboring King's County. The glue is still drying on the bases as these Airfix and Imex  1/72nd prepare for battle against Jerry's rebels.


Tuesday, July 20, 2010

The Hazards of Black Powder in the Garden

Last Sunday 2 friends came by to distract me and we took advantage of a warm day to game under the Willow tree. The first game as mentioned in the last post was a small Russian Civil War action. Les had also brought along his 10mm tricorne fellows, just in case. Since Jerry had to leave after several leisurely hours of coffee, conversation and cossacks and day light and energy remained to us, we reset the table, reseated our selves (I'm becoming very fond of sitting through a game! ) and broke out Back Powder.
Plenty of fluids  to hand on a warm afternoon and no where for extraneous 'stuff' to go but the advantages of 10mm troops for a sit down game are obvious despite my difficulty in distinguishing 1 unit from another not to mention the occasional error in facing.....

The afternoon was somewhat more advanced however and a faint breeze had sprung up, sending the foam stonewall and hedge that marked the objective, tumbling across the table to be replaced by an unceremonious hunk of gravel, a constant barrage of Willow leaves occasionally obscured the lines of fire and Mystery the misplaced kennel now woodshed cat who can go days without being seen, interrupted us long enough to insist  upon being fed early. Most memorable was the invasion of a ferocious alien beast bigger than a man (well bigger than a 10mm man) with a smaller green worm impaled on its fangs. This creature, which can be seen crawling over the bayonets of one of the .....well, the not-Austrian regiments under Les's command (there are names for these countries but I have not yet learned them by heart.) right behind the colours,  spent a considerable while dodging bullets and dice as it sought a quite place for dinner.

Stout hearted lads, they didn't flinch at all.
 

Sunday, May 16, 2010

Like an Ox on the Run

Turn 1, The rebel advance guard shows up, the British deploy and score a hit,
 while the train rumbles on.

I was planning to write this game up but frankly it wasn't worth it so I'll let the captions tell the story and concentrate on comments on the rules. The original teaser is designed for much slower moving rules so I advanced the possible arrival times, essentially counting each turn as 3.

Turn 2. The main force arrives and surges across the table while the advance guard cowers. The shooting 1 die per Zulu unit proves deadly with the 1st company of the Black Watch with its flank exposed becoming disordered as well as suffering a hit and the Lancers also being disordered. Luckily for the Brits, the 2nd company was able to come up and cover.
Turn 3, the Zulu flankers miss a chance to come on and the Main Body refuses to charge the open flank. The Brits shuffle and the wagon train charges 3 moves forward. The 4.7" gun team was able to leave the table but since it is standing in for 3 wagons in the original, I just stopped in on the edge to let the Nku Khu have a go at it. On turn 4 the Zulu main body charges in and begins a prolonged melee while the flank guard rushes madly forward and manages to snipe a wagon into disorder. On the British half, the gun moves off table, 1 wagon moves to safety while the other gets screened and 1 unit breaks out of melee while the other falls back. 
The 4.7" heading for safety.

Black Powder is aimed at a table full of troops but since they include a low level Zulu War scenario with a handful of companies, I thought I'd give it a go. This is a rare outing for these troops, they haven't seem much action since I fell for 40mm glossy toy soldiers. I still like the old Britain's style and the Call To Arms Zulus are a good fit for them but having picked who was going on table, I'll admit to still not being keen on the larger new style plastics and metals. Since I am able to base my old Britain's (inc recasts) on 1" bases, they don't actually take up much more space than 28's and I could easily have fielded 20 man British units (2 deep)  if I'd had enough Zulus to face them. However, one of my old problems cropped up, the wagon train just takes up too much space so instead of the 8 wagons that the scenario calls for, I settled for 3.

Each side had 3 brigadiers plus a general. I was hoping that this would be enough to prevent 1 or 2 command rolls dominating the game. It didn't work. Even though my table is 6 ft by 8 ft, by using inches, the wagon train surged across the table too fast for the natives to have a chance to catch it. Having variable arrival only made it worse. In the event the game moved quickly but too quickly, it lacked the suspense and the build up to a dramatic finish which I am used to in this sort of scenario and I felt fairly superfluous, the whole thing seemed to hinge on 1 or 2 command rolls.

With hind sight, a rule saying that the oxen can only move once per turn might have helped the scenario develop but I doubt it, the moves are so long that the natives are in contact in no time then its all down to some dice rolling. The stop/start feel of the command system and random feel of the combat, especially, the paralyzing disorders was only exacerbated by the small number of brigades and the small numbers of units. If I had more Zulus or decided to fudge, disregarding looks, I would double the ranks on the Brits and halve all distances but double the number of companies on each side. This would make the rifle fire feel very short and make the artillery more or less irrelevant but might make the game flow better with command decisions seeming more important and with the game not balancing on the 1st couple of command rolls for the wagons.

However, after an enjoyable run through of the Alma river scenario today at Jeff's place using 15mm Nappy's as stand ins, I've had enough Black Powder for 1 week. The table is still set up though and I've just run through the 1st two turns of an original Colonial MacDuff game. Feels good so far but then this is the sort of thing they were written for..

Friday, May 14, 2010

Nku Khu War Unit Stats

Billy Russell observes an Nku Khu marriage ceremony officiated by Prince Kwannabe on the Royal Rock of Nmuphin when a messenger arrives with news of the approach of the British column.  
(54mm figures by A Call To Arms, W Britain, Trophy of Wales and unknown possibly Imperial?)


NKU KHU

Nku Khu Warriors: Musket & Spear  Melee: 6  Shoot: 1  Save 4+  Hits 3  Warband, Brave
Nku Khu Skirmishers: Musket,           Melee:5  Shoot: 2   Save 4+  Hits 2  Skirmishers
Rebels: Rifled Musket, Melee: 4  Shoot 2 Save 4+   Hits 2  Stubborn, Skirmishers, Sharp shooters

BRITISH


Highlanders: Rifled Musket  Melee 6  Shoot: 3  Save 4+ Hits 3  Steady, Stubborn, 1st Fire, Tough Fighters
Victoria Rifles: Rifled Musket Melee 6, Shoot 3, save 4+ Hits 3, Sharpshooters
New Durban Police: Rifled Musket Melee 6, Shoot 3, Save 4+, hits 3.
Volunteers: Rifled Muskets Melee 5, Shoot 3, Save 4, Hits 3 Unreliable, sharpshooters, Irregular skirmishers
17th Lancers: Lance, rifled carbine, Melee 8, Shoot 1, Save 4+  Hits 3 , Steady, Stubborn, Lancer
11th Hussars: Sabre, rifled carbine, Melee 8, Shoot 1, Save 4+ Hits 3, Steady, Stubborn
Rocket battery: Melee 1, Shooting:  2  Save 4+, Hits 1, pack animals, rocket min range 6" max 60"
* All British units may skirmish.

Special Rules:
Brave: Shaken units rally on 4+ if >12" from enemy,
Lancers: -2 to enemy save in melee.
Sharpshooters: may re-roll 1 miss each turn
Steady: Pass 1st Break Test of game
Stubborn: Re-rolled 1 failed save each time hit
Tough Fighters: Re-roll 1 missed melee die each turn
Unreliable: No move if orders roll = commanders CV.

Drums, Drums, the lion is not asleep tonight! Black Powder meets Britain's

Well, May is supposed to see the launch of the Lydian Campaign and it may happen yet, but while the Persians are just about ready, but the Lydians aren't. Meanwhile some discussions and a test game of Black Powder has me curious as to whether it can really give a decent  Colonial skirmish. My 54mm Sudan troops are all gone but for a few stragglers but I still have my handful of Nku Khu warriors (aka Zukus) and enough 1860's British troops to set some thing up. I was tempted to pick an old favorite but its time to try another as yet unplayed scenario from The Battlegames Table Top Teasers, Vol 1.     Now where in this mess of a 1/2 moved into house, are my  54's and what do I still have 5 or 6 years after their last game? Since the number of figures per unit doesn't really matter other than relative size and looks, I'll skimp a bit and use 6 or 8 Brits in a single line as a standard unit and 10 or so natives as a warband or 6 as skirmishers. OK, a planned OB from memory then, when I clear the table and break out the troops, we'll see what troops can actually  make it!


New Durban has enjoyed peace for a decade now (see New Durban Times) , but with peace has come an influx of settlers and pressure to expand the boundaries into Nku Khu Land. A new settlement on the Kenabekhazi River has led to some minor violence and threats and Fort Belmont has been established to over awe the natives. It is the end of May and to the normal resupply convoy, a 4.7" naval gun has been added to beef up the fort's defenses. The aging rebel, TopHat hears of it and convinces Prince Kwannabe to take steps to stop the gun from arriving.  

Nku Khu under  Prince Kwannabe CV 8

Advance Guard under: Top Hat CV 9
2 units of rebel skirmishers with rifled muskets
1 Nku Khu warband

Main Force under Dhatawayo CV 8
1 unit skirmishers with muskets
3 Nku Khu warbands

 Flanking Force under Ngoharonde CV 8
2 Nku Khu warbands

British under Colonel MacDuff CV9

(Picture lost)

Convoy escort under Major Dasher CV8
1 company Victoria Rifles
1 company Highlanders (Black Watch or Gordans)
1 company Naval Brigade
Wagon train.
1 troop of Lancers
(Picture lost)
Reserve at Schlafenplatz Farm under Major Livzere CV 8
1 company of local volunteers (skirmishers)
1 company ND Police
Rocket Battery  gun and crew
2 troops of Hussars

Tuesday, May 11, 2010

Battle of Grand Pre (final)

Since virtually all of the rebel side were my old troops, the Spanish being the only exception,  I took command of the Rebel army. Taking command 1/2 way through a battle is an awkward thing at the best of times and while I carefully listened to the reports of the morning's fight and of the enemy's likely positions and forces, the game was under way before I had a solid plan. When taking over a retreating army on the edge of the table with the enemy following,retreating a little farther seemed to make sense and so I did while pondering the geography and strategic aims as well as the possible rules which I was only noddingly familiar with. My commanders all served me well though as did the column bonus which  pretty much guarantees at least 1 move per turn if you're careful and are lucky enough to not have a Brigadier blunder. It took a while to get accustomed to visually gauging cm instead of inches. Neither a 12cm command radius nor a 6cm brigade integrity rule give much leeway.

On the southern flank, the Hessians advanced slowly up to the wood and Von Barner's light infantry began to trade fire with my riflemen.
The Brunswickers, in close order in the open, were swiftly getting the worst of the firefight so fixed bayonet and charged. The rifles evaded back into the woods and then came back to resume sniping. Jerry deployed Barner's as skirmishers along the edge of the woods and the firefight resumed until eventually with 2 hits, Jerry pulled them back to a safe place where they became stranded out of command and unable to screen my riflemen.

While this was going on, the Grenadiers reformed into columns and began to move past the wood with the dragoons on their flank. Suddenly a problem became apparent, the CV 7 Brigadier had trouble issuing 1 order let alone 2 or 3 and the Germans were too spread out to be controlled as a brigade. Jerry either had to keep trying to push ahead as best he could, choosing 1 unit each turn as the most important to move and occasionally getting lucky and moving several, or else stop for a turn or two to purposefully reform his brigade to make it easier to control. Having riflemen sniping from the flank, occasionally causing disorder or getting close enough to cause a -1 orders penalty did not help. The German dragoons (being subject to the 'marauder' rule that allows them to operate at any distnace from their Brigadier) advancing slowly up to the top of the hill but there they sat in column and waited for the infantry to catch up. It all seemed pretty minor at the time but in retrospect, those persistent riflemen may have been instrumental in preventing the grenadiers from advancing and cracking my center.

In the north, the French were prompt and appeared on Turn 2, the  earliest possible time,
(Lauzon's Legion marching on)
The remainder of the Hessians arrived from the south but the British were obviously bogged down and disorganized after having stormed the bridges as it was several turns before they finally showed up. By now, with a large Hessian force moving up from the south, the French on hand and no British in sight, I was starting to formulate a plan and started moving troops to hold an 'L' shaped defensive line up the road and then refused back across a line of hills with the cavalry on my right. Delegating   some units of the left and center brigades to act as a rearguard, I started moving the rest in column to my new position and soon found myself in the same position as Jerry, unable to move scattered forces efficiently. In my case, my personal figure was soon at hand to control the troops forming the new refused flank but before I could pull in my rearguard, the British appeared and I had no choice but to turn and fight.
.(British Grenadiers and Light Infantry, supported by artillery attack the rearguard of the center brigade)

(Jerry contemplates the march of the Hessians while my cavalry heads for the hills.)
At last the remaining British forces marched on. I smugly pointed my cannon at his march columns only to find that my artillery was only allowed to fire at very conservative ranges. Forty eight inches may seem like a substantial shot but 48 cm doesn't get you far! No problem I thought, he'll be here soon, but as I waited and waited, there were more command control problems, a CV 7 general who couldn't roll low to save his life, and a command that was soon scattered as the light infantry deployed on one flank. Eventually, I began to drag my cannon forward and opened a desultory fire.

 Fighting was now general all along the line with the British Light Infantry charging into a woods full of militia who held turn after turn, giving as good as they got (thanks to the cover of the woods and some hot dice).
 (The red disc indicates disorder, the little green die tracks hits)
Eventually the militia would break and run but the victorious light infantry were shaken and not fit to press the attack. By then, the rest of the brigade had turned and taking advantage of an serendipitous  rear slope position, launched a counter attack on the rest of the British central brigade. One battalion was halted by fierce canister fire and eventually thrown back shaken to rally in dead ground but the other battalion supported by artillery surprised the grenadiers with a  tremendous first fire. The grenadiers would make a fight of it but the end was almost inevitable, eventually they broke and ran and the remains of the center column was forced to beat a hasty retreat.
  When I say the grenadiers were 'shaken' I mean it! By now, the light was failing.
To the south, the Hessian line brigade was pressing forward through a narrow defile defended by 1 battalion, a fierce fire fight resulted in the Americans falling back only to be replaced by a fresh unit which broke the leading Hessian regiment and then braced to receive the rest. On the heights, my cavalry had eventually made their way onto the high ground, just failing to catch the Hessian cavalry still in march column. My 1st squadron of Lauzon Legion Hussars charged supported by the second squadron and the American dragoons. A handful of 1's and 2's rolled out to my great alarm, made worse by the handful of disordering 6's leading the enemy's roll. Luckily I saved enough hits that the supports brought it to a tie. In the second round the luck changed and the Dragoons, narrowly defeated, rolled a 3 for morale and broke. My battered squadron fell back while the fresh ones  maneuvered around the flank of the Hessian Grenadiers.
Finally, in the south, I became impatient and launched the 3rd NY and the Green Mountain Boys in a counter attack.
(The counter attack begins. The British have a unit in column on the road, another behind them also in column, light infantry in skirmish order to the flank and artillery behind.)
(The British barely had time to form line before being crushed by the rebel fire and broken.) 
Pressing forward, with the rest of the brigade moving up in support, my infantry turned on the Loyalist light infantry and routed them.  With both British brigades broken and both of his remaining Hessian brigades in sticky situations, Jerry decided it was time to call off the attack and fall back to the river.

______________________________________________________________________________

So that was our first 20mm cm option AWI game. How did it go? Well, despite a cheering win, I thought it was great!  The scale of the action and units on that size table meant that there were no flanks secured on table edges, many of the smaller AWI battles in the northern campaigns involved small forces and large distances and this captured that feel. Not only that, but we were able to handle 4 brigades per side, totaling a score of units each, playing a set of rules we were novices at, in a complicated situation, and play the game to a conclusion in a long afternoon with breaks, probably 5 hours of actual play time including looking up rules, maybe less, and I'm not sure how many turns, my guess would be 10. With 2 or 3 experienced players a side, we could easily have knocked it off in 3 hours.

After my first small tests, I was concerned that the order mechanism would control the game but here, with multiple commanders and a better feel for the use of columns, brigade orders and initiative, I felt that despite occasional failures, over all, it was my decisions that mattered, not the die rolls and my battle plan unfolded as I envisaged it, the command occasionally slowing things rather than stopping them. The major impediment came from the enemy, not the rules.

There are still some process quirks that irritate me but since it is not a process oriented set of rules and because they seem to give the right feel and results, I am willing to over look them. (for the curious, the main one is that I am uncomfortable with the way the attacker can always get first shot, this does reward aggressive play and mirrors the early 18thC British tactic quite well. I will content myself by observing that it may reflect a pyschological edge for the attacker and that the combat is really simultaneous despite the igougo game mechanism and so doesn't necessarily mean what it appears to. I also felt that the artillery might have had a slightly longer range, especially in a theater where ammunition might be less of a problem than in North America!

Tactical observations when using Black Powder, esp with the cm scale on a big table:
a) obey the principles of war, concentration, economy of force, surprise etc
b) keep your brigades properly formed so that the Brigadier can control them
c) if you want to march substantial distances, do so in column but deploy into line where it is still safe to do so, don't gamble on waiting for the last minute,
d) skirmishers can cause serious delay and disorder in the enemy but don't expect to break any enemy units with their fire, well, unless they stand still and let them selves be sniped at for a protracted while,
e) keep a reserve when possible,
f) lastly, if you are going to attack, attack! don't f**t around, 'slap, don't tickle' is the expression I think.Take the casualties and inflict them and have a reserve on hand. If you are defending or meaning to annoy the enemy, then sure, a little long range fire is ok but don't throw away troops in close firefights or charges unless there is a good reason.

A thoroughly enjoyed game  and I foresee more Black Powder games to come.

Monday, May 10, 2010

The Battle of Grand Pre (The Set Up)


On Sunday 9 May, I went over to my friend Jerry's for a game of Black Powder. For the last decade, we have been periodically indulging a largely narrative campaign set in a slightly alternate Nova Scotia at the time of the American Revolution. (By narrative campaign, I mean that what happens in between battles has been largely though not entirely, determined by discussion.)

The campaign was inspired partly by the limited historical armed rebellion here (http://en.wikipedia.org/wiki/Jonathan_Eddy) and partly by a desire to fight some games on home terrain (ie where we can walk the ground).   To make it work, we supposed a slightly more populous and developed Nova Scotia but decided not to take the alternate history aspect too seriously as the main goal was to play some fun games with what figures we had available or felt like painting. The original battles were played in 54mm  and then a series of 40 mm games were played in the same setting and following on from the 54mm games but which Jerry largely missed out on. These games all took place in Halifax and Hants West Counties. Two or so years ago, I dug out my 20mm (1/72) plastic AWI, armies painted in the 80's, Jerry added some of his own and King's County became the setting for a series of 20mm games.

Life has been busy and Jerry and I haven't been able to game together as often as we would like so I passed him my troops and he has been playing some solo games, including some map moves. The last game he played, saw the Rebels with their Americans and French allies, defending a line along the Gaspereau River with their backs to Grand Pre (of Evangaline fame) and Wolfville, against a British and Hessian force advancing from Windsor. The Hessians attacked the Wallbrook bridge and outflanked the rebel line. After fierce fighting, a general retreat took place all along the line. At a vital road junction about 3 km to the rear, the rebels turned to fight again. This is the point where Sunday's battle begins (See previous post). To avoid complications in translations between rule sets as well as tending towards making a better game, any units not deemed destroyed after the morning's fight were miraculously restored  to full strength (with hind sight we could have assessed 1 hit on each unit that had taken losses earlier since one cannot rally off the last hit during a battle). Generally the stats were as used for the sample Saratoga game but the rebels had their Melee dice reduced by 1. Command Values established earlier in the campaign and used in BKC variant games were mapped directly into BP.

A satellite view of the battlefield can be seen on google maps here: Grand Pre battlefield , but the table was terra-formed by Jerry after having walked the ground. Using cm and a 6x10ft table gave us an area roughly 3 km x 2 km to fight over.

(Note on pictures: Once again, I forgot my camera at home and had to rely on my cell phone. Jerry's occasional gaming loft manages to make my games room look remarkably well lit, this only got worse as the sun sank. Faced with poor quality pictures or none at all I have decided to share the best of the bad lot so you can get some idea of the terrain and how the troops fit into it. )

OVERVIEW from the North-East.
Note height of hills compared to 20mm figures. Here is a picture of a similar area a few km to the south


Since the whole campaign has been casually conducted, and the game was an opportunity grabbed, I don't have as much detailed information at my hand as I would like, for example, I don't have a complete list of units and commanders. My first 20mm armies began life with the plan of being used with a precursor of the original MacDuff rules  and were going to have a charge like organization of 3 12 man companies but by the time Peter Douglas and I played the 1st game, we had settled on Konig Krieg as rules. I later used these armies to develop the original version of Morschauser Meets MacDuff and  Jerry was working on an 18thC version of BKC when Black Powder came out. It seemed like a good match so we decided to give it a try using the optional cm scale. The battalions we were using were largely based 4 figures on a 1.5" square base (iir), (loose files indeed) with 3 or occasionally 4 stands per unit.

The rebel army was composed of 3 brigades:

  •  Left Brigade: CV 9 commander with 3 battalions of regulars, 2 guns and a battalion of militia, (seen in picture in 1st post)
  • Center Brigade: CV 8 commander  with 3 battalions of regulars, 2 guns and a battalion of militia,
  • Right Brigade: CV 7 commander with 3 battalions and a detachment of riflemen, the attached militia having been destroyed earlier in the day. 
  • Independent squadron of dragoons reporting directly to the CV8 commander. 

  • Off table to the north was a brigade of French and Spanish troops under a CV9 commander composed of 2 squadron's of Lauzon's Hussars, a battle of Legion infantry, a gun and a battalion of Spanish. These had to roll to appear and were in danger of being cut off if  the Grand Pre cross road was taken by the British.

The King's troops began with a Hessian Brigade deployed on the Southern table edge:
  • 1st Hessian : CV 7 commander, 3 grenadier battalions, 1 Lt Infantry battalion, 1 Dragoon Squadron
 and the rest of the British troops  dicing for arrival at various road exit points depending on which bridge they had crossed:
  • 2nd Hessian (south): CV8? commander with 3 battalions of line, 2 guns and a jaeger battalion
  • 1st British ((south-east): CV8? commander with a battalion of Grenadiers, a battalion of Lt Infantry and 2 guns.
  • 2nd British (north-east): CV 7 commander with 2 line battalions, a loyalist lt infantry battalion, 2 guns and a squadron of Dragoons as well as the army commander CV8
  • There was also a detached battalion which had landed on the Grand Pre peninsula and were following the French.

The next post will recount the over all battle, some particular events of interest and comments on BP, how it played, how it affected the game, command decisions etc.

Sunday, May 9, 2010

Battle of Grand Pre 1778

Rebel forces retreat onto the table at the start of the game. 
The Nova Scotian War of Independence in 1/72 plastic. A Black Powder game. Details in a day or so.

Saturday, April 10, 2010

BWMS - Black Powder

The 2nd run through of the sample game from Don Featherstone's Battles With Model Soldiers (see 9 April post) was fought using Black Powder. Coincidently this was also my 2nd game with these rules, my first solo one. I hoped that the combination of alternate moves with the uncertainty of the command rolls would make this a good set of solo rules. They are, but, while I like saving throws enough when I'm countering an opponent's fire or anxiously watching  him try to counter mine, not for the first time, I found saving throws tedious when I'm playing against myself, possibly its due to not knowing who to cheer for. Conceptually the Red army was supposed to be the "good  guys" and the Blue army the "bad guys" but I've grown very attached to my Boys in Blue.

I declared all units to be standard sized and used the generic template for stats except that I gave the cavalry the  marauder rule which allows them to operate on their own as they did in the original battle, and gave the infantry the square ability and first fire. Each side had just 1 CV 8 general.

The game got off to a slow start with both commanders just squeaking out 1 move for all units.  On the 2nd move things began to be interesting. The US general decided on a brigade order to the infantry and guns to be followed by a separate order to the cavalry. The 1st order was for the infantry to advance and wheel left, the gun was to move to the left flank. rattle rattle, roll....boxcars! A Blunder! Another roll and a quick check of the chart and yes all units move to their right! ("Hayfoot, Strawfoot", came to mind followed by the voice of the old drill sergeant "YOUR OTHER LEFT!! sir" ). This ended the US turn leaving the cavalry stranded. The British, calmly advanced 1 move again.

On the 3rd move the US infantry and gun advanced in the proper direction and opened fire counting the target as not a clear shot due to the stone wall. The Dragoons, bemused perhaps by all this marching and counter marching refused any and all orders. The infantry and artillery fire succeeded, after saves,  in inflicting 1 hit a piece on the limbered gun and the 49th Foot but more importantly, a 6 had thrown the gun into disorder. This meant it was immobilized, no doubt held up by the need to cut the traces to a dead lead horse.  The rest of the British units plodded forward 1 move and opened fire with minimal effect.

On the 4th move, The Dragoons finally shook out and moved left, the infantry and guns stood and fired to little effect. The Bengal Horse Artillery was now clear to go but upon being ordered to unlimber, refused, ending the turn. Belatedly, I remembered that limbered artillery and march columns always get at least 1 action unless there is  a blunder. I went back and unlimbered it and they fired a salvo into the ground. The infantry fire on the other hand now disordered the 2nd Infantry.

On the 5th move the cavalry  units finally clashed while the firefight continued. With 8 dice a side and a charge bonus meaning 3 or better to hit casualties were steep despite some good saving throws. The GG Bodyguard suffered worse with 4 hits and lost the melee, shaken with an excess casualty. A mediocre morale throw of 5 on 2 dice was not quite enough to stop them from breaking and fleeing the field while the US Dragoons swept forward. (an after combat bonus move referred  to as a "sweeping advance".)  It was now the turn of the  British to blunder and an order to the Buffs to face the cavalry became an advance instead, resting their flank on the woods.  (not as dumb as they look). This ended movement but the British fire inflicted another hit on the 2nd Infantry leaving them disordered and shaken.
(this is the point at which the batteries in my camera gave out)
On the 6th turn the 3rd infantry and the gun used their initiative to move forward into close range, then failed to hit anything. The 2nd fired at reduced effect but were lucky and disordered the Buffs, delaying any charge. The cavalry,ordered to charge the guns but doubtless too tired to gallop anymore but too canny to get too close made 1 move and stopped, just beyond 12" from the gun, in other words, just too far away to allow the gun an automatic reaction during the initiative phase. The fire from the 2nd infantry and the US artillery disordered both British regiments. This left the gun as the only unit eligible to receive an order, of course since they had refused every other order, they saw no reason to obey now and failed to face the cavalry and also failed to hit anything. The disordered Young Buffs, however,  poured in a heavy fire routing the 2nd infantry.
(this is the point at which I remembered my cell phone camera)

On turn 7, the 3rd Infantry wheeled back to protect its flank left open by the rout of the 2nd. The cavalry gleefully accepted an order  to charge the flank of the gun, over running it and continuing on to roll up the 49th from behind their flank.  The Young Buffs faded back into the woods and were allowed to go.


Round 2 to the US.
Tomorrow, or maybe Monday, With MacDuff To the Frontier meets Featherstone.

Sunday, February 28, 2010

You can't always get what you want

I did manage one evening at home, but I didn't have time to arrange the Boating Adventure so that will have to wait now till after Cold Wars.  However, my friend Jerry dropped over to collect his copy of Black Powder which had arrived on Thursday (several of us took advantage of the cheap amazon.ca price to place a group order to get free shipping). Since I was in the midst of sorting the NQSYW figures to take to Cold Wars, it made sense to divide them up and play a few turns to get a feel for the rules. Each Charge! company became a Black Powder battalion  etc. Since it was a quick trial to get the feel, we kept it very simple using CV8 commanders and basic troops from the list of templates.

Once again I did not have my camera to hand but instead my new HTC Hero smart phone.  Not so good at dimly lit conditions (and my lighting is atrocious at the moment) and hard to brace. I'll have to check out settings, practice, and make sure I have my camera at Cold Wars!     Meanwhile, imagine a quick water colour sketch giving a broad sweeping view of the action rather than a detailed mural.

On the left under General Legge, we have the French, on their right, a "Brigade" composed of 1 Squadron each of Fitzjames and the Colonel General's Regiment, a gun and 2 battalions of infantry (Picardy and de Roi iir), and on their left, a "Brigade" composed of 1 squadron each of  Orleans and  Lanciers de Saxe, 1 guns, a battalion of Chasseurs and 2 battalions of infantry (La Reine and Languedoc).


    On the right commanded by the venerable MacDuff, we have the army of Rosmark, on their left a "Brigade" with 2 squadrons of the Crown Prince Dragoons, a gun,  a battalion of Prince Michael Pandours and the Grenadiers and 1st Battalion of MacDuff's Fusiliers. On their right a "Brigade"composed of 2 squadrons of Moravian Hussars, a guns and the 2nd and 3rd battalions of MacDuff's Fusilers.

The game began by a swift advance by the French right which deployed in a firing line around a stone house. This was followed by a tentative creeping forward of 2 march columns and the limbered gun on their left. An opening salvo from their gun did no damage. The Rosmarkians (Rosmarkers? Rosses?) advanced and deployed along the line. An order to the Hussars to sweep forward and ride over the limbered enemy gun  resulted in a lengthy, stirring speech by their Colonel followed by a leisurely walk-march to the top of the hill. The guns and skirmishers opened fire causing some damage to the enemy.

On the 2nd turn the French right was all set to creep forward when we realized that the Pandours were within 12" which was sufficient to cause them all to pause and rethink the matter. (ie the minus one made it a failed Brigade order). On their left, the infantry formed attack column, the gun deployed and the cavalry and skirmishers came up into line. The French fire disordered the Pandours but did no other damage.  

MacDuff's 1st battalion moved forward into line with the Pandours, supported by the Grenadiers but the 2nd and 3rd battalions mistook the order to advance and open fire as an order to return to camp and light their fires. (Blunder, retire 2 moves) Since it was a test game and they were 23" from the edge, we halted them there instead of rolling to come back on. The artillery, Pandours and MacDuff's opened fire causing several casualties and disordering 2 French battalions. The yellow Hussars drove back and disordered the lancers but declined to pursue into the enemy cavalry.      

On the 3rd turn, the French had 4 units within initiative range, but 2 were disordered and unable to move.  La Reine charged into MacDuff's who blasted them with 3 hits and a disorder. The Orleans cavalry charged the 1st Squadron of Hussars who countercharged, leaving their supports behind (luckily as it turned out). The French fire disordered the poor Pandours again, (apparently the red pants make a good target), and put a hit on one gun. The melee was a hard fought draw with fantastic saving throws but the shaken La Reine had to check morale and fell back. The Hussars were ridden over by their heavier enemy and were dispersed but Orleans were disordered and unable to pursue. On the Rosmark turn, the remaining Hussars charged the disorderd Orleans while the 1st Battalion of MacDuff's moved forward and poured another close range volley into the enemy while the gun pounded the shaken column. Orleans were no match for the fresh hussars and routed, sweeping away the supporting gun and skirmishers. The shaken column also took more hits and broke. At this point, with 4 French units broken and 2 more shaken vs 1 broken Rosmark unit, we called the game so I could continue packing.  

Clouds of gunsmoke blur the view even more.
On the whole, I was very pleased with the rules though I enjoyed reading the book enough to have made it a worthwhile purchase anyway. They moved quickly, were flexible, easily accomodated the armies being assembled for a different set of rules, gave what felt like reasonable results and had a good "fun" element of risk, unpredictability and chaos to manage.   Considering that I had only read the rules over once the previous day and that Jerry hadn't even had the chance to do that but had only perused the on line Quick Reference sheet, it was impressive that we could get playing that quickly and have the game move along smoothly with quick stops to confirm rules as we went. (Having played BKC & Warhamster helped despite the differences). Even better, despite the new age  mechanisms and no casualty removal,  (I laid figures down to mark hits and used casualty figures to indicate disorder) they had an old school feel. (Actually, they reminded me of an improved version of some of my own rules in feel and philosophy though not in mechanism.)

Recommended.