Click on pictures for larger size. Depending on your machine, you can use your figures to enlarge or shrink the picture, or there may be a '+' on the picture which will expand again and allow you to slide the large picture to see all of it. Click on the header arrow pointing left to go back to the regular screen.

Showing posts with label stout hearts. Show all posts

Monday, March 18, 2024

Bridgehead!

Even Prince Micheal can't be everywhere at once but the skirmishes and battles go on with or without him.

Scouts had reported that a party of Saxons had seized the ponte caeruleo and the beacon fires had been lit to call for reinforcements. The local auxilia had been first on the scene and sacrificed themselves to prevent the Saxons from breaking out before the legionary cohorts arrived. They put up a desperate fight and held until reinforcements arrived, but if these had been any later, they would have been too late.
(see previous post)

With only 1/2 their army on hand, it was the Saxons who were in a tight spot now, but it was Helgin and his Hearthguard who led the defence, and reinforcements were not far off.


The Saxons held the first Roman attack but took heavy losses and were forced to fall back towards the bridge and their reinforcements.  


A third attack was held as the sun sank in the sky, but with one flank exposed, and his huscarles slain, Helgin ordered one last retreat, back to the bridge for a last stand before night ended the fighting.


The Romans took a moment to order their line then the trumpets sounded!


As the Roman cavalry made their 4th charge of the day, the Saxon line broke, leaving the wounded Helgin and his standard bearer to greet the Roman commander.

Notes: This was of course the 3rd run on this OHW scenario using the latest tweak of my simple rules for my Prince Valiant figures, the ones I intend to use at Huzzah! 2024 in May.  One or two more games and I'll be ready to share them.


Sunday, October 30, 2022

If You Go Down To The Woods Today....

The Adventures of Prince Micheal: Episode 25: 

Be prepared for a big surprise!

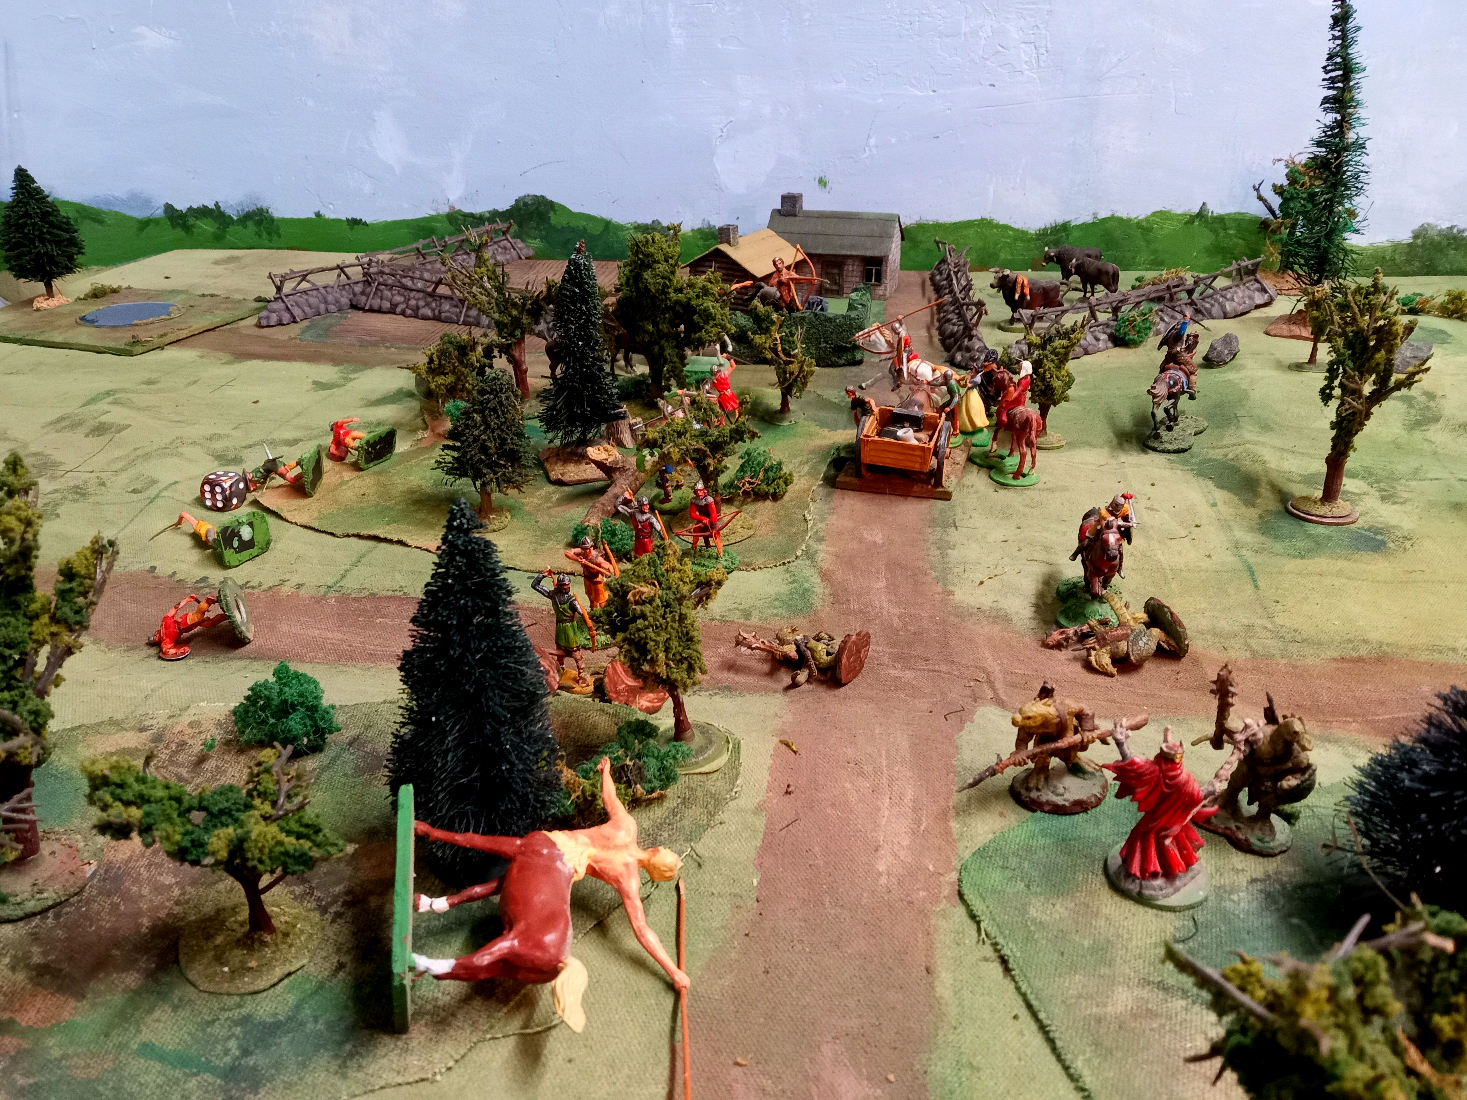
As the month of October drew towards a close, Prince Micheal found himself assigned to escort his Aunt Kathleen home after an extended visit.  They set out on a cool but sunny October morning, two of his companions,  four archers, a wagon, 8 infantrymen as a rearguard and a mounted rider scouting ahead. 


(Click on the pictures to see an enlarged version.)

All had been quiet until the scout was surprised by a troop of Centaurs emerging from the woods ahead of him, followed by the sound of battle from behind him. With the way ahead and behind him blocked, he chose to try to out run the arrows and warn the rear of the column. He nearly made it......

The sudden appearance of armed lizardmen in the woods startled Lady Katherine whose horse bolted. The brave Sir Jeffery was soon in hot pursuit leaving only Prince Micheal and one knight to hold off three times their number of lizards. They decided to exercise their discretion. 

Hardly had the fray begun when a party of centaurs appeared from the woods behind the column, acompanied by woman in purple riding a giant Siamese tiger! As the Centaurs' arrows began to clatter on their armour, the Purple witch rose up waved her hands and lightning flashed out. Unable to reply, the soldiers fell back into the woods.  


For a moment, the whole force, faced with such unusal and terrifying enemies, like characters from an old folk tale, wavered but the example of their bold Prince, the cover of the woods and the sudden appearance of a huge Woodmen who called encouragements to them as he appeared out of the depths of the woods. 

With the line steadied, the archers emerged from the woods to get a clear shot at the Lizards, supported by Prince Micheal, the Woodsmen and the remains of the escort. In the rear, the infantry lurked in the woods, sheltered from the Centaurs missiles while Brave Sir Jeffrey (who had been first to the rear as usual)  stood guard over the Princess. 


The archers peppered the Lizards with arrows but it wasn't enough. The Shamen leading the Lizardmen summoned evil images and thoughts and hurled them at the knights. The Prince stood firm but the rest were cowed and fell back, even the brave forester found himeself unable to withstand such magic. The Prince, determined to end this or die trying, pricked his charger and bellowed a challenge. As he hewed the first Lizardman, the rest suddenly broke, not even the old Shaman could hold them.  

With the flight of the Lizard warriors, it was over. There were not enough Centaurs remaining to tackle the whole of  escort supported by their new friends and as quick as they came, they were gone, fadingback into the woods.   Back by the farm, the Lady of the Glade  treated the wounded and calmed the Lady Katherine while Michael's men regrouped and started preparing to camp for the night.


Note: This game was played using the current version of 'Stout Hearts and Willing Swords' with a few hurriedly written fantasy rules. These will probably be adjusted and expanded.

Saturday, May 2, 2020

(Updated ) Reflections on Games "In the Days of King Arthur"

This week's focus on my Elastolin Prince Valiant figures has reminded me of three things.

Firstly, I get a great deal of pleasure from my Prince Valiant figures, converting and painting them,  playing games with them, and blogging the games.

Secondly, I don't really enjoy playing the sort of semi-roleplaying  game that our hobby calls 'skirmish' games.  I do quite like games based around what was called petite guerre in the 18thC, raids, ambushes and the like but played with simple, fast play rules and a half dozen or so small units rather than a few individuals.

A game of Grant's 'Wagontrain '  (my name)  scenario using one page rules called  Castle Dangerous that I wrote 2 years ago for this game with friends.

Thirdly, I blogged this same discussion last fall (see Battle by Lamplight), and reached the same conclusion that I reached last week.  The simple rules that I had come up two years ago for a one off Prince Valiant game with friends, based around 4 figure cavalry/archer and 8 figure infantry units plus characters, were about right for what I want to do and that's what I used for the Saxon counterattack in the previous post.
 
 Battle by Lamplight fought last September.
The rules need a new name since, due to a shortage of inspiration at the time, I called them  "Castle Dangerous". I like it but that was an historical fiction novel by Sir Walter Scott, set in 13thC  Scotland, and had nothing to do with Dark Age Britain or the world of Hal Foster's Prince Valiant.  They also need to be flushed out to cover more than the basics and, if I can find something I like better, I need an effective replacement for the armour saves that I initially used. 

The initial quick reference for a proposed merged version of the rules is now available for the curious. I've decided to use just the first part of the first name: Stout Hearts

But now its time to get back to the French Revolution and maybe some 19thC Colonial action.

Monday, September 2, 2013

Swords Behind the Scenes

 Where to begin? Lets start with the changes to Stout Hearts. The first 12 Prince Michael games were all played using Medieval Mayhem by Rob Dean with input from yours truly, (See Battlegames Issue 6). This set featured variable length moves, shooting during enemy movement, opposed die roll combat with armour saves, and a bunch of morale tests.  

I was a proponent of variable length moves from the early 80's until recently but have now gone off them. I'll still use them, I'm just not a big fan anymore but that's another post someday. I like the missile fire and the melee is ok but occasionally tedious as each pair of figures fights in serial fashion with 2 rolls each time. The morale tests are what I never really cared for never the less the rule work well enough that I was planning to continue using them. 

That changed with Rattle of Dice which I enjoyed enough that I did up an ancient/medieval/fantasy version with 1 die per 4 figures whether shooting or meleeing with armour being a modifier and heroes getting extra dice. It appeared to work just fine in early tests until it came to duels between heroes. While not inevitable the mechanism tended to leave one hero dead and the other badly wounded.  Rather than having a separate mechanism for duels, I switched to opposed die rolls for melee while leaving everything else the same. This was an inconsistency which is often a problem and sure enough, during the first game, I kept accidentally reverting to dicing for each shooter instead of firing by group. I needed to either revert to group melee or switch shooting over. Since I had decided that the games were about as big as I wanted to get, going with single figure combat made sense but to prevent missile fire from being too deadly, I needed to do a better job of capturing the effect of armour. Rather than being clever, I fell back on armour saves which I associate with Don Featherstone but which many will associate with the much later Warhammer. As it turns out the saves made melee better as well but the advantages over using Mayhem with magic and heroic add-ons have become trivial. None the less the rules work the way I want and the work is done.

The Saxon raiders advancing quickly in loose order before stopping to form shieldwall for the final approach.

Something else I wasn't happy with was the shield wall rule which had been in and then out, finally becoming a modifier which basically assumed all "heavy" infantry would be in shieldwall.  That wasn't really what I wanted and anyway during the first game I kept forgetting that rule too!  So I reinstated a shield wall rule for heavy infantry in base to base contact.

As usual, once I started tinkering I adjusted various details and modified the one morale test merely to be consistent with Rattle so as to ease brain strain when I switch back and forth.

So much for rules.  The post containing the rules has been updated. When I'm sure they are stable I'll put them into dcument form for download.
______________________________________________________________

Last game I made the 4 fur kilt, bare chest Saxons elite giving them a plus in combat and morale but I found myself calling them berserkers as I was deploying them and then wanted to show the resilience to wounds which that state seemed to confer. Hero status seemed to be just the thing and its lucky I did. The 2 slingers at the wall got off 2 shots at medium range and 2 more while being charged needing 5 or 6 to hit. They hit all 4 times! Then they proceeded to win several melees against the berserkers despite being classed as non-fighters! 

It was definitely  a game for non-average die rolls  but luckily spread evenly between the 2 sides. For example one of the Saxon archers, the one that can be seen in some photos sneaking into the back of the farm, also never missed  a shot, killing 2 farmhands and 2 soldiers. The 3rd soldier caught the arrow on his shield then whacked the archer over the head. His helmet saved him and he nimbly skipped back to safety. I may have to name and promote him for the next game. Prince Michael and his knights were the opposite, their dice were loaded with 1's and 2's. Only their heavy armour kept them alive long enough to eventually do some damage.

Look out Princess! If the initative switches the big bad Saxon will close the extra inch and catch you!

Now the Snow White thing, that wasn't actually planned. Since I was re-using the Hook's Farm terrain I was going to leave the church in place but discovered that the only 40mm priests I have are armed with muskets. Converting and painting one has now been added to my todo list, I suppose I'll need a celtic tonsure. A cottage or village with peasants seemed a fair substitute but while I have a number of fine ladies, I have a distinct lack of medieval peasants painted up and those were already taken by the villa. More for the todo list!  The next best thing was  a witch or similar. I ended up making a small deck of cards with the Queen of Spades indicating an evil witch with a grudge against the centurion and/or Michael, the Queen of Hearts would be a good witch opposed to the Saxons while the Queen of diamonds would indicate a lady worth ransom money if captured. Two jokers were included to allow for loss of time while the Saxons tried to figure out who the character was.  When I went to take one of my newly painted ladies/witches my eye fell on the Snow White figure with her little bluebird, I looked at the cottage and the woods, and, well, I was sunk. I would have swapped her out if revealed to be an evil witch but dice and cards can't be trusted and the story developed as told.

_________________________________________________________________

A quick look ahead at Prince Michael.  I have a few more figures to convert/paint for the current setting but I am nearly done. I do need to add more civilians, especially peasant types for which I intend to supplement the remaining Elastolin kits with 40mm Prince August women and peasants. There are also a handful of fantasy figures. My new target date for the enchanted forest game will be New Year's or thereabouts. 

I've never been happy about using Huns in Britain, even when trying to call them Sarmatians or Picts and they will now be dismissed and allowed to return home. My initial thought was to raise a Hun army to allow Michael to slip over the channel and emulate Val's exploits against the Huns but there is something else that has been haunting my dreams like a white elephant.


Oh, wait, it IS a white elephant. Prince Valiant took various trips to the Med (not to mention North America where he met some Prince August Skraelings), so I see no reason why Prince Michael can't journey to the Black Sea and encounter Persians. I just need a Persian hero General with a small body guard of Knights (clibinari), some infantry, some Hun mercenaries, and, of course, an elephant!


Monday, August 5, 2013

A Behind the Scenes Look at Episode 13

This game was based on Betrayal, Scenario #43 from CS Grant's Scenarios for Wargamers.  As usual, forces, terrain and special rules were adapted to my resources and habits. 

(My apologies for repeating the same photos with different captions, with over 2,000 photos loaded onto my blog I was beginning to worry about reaching my free limit but I see today that there is still lots of room so next time I won't delete the extras.)

It felt a bit sparse fielding 4 infantry or 2 cavalry per "unit" but I had to hurriedly add 1/2 dozen figures and turn almost all of Prince Michael's British infantry over to the raiders to meet even that. As it turns out it was enough but I may need to add Urien of Rheged as an enemy to give a more comfortable home for the non-barbarian, non-Roman figures when I need to balance forces out.  

The designation of figures was made largely by looking at them and cross referencing past games as well as the scenarios.  The garrison was dressed in Roman fashion despite being native Briton's a useful and romantic if improbable conceit. The gate mercenaries were supposed to be Saxons but when troops ran out I included some Romans, including trumpet blowers, and hoped the allegiance roll would be friendly. Since the lone Irregular Celt stood out from all other parties and is a good deal bulkier than the average Elastolin, I made him a minor hero and put him on 1 gate. 
The rest of the garrison consisted of 4 infantry units, 1 in the tower, 1 in the "market" next to the wall on the right and 2 off table. The cavalry, consisting of a heavily armoured Sir Bors and his Elite squire, and the Garrison commander-Hero were also in the tower. Grant mentions artillery in the tower so I allowed the 2 catapult crews to sleep in the towers underneath their engines, awakening at the same time as other garrison troops. The infantry and cavalry were all classed as heavily armoured, the infantry having javelins (or throwing spears if you prefer)

The attackers were divided into 4 groups. In the book the advance parties are composed of 1 unit each of light infantry and light cavalry. I haven't done more Pictish cavalry yet (the main reason for their inclusion), the Saxons have none, and I'm not ready yet to have the Sarmatians revolt and become Huns in Britain so I stuck with light infantry. The Picts got 4 archers and 4 javelinmen, the Saxons, 4 archers and 4 elite light infantry of the fur bikini, shield gnawing, type, led by the newest addition, Eric the Redleg, a minor hero. 

The main Pictish body turned into 8 infantry and 2 light cavalry heroes, Dearg Mor and Buidhe. After his wounds last year, I decided to keep Dearg as an ordinary hero and rated the always unfortunate Buidhe as a minor hero. Not having enough spearmen for a hedgehog/proto-schiltron I called  the remaining Picts light infantry as well. 

Turning to the Saxons, Helgin was  a Hero/player General assisted by Raven, his elite standard bearer.  Not being able to identify any other discernible heroes, the 16 remaining "Saxon's" were classed as heavy infantry with javelin. 

Last but not least, there is provision for the citizens of the town to take to the streets to fight off the attackers. My stock of civilians for this mob thus far is limited to 1 milk maid, 2 labourers, a pageboy and a 1/2 dozen princesses and ladies. Not much of a mob.

I hadn't fit our young hero Michael into the picture yet. There were no troops left for him to command, I haven't done a mounted version of his figure yet and he is never one of the disciplined Roman garrison types.  My first thought was to place him with one of the gate guards but there should be a chance that these all go over to the invaders and anyway it might have unbalanced the scenario. Finally it dawned on me that he might have been at the inn and could appear as part of the civilians erupting into the streets. Since he is still young, I only made him a hero not a great hero. He has to have room to grow!

 A repeat view of the town. The garrison was quartered in the round tower and in the houses next to the wall in the upper right hand corner of the picture. The off table groups came in on the roads, 4 to the left of the tower, 4 to the right of it. The Inn where Prince Michael was staying is right next to the West Gate. (center of picture)

The game begins with the gates opening and a roll being made to see if any gate guards stay local. Grant suggests a die roll for a percentage but with only 4 in each group I decided 1 turned and the rest had a 50% chance of staying loyal. Each of my groups had 2 barbarians and 2 Romans and dice being the unpredictable things they are, the Roman figures all rolled loyal and the barbarians all went over. Hunh.

Turning to the advance guards, I started to move them and then realized the Picts were out of command. The odds of moving were 3 or better on 1 die, they laid low. On the 2nd turn, the alarm was given and the loyal guards attacked the traitors. At the South Gate the traitors struck down the loyal guards but the Picts outside still refused to budge. Luckily the main force also being light troops were rapidly approaching. At the West Gate the fight was a draw but the Saxons were at the gate and the last guard went down under Eric the Redleg's spear, this time being a hero helped.


Here we see Eric Redlegs celebrating his first victory.  I almost used my old cloth since it matches the bases on these figures better colour wise but once on I was reminded of how much of a nuisance the over hang is since so many things like dice and scenery are now stored under my table. I also noticed, once again, just how wide those 1" square bases are. Eric sports a prototype of 3/4"x1" rectangle with the corners clipped which I've also been experimenting with for Atlantica. Wide enough to be stable but not so wide as to keep every one in open order. I had meant to flock them but ran out of time so just slapped on some paint. Seems to match the table fairly well so I may just fill and paint. I like when bases become inconspicuous.

On the 3rd turn the remaining garrison troops turned to and formed up. On the 4th turn, the Saxons again went first and charged into the group in the market. The streets were narrow so it was 3 on 3, elite light infantry vs heavily armoured heavy infantry. The Saxons rolled 3 x 6's, the Romans 1's and 2's and it was over, the last figure routing. Oops!  No Romans left in this quarter! Well, I had directed the cavalry that way anyway and they reached a point just behind the Saxon flank. At the same time Michael and his volunteers appeared in the street before the gate. First move would be important next turn.

In the narrow streets, the attackers had a hard time making use of their numbers. Having solid houses discouraged me from looking to see how the rules would handle detaching a few figures to work through them and thus around the flank. I figured they would have to come out again to attack and it was faster for the light infantry to go around. As it was, house fighting didn't come up so that's still an unknown. Street fighting seems more typical of pre-gunpowder wars anyway but I could use more occupy-able houses.

The Picts at last entered the South Gate and the archers finally rolled a 3 and crept towards the wall before stalling again and being abandoned by me! Because of his +2, Dearg got to move automatically and I let him control any of his men within 12" which  might not be what the rules for a sub-general actually say, if they say anything but it was such a small force and of the same general troop type so treating them like a single unit seemed fair enough. The first attack went straight on with cavalry in the middle. Javelin fire during the charge took out 1 figure but I messed up, rolling 1d/1 instead of 1d/2. The game was 1/2 over before I rolled 3 6's on 4 dice for shooting during a charge and thought "something's wrong". For the rest of the game the barrage of missiles during a charge became less deadly.

The poor Picts with 2 handed spear and no shield were a problem. The weakest troop on the board. I need to think a bit about the shield wall and hedgehog rules. The original idea was for them to be defensive, making combat less decisive but with the switch to a modifier for an opposed die roll, they are the same as any other modifier. I'm going to check out the possibility of them requiring a difference of more than 1 to win or allowing the 2nd rank to roll and let the formation pick the best die or something More thought needed.

Anyway, returning to the combat, the Pictish combat rolls were bad and they were forced to recoil. The Garrison chose to stand fast on the hill with secure flanks. Having the hero general with them meant no chance of disorderly pursuit.

The knights prove their worth and the vagaries of the 2 vs 1 combat is revealed!

Back at the market on turn 5 the initiative finally shifted allowing the knights to charge into the flank of the Saxons. With a maxed out +4 benefit, Sir Bors just managed to tie the melee! His squire won his but that meant a tied melee so the Saxons brought up more men and I realized that I had been pondering 3 ways of doing multiple  vs 1 combats and hadn't really specified any, merely implied 1 of 2 options. The way I have been handling 2:1 in MacDuff whence the melee comes, is to let each side roll 1 die per figure and then choose which figure to use. Medieval Mayhem which I had been using for Prince Michael treats it a series of 1 on 1 combats resolved sequentially with the single figure rerolling each time. The actual writing implies a series of simultaneous single figure matches with the single rolling once and applying the result to each opponent much the way that Armati does for unit to unit melee. The melee is so deadly that anything that slows it down is good so I opted for the MacDuff version. I'm actually tempted to go farther and borrow the Charge! version of needing more than 1 pip separation to win to make melee less deadly but that raises the spectre of also adopting the rolling 1 die for 2:1 but adding 50% to the total for the 2nd figure. It needs some thought but I'll probably opt for the MacDuff version of the 2 on 1 and leave the rest alone.

I was initially bothered that none of my civilians looked at all armed but the blacksmith guy who is supposed to be holding a wheel looks ready to give a good punch and the guy swinging a bucket didn't last anyway. I could use some cudgel men though.

Back at the gate Michael and Helgin appeared at the same time and thus engaged each other. One would expect the Hero to win over the Villain  but 2 turns in a row Helgin rolled up and Michael rolled down. Oh CRAP! Before I could spin a plot twist or storyline to save Michael, the knights won the 2nd round of melee despite being out numbered and pursued the retreating Saxons right into contact with the Saxon leader. There were 14 angry Saxons outside (the other 2 Saxons had been taken out by balista fire from the tower) but the gate was blocked by the melee taking place in it. It was now Helgin's turn to roll down once and then again. He bugged out. The knights pursued into the mass of Saxons and I thought, uhoh, they're going to swarm around the flanks if the 1st round goes south, which it did. Luckily the happy thought came to me that the wounded hero could close the gate as the remaining knight pulled back giving a Macdonnell at Hugomont feel to the whole thing.

I was about to call the game at that point. The Pictish heroes were all wounded, they had been repulsed  twice,  the odds of beating the heavily armoured Romans, uphill were low and another squad of Romans had appeared behind the flank of the Pictish javelinmen. But the initiative shifted again. The Picts threw their javelins taking down another Roman uphill meaning they could now be out flanked and then doubled back for a last stand against the new squad. The Romans charged in 3 wide with a +2 advantage to each die and.....were slain to a man!! The rear rank survivor routing. uh oh! DICE! You can't trust them! The fat lady hadn't sung yet!

I sent the main body back in, wounded heroes to the fore.   The shower of javelins did the work and a drawn melee left the Tribune alone, wounded and trying hard to look brave. Luckily the other reinforcements were behind him trying to figure out which way to go and just within command range. He fell back, they came forward and on the next turn the initiative flipped again and they charged with devastating effect just as Sir Bors appeared behind the Picts.

Now the fat lady was singing!

Last charge!

Apart from the few minor points mentioned, the rules worked pretty much as envisaged. The format and vagueness meant that making one-off rulings  for special cases did not require breaking rules, merely improvising. Not a problem for solo games or games between like minded gamers and there are lots of existing rules for those who need a comprehensive and authoritative set. A decision on the 2:1 rule and the benefits of shield wall and spear will follow shortly.

Once again the initiative rule provided lots of uncertainty and opportunities lost and won while the command rules were just enough to throw a minor wrench into things at times. The dice heavy combat also provided lots of suspense, right up to the end. The combat odds could be weighted but never assured and even a great hero puts his life on the line when he wades in.

Prince Michael will be back.


Sunday, August 4, 2013

THE ADVENTURES OF PRINCE MICHAEL: EPISODE 13

EPISODE 13: RUDE AWAKENING


 As dawn approaches, the gates of the town swing open as a small advance guard of Saxons and their allies rush forward. At each gate, 2 of the guards remain loyal. One sounds the alarm while the other rushes to close the gate. Bitter hand to hand combat erupts but at the West Gate, the arrival of Eric Redlegs tips the balance. Without pause, the bold raider leads his elite advance guard deep into the town. The way is open for Helgin, the infamous Saxon leader. Not a soldier of the garrison remains to oppose him.


Suddenly, Helgin finds his blocked! Prince Michael, en route for Belmont had been sleeping at the inn. Awoken by the commotion, he was soon armed and,  calling all able bodied men to follow, rushed to the defence of the town. A terrible blow from the ostler's fists laid one Saxon archer low but without arms and armour it was a hopeless cause and all were soon struck down leaving Michael to meet the powerful Saxon chief sword to sword. Fierce and heavy were Helgin's blows and the young hero was outmatched. Driven almost to his knees, one more blow would finish him and leave the road open. Where was the garrison?


Across town at the South Gate, the loyal guards were swiftly slain and the gate secured but the expected advance guard of Picts was nowhere to be seen. Spurring his horse forward, Dearg Mor soon arrived, a strong force of spearmen at his back. At last the archers emerged from the wood but still reluctant to move, they opened a desultory fire on the catapult crew in their tower. Rushing forward through the streets, Dearg and his men came face to face with Tribune Johan and a handful of soldiers blocking the narrow road where it climbed towards the keep.

Rushing forward, the lightly armed Picts threw themselves against the shield wall, but were held and then driven back. Both Dearg and Buidhe were wounded and paused to draw breathe while their men charged again cover by a shower of javelins from a small party that had passed up the next street. Suddenly, the tramp of hobnailed boots could be heard from the north and a another troop of soldiers appeared behind the javelinmen! The Picts had barely time to turn before these new soldiers were upon them. Four well armoured soldiers against three nearly naked Picts, the result seemed certain but the men of the garrison were barely awake and unused to warfare while the Picts were battle hardened raiders. In a moment three soldiers lay dead and the last one had fled in terror.  Only the Tribune and two soldiers still blocked the road. Riding to the front, Dearg Mor called upon his men to follow him for a third assault up the hill.

To the west, Eric Redlegs' drive into town got as far as the market place where it came up against a tight knot of garrison soldiers, armoured swordsmen to the front, archers behind. Drawing themselves into a tight knot, the Saxons charged. It was over in seconds. Eric took a blow but the soldiers were cut down or fled. The way to loot was open!

Suddenly from behind the Saxons came the thunder of hooves followed by lightning in the form of the swords of Sir Bors and his squire. Driving into the Saxon flank, they cut down Eric and another raider, chasing  the remnants back towards the gate. Spying Helgin's winged helmet, Sir Bors pushed into the mass. Two mighty blows he rained upon that helmet while his squire hewed at the masses. Suddenly the Saxons were falling back through the gate with the knight and squire close upon their heels. 

Outside the gate, the two horsemen were faced by more than a dozen Saxons, rallying now into a tight shield wall. As his squire was swarmed by Saxons and brought down, Sir Bors laid in left and right clearing a space. Behind him came a call, Michael, overcoming his wounds, had staggered to the gate and was pulling the last one shut.  Sir Bors slipped inside as the gate closed. As the bar dropped into place the Saxons began to pummel the stout gate from the other side.


Leaving Michael to hold the gate, Sir Bors galloped towards the South gate whence came sounds of continued battle. The last charge by Dearg Mor had led to a bloody melee and the wounded Tribune had been forced to recoil, left alone to hold the road.  Suddenly the last troop of garrison soldiers appeared at a run. Putting himself at their head the Tribune led them in a charge that swept away the Picts. One thought  took them all, back to the woods and safety!

A close run affair! As the soldiers and townsmen began to clean up and keep watch, young Michael was urged back to the inn where the inn keeper's daughter showed her appreciation by shy glances and soft smiles as she began to tend his wounds.
_________________________________________________________________

Tomorrow, a more technical look at the game.

Friday, August 2, 2013

Eleven O'clock and All's Well!


On the banks of the Avon River lies the town of Windsor. Behind its stout walls, the citizens sleep easily. No raiders have been seen yet this year and anyway, the town has a garrison of Roman soldiers from the wall and a troop of Count Hubert's knights. At the gates,  Saxon auxiliaries hired by Prince Vortigern himself stand watch this night and the citizens take comfort as they call out the all's well at each hour.

What could possibly go wrong?

Meanwhile, in a small wood near the South gate.....


Monday, July 29, 2013

Stout Hearts and Willing Swords (Updated)

STOUT HEARTS and WILLING SWORDS
(Draft edited 31 July 2013)
A simple wargame by Ross Macfarlane

Stout Hearts  Part 1. Set up and basics.


This is the second draft of a set of simple rules for resolving movement and combat in tabletop miniature wargames inspired by heroic fiction whether historical or fantastical in origin. The main changes are to revert to the old Featherstone idea of armour saves which has led to a number of other changes to facilitate this and keep melee and missile fire consistent but there are others such as to make shieldwalls explicit again instead of implicit.

lease note that this is not a complete gaming system. A game masters/organizer is required to choose or design a scenario and add house or scenario rules where needed, preferably in accordance with a background storyline, of their own choosing or design. To get the most from the game, players will need to be equipped with a strong imagination of their own.

P

The game requires at least 1 person in which case that person will be GM and solo-player rolled into one. If 2 or more persons are available the game may be played as a conventional game with one or more players on each side playing against each other or as players with personal goals playing against a GM controlled enemy. There is no theoretical limit to the number of players.

The rules assume that figures will be singly based but with the help of some markers and imagination troops on multi-figure stands may be used.

All dice are traditional 6 sided dice.


Heroes: Heroes are individual figures who are above the crowd. A hero may start as part of a unit whether as the unit commander or as an ordinary ranker, be a general or be on their own. They may even be an animal or non-human. Each player must pick one and only one Hero who represents himself and who will always attempt to move as the player wishes.  All heroes who are not a player’s personal figure are non-player heroes and must test as per the orders rule when the player goes to move them. Heroes must be given a name and  assigned a Power of 1 (Minor Hero), 2 (Hero) or 3  (Great Hero). When a hero takes a hit his power is reduced by 1. If reduced to Power 0, the next hit will kill or incapacitate him. Player heroes and all Great heroes do not normally die but will instead collapse from blood loss and be captured or buried under a pile of bodies to later escape or be rescued. A GM may of course overrule this but beware, if the main hero dies, the story usually ends and you may need to start a new series.

Last but not least, having too many heroes in a single game will probably spoil the broth.
Generals. A General is a hero who commands an army or in a large game, a portion of an army that is assigned to him. In the case of an alliance, one general may be in supreme command or both the armies might only recognize their own general. It is usual for one of the player’s to have their personal figure as the General but it is not necessary. If the General is not a player-character, units must test as per the Orders rule. If a General is killed he is not replaced during the game or rather whoever takes over does not have the same authority, units must test as per the orders rule.

Units. A unit is a group of figures that must normally stay together. A unit might or might not contain a hero and might be a non-military group such as a group of villagers or be a single large creature with or without a crew. There is no minimum or maximum unit size but around a dozen heavy infantry or ½ that number of cavalry or light troops works well. A unit may be ordered to split off a detachment for a particular purpose, such as to guard a bridge and this then becomes a separate unit. Units are classed primarily by function. Non heroes are killed if they take a hit.

Units may be classed as:

Heavy Infantry trained and equipped primarily to fight hand to hand in tight ranks although some units may also use some missile weapons. They are normally assumed to be armed with some combination of spears, swords and axes but heavy infantry with two handed pikes have special rules.

Light Infantry trained and equipped to operate in looser formations for rapid movement in all sorts of terrain and normally relying primarily on shooting with bows, slings and javelins but usually armed to fight hand to hand as well. Light Infantry may only carry light armour at most plus a shield.

Heavy Cavalry trained and equipped to fight on horseback and rely on shock charges although some are also equipped with missile weapons.

Light Cavalry trained and equipped to operate on horse back using rapid movement and missile fire to harass and weaken the enemy but also normally equipped for hand to hand combat as well. Light cavalry may only be equipped with armour plus a shield.

Artillery trained and equipped to use catapults and other engines of war to attack the enemy at a distance.

Train equipped with wagons and beasts of burdens to transport goods and only capable of limited self defence.

Elephants trained for war and usually carrying a crew as well. Treat the elephant and crew as a single hero figure with a power of 3 in melee. When shooting count the crew as foot archers.

Civilians neither trained nor equipped for fighting.

Special and custom units. Due to the breadth of imagination in heroic fiction not to mention history, the GM may have to slot units as best as possible, camel riders as cavalry, goblins  as light infantry and so and should feel free to customize their characteristics to taste.

Armour. The rules assume that most troops are "armed" that is they have some basic protection, a shield and possibly a jerkin or stout cap. Those who lack any substantial protection, a peasant or  unarmoured archer perhaps, should be classed as unarmed. Troops who are more heavily armoured than usual, having mail plus helmet and a large shield or a full suit of armour or riding armoured horses should be classed as Heavy Armed. Light infantry and light cavalry may not be heavy armed. Heavy cavalry only counts as heavy armed if their horses are protected but may still be able to count as heavy armed when they dismount. Armour is classed as follows:
Light Armour: A helmet and/or minimal body protection such as a fur.
Armour: A helmet and metal or proper fabric or leather protection for the torso.
Heavy Armour: A helmet and mostly metal armour for torso, arms and legs. For cavalry this must include some horse armout while mounted.
Shield: Any substantial shield. A pavise or similar counts as cover not a shield.

Unit Quality.  Most units are assumed to be competent. Units such as a General’s bodyguard may be considered to be better than average and rated Elite while civilians, untrained levies and troops who are demoralized or disaffected should be rated  Poor.

Formations and Facing. Units normally form as a loose cluster of figures all facing the same direction, the unit’s front is then considered to be the area directly in front of it and reaching out to 45 degrees of either side of straight ahead. Everything else is its flank. A unit may form into a circle but may not move if it does so.
Skirmishers. Light infantry may disperse as skirmishers with more than an inch between figures and with each figure facing as desired. Their facing is then determined individually.
Hedgehog. Heavy Infantry with long 2 handed spears may take a whole turn to form up in a hedgehog with bases touching, at least 2 ranks deep. They may face out in all directions and then have no flank. As soon as the unit moves it is no longer in hedgehog. Units in hedge hog count as defending an obstacle if charged frontally,
Shield wall. Heavy infantry may take a turn to form a shield wall with figures in base to base contact and at least 2 ranks deep. The shield wall will move at reduced speed but counts as being in cover. Infantry with long 2 handed spears get the same benefit with the reach of their spears and the think cluster of spear shafts providing the cover.
Garrison. Any infantry defending fortifications or buildings lose all formation but may face in any direction and the unit is considered to not have any flank in a direction that at least 1 figure is facing.

Magic. Magic is problematic in a simple game.  In my limited experience, magic in traditional heroic tales usually appears most often in the form of enchanted weapons or armour, spells or potions used in private, far from the battlefield, or as summonings of monsters or magical creatures, undead and the like. Magical items will raise the power of the owner by 1 or will bestow a special capability, speed, invisibiity etc  as defined by the GM. Pre-game enchantments and potions are probably best written into the scenario with both the effect and how it is dispelled. In the same manner a summoning may just be represented by adding a  special unit or creature to that side’s order of battle or the magician may have to try to raise it during the game. Apart from that, magicians are treated as unarmed heroes whose power may not be used in combat but they may use the magic rule to cast a spell instead of moving. Spells are each rated by their Power ranging from 1 to 4. When casting a spell roll 1 die. A modified roll of 4,5, 6 indicates success. A modified score of 1, 2 or 3 indicates  a lot of chanting and hand waving with no visible result. A modified roll of 0 or less means the spell goes wrong and the magician will suffer a horrible death.  Add the power of the wizard to the die roll then subtract the power of the spell he is attempting  (for example, a Power 1 wizard tries to cast a level 3 spell he will have a cumulative modifier of -2 (+1 -3). He needs to roll a 6 to succeed, and on a roll of 1 or 2 will die a horrible death. (Priests may be treated in the same way but may not use spells, only prayer, preaching and, of course, loud choruses of "Hallelujah!".)

Fireballs/lightning bolts etc: Each inflicts 1 hit on a target within 12” to the front. The power of the spell is equal to the number of fireballs being cast.
Summoning a demon. A demon is treated as a single heavily armoured hero or a beast. The power of the demon is equal to the power of the spell. The demon will appear next to the magician and may be moved immediately. In order to control the demon, the spell must be successfully repeated each turn. On any turn that it is not controlled, the demon will attack the nearest unit of either side and then leave the table.
Enchantment. An enchantment allows a magician to control a hero including a player hero. The magician must have line of sight to the hero within 6”. The power of the spell is equal to 1+ the power of the hero being enchanted. If successful the controlling player may make any valid move with the enchanted hero including attacking his own side. The control lasts until the magician’s next turn at which it must be repeated to maintain control. If a 0 is rolled the hero sees the wizard and slays him with a thrown dagger or something suitable.
Confusion/Illusion. This is a Power 1 spell and causes 1 unit within 12” and line of sight to halt in confusion. It immediately loses hedgehog formation if applicable and may not make a charge reaction this turn or move or shoot on its next turn.
Others. Any spells desired, illusions, raising the dead etc may be set out and assigned a power level by the GM before a game.


Stout Hearts  Part 2. Playing the game.

Initiative. At the start of each turn each side rolls one die and adds the General’s Power. The side with the highest score chooses whether to go first or second for that turn only. In case of a tie, the previous turn’s sequence is repeated.

Sequence of play. The first player issues and resolves any challenges then moves and/or shoots with any of his units then resolves any melees. The second player may be able to react to the charge. Once all combat is resolved repeat reversing roles. Do any end of turn activities called for by the scenario then start the next turn.

Challenges. Each player turn, one hero may issue a challenge instead of moving or shooting. Any opposing hero within 12” may accept. The heroes will move into contact between the armies and will proceed to fight a melee. The melee will continue immediately until one of the heroes is struck down and killed or captured or is forced to retreat.  Once the duel is over, the winner may retire a move and the turn continues. If the winner had a lower power he will immediately gain 1 Power.

Orders. All units and groups are assumed to move in response to orders whether of the general or their unit commander.  No order is required to shoot or rally.  A player’s personal figure may always move as the player wishes (subject to the rules of course). If the player’s hero is also a unit commander, the unit will always obey his orders.

If the player’s hero is the general then all units within 24” of him will follow orders unless  of course they  happen to be under the control of another player’s hero and he decides not to. If the general is not a player general then he must roll 1 die at the start of his turn. On a 6 he must order at least ⅓ of his units to advance at least ½ move or charge. On a roll of 1 he must order at least ⅓ of his units to fall back at least ½ move. On any other roll he may issue orders as the player wishes.


If a unit or a non-player hero is not within 24” of the general and a player wants it to move, roll 1 die with  a modified score of 4,5 or 6 indicating that it has received the order or is moving on its own initiative.

+1 if Elite, -1 if Poor, + the Power of the non player hero if alone or if the hero is the unit’s leader.

Units  in ambush who have an enemy within shooting or charge range must take an order test if the player wishes them to remain hidden and NOT charge or shoot.

Movement.  
Heavily armoured infantry or any infantry in shieldwall: 4”
Other heavy infantry not in shieldwall: 8"
Light Infantry, Elephants 12”
Heavily Armoured Cavalry: 12"
Other Heavy Cavalry 16” 
Light Cavalry, Flying Creatures 20"
Wagons, pack animals, civilians 8”
Light Artillery 4"
Heavy Artillery may not move.

Units may move forward up to their full move which may include wheeling or may retreat straight back at ½ speed while facing the enemy. They may also turn then 90 or 180 degrees then move ½ move. No individual may move farther than the unit’s  maximum. Skirmishers and light cavalry may move full speed in any direction and change facing as needed.

Interpenetration. It takes a whole move for 1 unit to move through a friendly unit except that cavalry and light infantry may pass through skirmishers and vice versa without penalty. Cavalry which begin their move in melee with enemy light infantry may pass through them.

Dismounting. It takes a whole move for cavalry or infantry mounted on any form of transport to dismount or to remount their transport.

Heroes which are part of a unit move with it. Heroes on their own move may move in any direction at light infantry or light cavalry rates unless heavy armed and may face any direction.

Charging. A charge is a move into contact and must bring as many figures as possible into contact. The target of the charge must be at least partially within the unit’s front before it moves. If at least 1 figure is within the enemy’s front then the charge must be made against the enemy’s front. A unit may not charge through the front of one unit to attack a different one.  Heavy cavalry which has been charged from the front may declare a counter charge and will meet the charging unit ½ way.

Terrain. The nature of terrain features will need to be decided by the GM. in general, skirmishers are not slowed by terrain being assumed to run when needed and to move easily around obstacles. Other troops move at ½ speed if they cross one or more obstacles or move through a terrain feature which is deemed passable but an obstacle to movement. Some terrain  features may be classed as impassible to some troop types. Normally all terrain features are impassible to wagons except along roads and trails. Visibility into or within woods etc is 2”. Infantry concealed on the edge of woods  will not be seen until the enemy is within 2” unless they break concealment to move or shoot at which time they may be seen as normal.

Shooting.
Archers on foot may shoot up to 16” to their front but may not move and shoot in the same turn. If their unit is in melee but they are not in contact they may fire over head at the enemy unit but may only target enemy figures who are not in contact.
Light infantry with javelins or slings may move 1/2 move and shoot up to 4” to their front at any point during their move. They may also shoot if being charged.
Light cavalry may move up to 1/2 move and shoot up to 4” in any direction at any point during their move.
Heavy Cavalry with may shoot up to 12” with bows if they don’t move or may throw javelins as they charge.
Heavy Infantry with javelins may shoot as they charge or if they are being charged.
Artillery may shoot 36” and ignores armour but may not move and shoot. Light artillery has up to 2 crew. Heavy artillery has up to 4 crew. Heavy artillery may break down walls. The strength of a wall must be determined by the GM. Palisades should be around 3, weak stone walls 6 and fortresses, 12. Each hit scored by heavy artillery reduces the strength of the wall by 1. When reduced to 0 a breach 1 figure wide is created.

Effect. Roll 1 die for each figure shooting, needing a 5 or 6 to hit. The owning player may assign hits on a unit in any way he chooses.
+ Power if a hero or +1 if Elite archers
-1 if the target is in cover or are skirmishers or if the line of sight is obscured (for example if firing over friendly troops).

Armour Saves. For each figure hit roll 1 die to see if their armour has been overcome. Light armour is worth 1 point, Armour 2 points, Heavy Armour 3 points, +1 if carrying a shield, +1 if mounted on a horse. If the die roll is greater than the armour value then the figure is hit. If not the hit does not count. Infantry with 2 handed spears cancel the horse point. Infantry will 2 handed cutting weapons reduce the value of infantry armour by 1. (For example an infantryman with light armour and a shield will be hit if the armour roll is 3 or higher)

Melee. Pair up opposing figures in contact. Roll 1 die for each figure in contact and compare them. Any figure which has a higher total than his opponent will inflict a hit if the enemy's armour is overcome (reminder: heroes lose 1 power for each hit if reduced to 0 the next hit will kill them, others are killed if hit). If multiple figures are fighting 1 enemy, compare his one die roll against each enemy roll . The single figure may only inflict 1 hit but if he rolls higher than more than 1 enemy, he may choose which to hit. The single figure however, may be hit by more than one enemy.

Die Modifiers (The maximum modifier that may be used is +4)
+ relative quality modifier (hero = +power, elite = +1, poor =-1) (for example a Power 1 hero fighting an average warrior would add +1 but if fighting a poor levy would add +2)
+1 charging at least 6" over open ground.
+1 if in cover or defending an obstacle or a hill or if in shield wall
+2 if fighting the enemy flank or rear

Resolution. Compare the number of hits suffered by both sides after a round of melee. Include missile fire hits that turn. If the hits were equal or the difference is only 1 then it is a tied melee and will continue during the next melee phase unless either side retreats voluntarily. Front rank casualties may be replaced by rear rank figures.

If one side suffered at least 2 hits more than it inflicted it will recoil ½ move facing the enemy and must rally on its next move. The enemy must advance up to ½ move in an attempt to keep contact unless they are defending cover or an obstacle or pass an orders check to hold their position. If an elephant is forced to fall back it will turn in a random direction and move full speed, charging into contact and fighting a round of melee out of sequence against the first unit of either side which it meets. After one round the elephant will be killed by its mahout or wonder off and be removed. 


Rallying. Roll 1 die. 4,5,6 = recover and may act as normal next turn. 1,2,3 = Retreat a full move leaving the table for good if the edge is reached. 
+1 if Elite, -1 if Poor, +power of hero General who has joined the unit.
If a player hero is with a unit which retreats he may choose to leave it. Other heroes must pass an orders check to leave the retreating unit.


Winning and Losing. It is best to have a mission to be accomplished within a reasonable time frame but in the absence of any other conditions or of one player conceding, this is heroic warfare so the fight is to the finish!